Yamaha DGX-650 Owner's Manual - Page 12
Attach the back board., Put the keyboard on the stand. - pedal
 |
View all Yamaha DGX-650 manuals
Add to My Manuals
Save this manual to your list of manuals |
Page 12 highlights
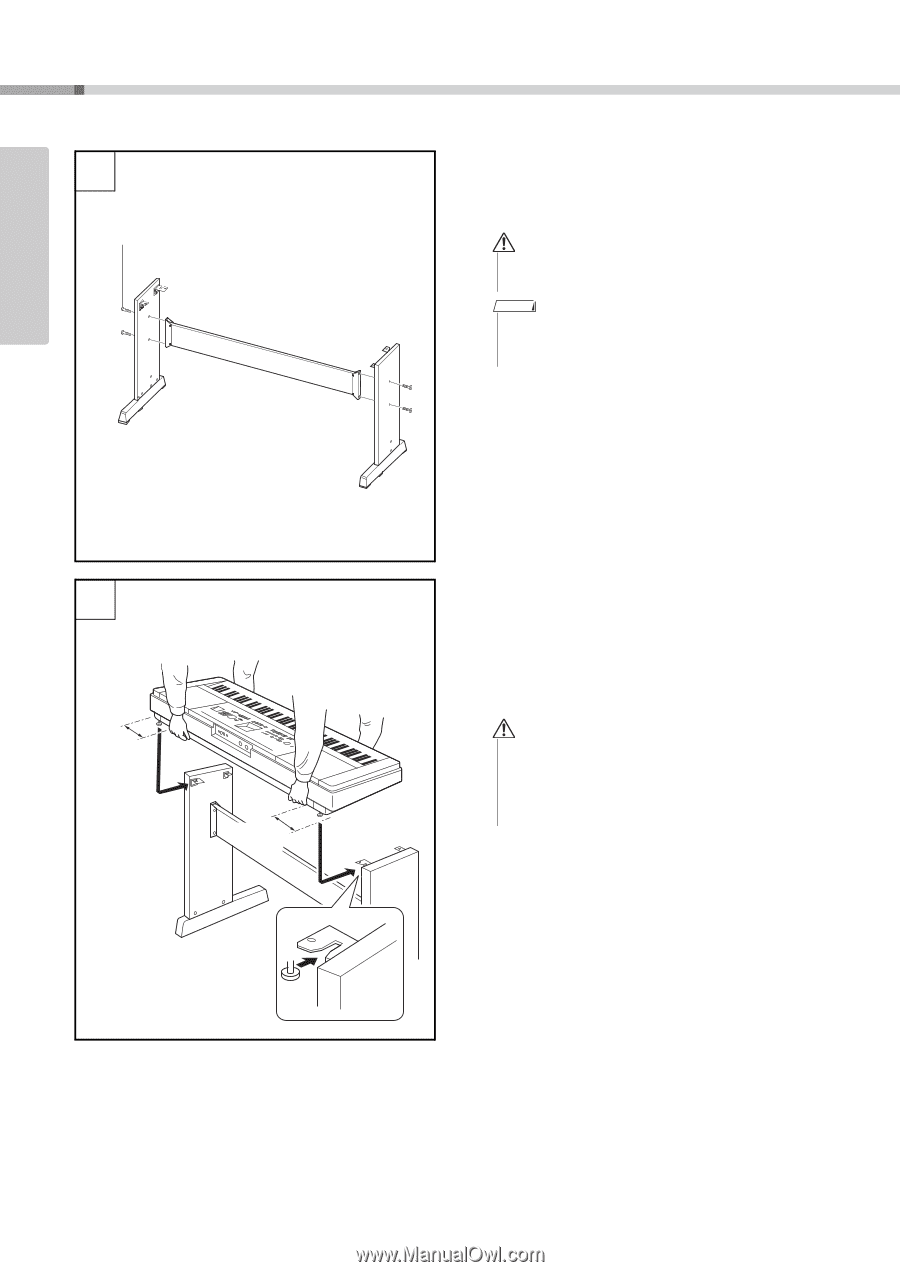
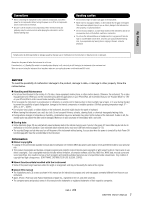
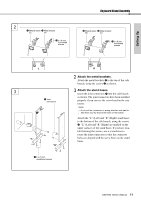
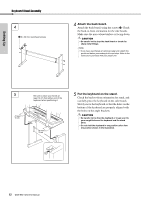
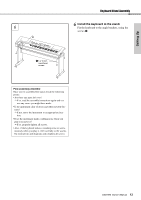
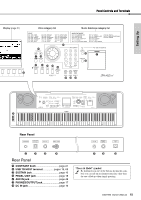
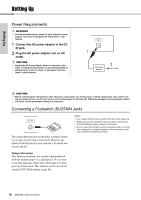
Setting Up Keyboard Stand Assembly 4 t 6 x 30 mm roundhead screws 4 Attach the back board. Attach the back board, using the screws t. Check the back-to-front orientation for the side boards. Make sure the non-colored surface is facing down. CAUTION • Be careful not to drop the back board or touch the sharp metal fittings. NOTE • If you have purchased an optional pedal unit, attach the pedal unit before proceeding to the next step. Refer to the instructions provided with your pedal unit. 5 At least 10 cm Be sure to place your hands at least 10 cm from either end of the keyboard when positioning it. At least 10 cm 5 Put the keyboard on the stand. Check the back-to-front orientation for stand, and carefully place the keyboard on the side boards. Slowly move the keyboard so that the holes on the bottom of the keyboard are properly aligned with the holes on the angle brackets. CAUTION • Be careful not to drop the keyboard or to get your fingers caught between the keyboard and the stand parts. • Do not hold the keyboard in any position other than the position shown in the illustration. 12 DGX-650 Owner's Manual
-
 1
1 -
2
-
3
-
4
-
5
-
6
-
 7
7 -
 8
8 -
 9
9 -
 10
10 -
 11
11 -
 12
12 -
 13
13 -
 14
14 -
 15
15 -
 16
16 -
 17
17 -
18
-
19
-
20
-
21
-
22
-
23
-
24
-
25
-
26
-
27
-
28
-
29
-
30
-
31
-
32
-
33
-
34
-
35
-
36
-
37
-
38
-
39
-
40
-
41
-
42
-
43
-
44
-
45
-
46
-
47
-
48
-
49
-
50
-
51
-
52
-
53
-
54
-
55
-
56
-
57
-
58
-
59
-
60
-
61
-
62
-
63
-
64
-
65
-
66
-
67
-
68
-
69
-
70
-
71
-
72
-
73
-
74
-
75
-
76
-
77
-
78
-
79
-
80
-
81
-
82
-
83
-
84
-
85
-
86
 |
 |