Yamaha DGX-650 Owner's Manual - Page 40
Recording Your Performance, Song Recording - case
 |
View all Yamaha DGX-650 manuals
Add to My Manuals
Save this manual to your list of manuals |
Page 40 highlights
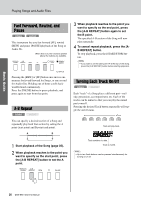
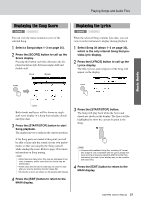
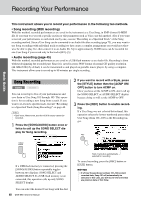
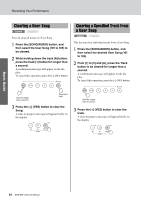
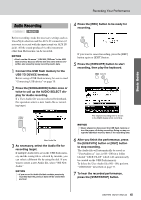
Recording Your Performance This instrument allows you to record your performance in the following two methods. • Song recording (MIDI recording) With this method, recorded performances are saved to the instrument as a User Song, in SMF (format 0) MIDI file. If you want to re-record a specific section or edit parameters such as Voice, use this method. Also if you want to record your performance to each track one by one, execute "Recording to a Specified Track" of the Song recording method. Since a User Song can be converted to an Audio file after recording (page 75), you may want to use Song recording (with individual track recording) to first create a complex arrangement you would not otherwise be able to play live, then convert it to an Audio file. Up to approximately 30,000 notes can be recorded for one User Song if you record only to the tracks [R/1]-[5]. • Audio recording (page 45) With this method, recorded performances are saved to a USB flash memory as an Audio file. Recording is done without designating the recorded part. Since it is saved in stereo WAV format of normal CD quality resolution (44.1kHz/16bit) by default, it can be transmitted to and played on portable music players by using a computer. This instrument allows you to record up to 80 minutes per single recording. Song Recording SONG AUDIO You can record up to five of your performances and save them as User Song 101 through 105. This operation is for recording a new Song from scratch. If you want to re-record a specific track, execute "Recording to a Specified Track (Song Recording)" on page 42. NOTE • Split Voice, Metronome, and the AUX IN sound cannot be recorded. 1 Press the [SONG/AUDIO] button once or twice to call up the SONG SELECT display for Song recording. 2 If you want to record with a Style, press the [STYLE] button then the [ACMP ON/ OFF] button to turn ACMP on. Once you have set the ACMP to ON, don't call up the SONG SELECT or AUDIO SELECT display because doing so will set the ACMP to OFF. 3 Press the [REC] button to enable recording. If a User Song was not selected beforehand, this operation selects the lowest-numbered unrecorded User Song (from 101-105) as the Recording target. Basic Guide If a USB flash memory is connected, pressing the [SONG/AUDIO] button repeatedly toggles between two displays: SONG SELECT and AUDIO SELECT. If a USB flash memory is not connected, this operation calls up only SONG SELECT display. You can select the desired User Song with the dial. 40 DGX-650 Owner's Manual Track 1 (and A) is automatically selected for recording. To cancel recording, press the [REC] button or [EXIT] button. NOTICE • If all User Songs (Song numbers 101-105) contain recorded data, Song 101 will automatically be selected. In this case, you will record over and erase any previous data of this Song.
-
 1
1 -
2
-
3
-
4
-
5
-
6
-
7
-
8
-
9
-
10
-
11
-
12
-
13
-
14
-
15
-
16
-
17
-
18
-
19
-
20
-
21
-
22
-
23
-
24
-
25
-
26
-
27
-
28
-
29
-
30
-
31
-
32
-
33
-
34
-
 35
35 -
 36
36 -
 37
37 -
 38
38 -
 39
39 -
 40
40 -
 41
41 -
 42
42 -
 43
43 -
 44
44 -
 45
45 -
46
-
47
-
48
-
49
-
50
-
51
-
52
-
53
-
54
-
55
-
56
-
57
-
58
-
59
-
60
-
61
-
62
-
63
-
64
-
65
-
66
-
67
-
68
-
69
-
70
-
71
-
72
-
73
-
74
-
75
-
76
-
77
-
78
-
79
-
80
-
81
-
82
-
83
-
84
-
85
-
86
 |
 |