Yamaha DGX-650 Owner's Manual - Page 61
Setting the Split Point, Setting the Chord Fingering, Holding down the [ACMP ON/OFF]
 |
View all Yamaha DGX-650 manuals
Add to My Manuals
Save this manual to your list of manuals |
Page 61 highlights
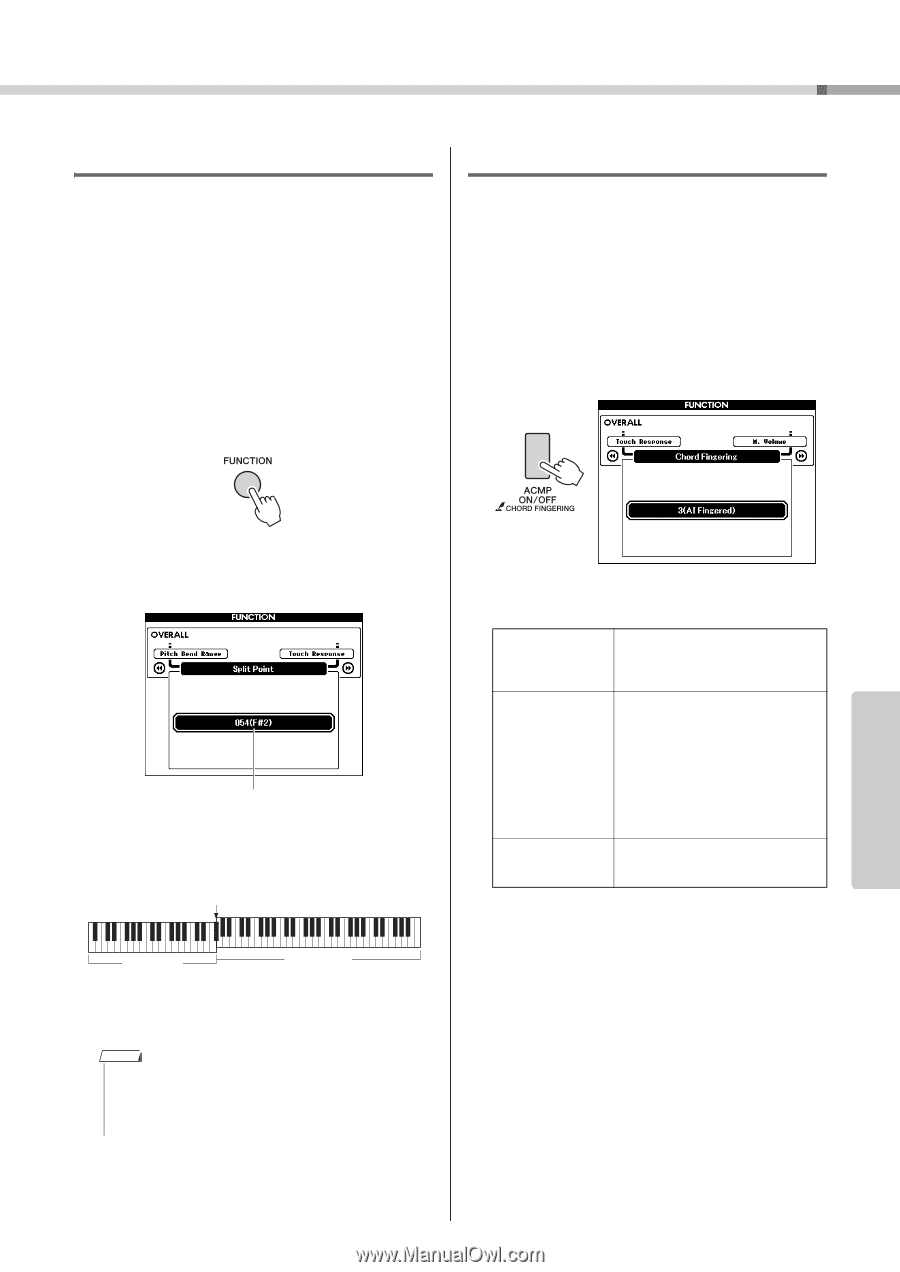
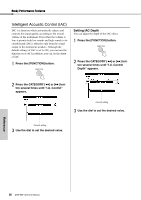
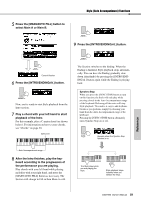
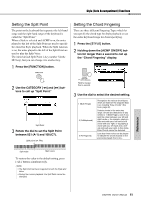
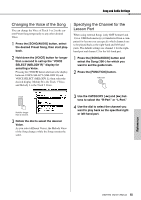
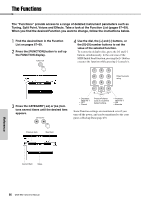
Style (Auto Accompaniment) Functions Setting the Split Point The point on the keyboard that separates the left-hand range and the right-hand range of the keyboard is called the "Split Point." When a Style is selected and ACMP is on, the notes played to the left of the Split Point are used to specify the chord for Style playback. When the Split function is on, the notes played to the left of the Split Point are used to play the Split Voice. The initial default Split Point is key number 54 (the F#2 key), but you can change it to another key. 1 Press the [FUNCTION] button. Setting the Chord Fingering There are three different Fingering Types which let you specify the chord type for Style playback or use the entire keyboard range for chord specifying. 1 Press the [STYLE] button. 2 Holding down the [ACMP ON/OFF] but- ton for longer than a second to call up the "Chord Fingering" display. 2 Use the CATEGORY [r] and [f] buttons to call up "Split Point." Split Point 3 Rotate the dial to set the Split Point between 021 (A-1) and 108 (C7). Split point (54: F#2) Hold for longer than a second. 3 Use the dial to select the desired setting. 1 (Multi Finger) 2 (FullKeyboard) 3 (AI Fingered) Recognizes the various chord types which are listed on the separate Data List, including "Easy Chords" (this book, page 30). Detects chords in the entire key range. Chords are detected in a way similar to 1 (Multi Finger), even if you split the notes between your left and right hands - for example, playing a bass note with your left hand and a chord with your right, or by playing a chord with your left hand and a melody note with your right. In this mode, Easy Chords cannot be detected. Less than three notes can be played to indicate the chords (based on the previously played chord, etc.). Split voice Main voice To restore the value to the default setting, press [+]/[-] buttons simultaneously. NOTE • The Split Point set here is applied to both the Style and Voice. • During the Lesson playback, the Split Point cannot be changed. Reference DGX-650 Owner's Manual 61
-
 1
1 -
2
-
3
-
4
-
5
-
6
-
7
-
8
-
9
-
10
-
11
-
12
-
13
-
14
-
15
-
16
-
17
-
18
-
19
-
20
-
21
-
22
-
23
-
24
-
25
-
26
-
27
-
28
-
29
-
30
-
31
-
32
-
33
-
34
-
35
-
36
-
37
-
38
-
39
-
40
-
41
-
42
-
43
-
44
-
45
-
46
-
47
-
48
-
49
-
50
-
51
-
52
-
53
-
54
-
55
-
 56
56 -
 57
57 -
 58
58 -
 59
59 -
 60
60 -
 61
61 -
 62
62 -
 63
63 -
 64
64 -
 65
65 -
 66
66 -
67
-
68
-
69
-
70
-
71
-
72
-
73
-
74
-
75
-
76
-
77
-
78
-
79
-
80
-
81
-
82
-
83
-
84
-
85
-
86
 |
 |