Yamaha DGX-650 Owner's Manual - Page 28
Playing Styles
 |
View all Yamaha DGX-650 manuals
Add to My Manuals
Save this manual to your list of manuals |
Page 28 highlights
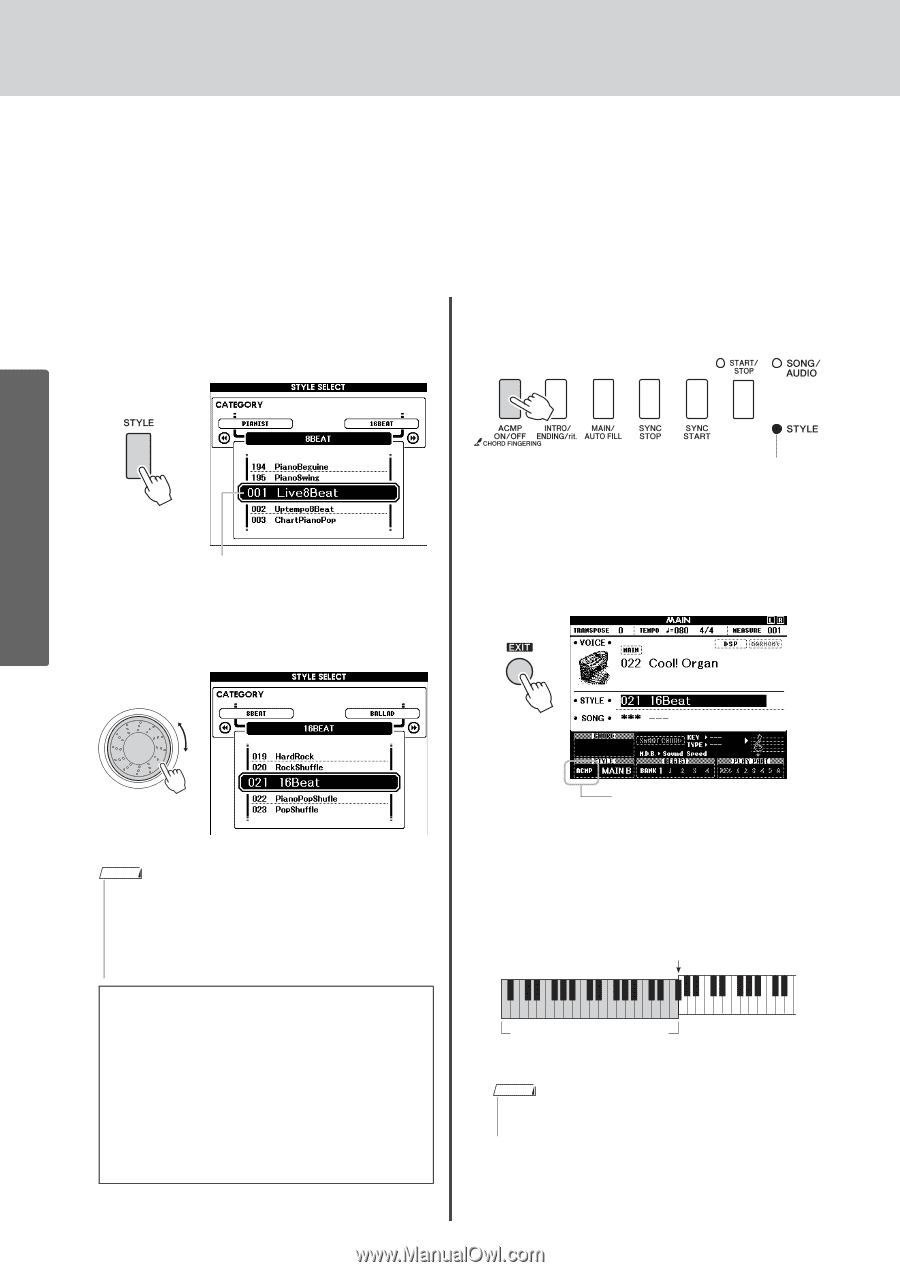
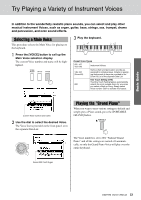
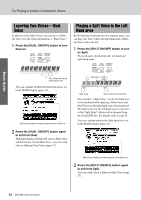
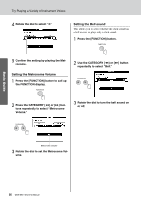
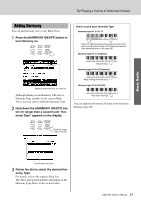
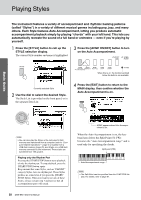
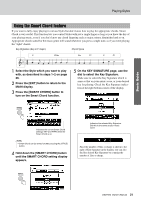
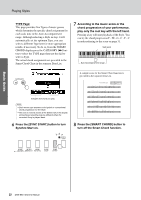
Playing Styles The instrument features a variety of accompaniment and rhythmic backing patterns (called "Styles") in a variety of different musical genres including pop, jazz, and many others. Each Style features Auto Accompaniment, letting you produce automatic accompaniment playback simply by playing "chords" with your left hand. This lets you automatically recreate the sound of a full band or orchestra - even if you're playing by yourself. 1 Press the [STYLE] button to call up the STYLE selection display. The current Style number and name is highlighted. 3 Press the [ACMP ON/OFF] button to turn on the Auto Accompaniment. When this is on, the functions printed below the buttons are available. Currently selected Style 2 Use the dial to select the desired Style. The Style List is provided on the front panel, or in the separate Data List. 4 Press the [EXIT] button to return to the MAIN display, then confirm whether the Auto Accompaniment is on. Basic Guide NOTE • You can also play the Styles in the instrument's flash memory area transferred from a computer (refer to "Computer-related Operations"-page 9) or loaded from a USB flash memory (page 76), and Styles on a USB flash memory connected to the instrument. These styles are numbered from 196 upward. Playing only the Rhythm Part Pressing the [START/STOP] button starts playback of only the rhythm part. To stop playback, press the [START/STOP] button again. Keep in mind that some Styles, such as "PIANIST" category Styles, have no rhythm part. These Styles produce no sound even if you press the [START/ STOP] button. When you want to use any of these Styles, always execute step 3 and later so that all accompaniment parts will sound. 28 DGX-650 Owner's Manual ACMP appears when Auto Accompaniment is on. When the Auto Accompaniment is on, the keyboard area left to the Split Point (54: F#2) becomes the "Auto Accompaniment range" and is used only for specifying the chords. Split point (F#2) Auto Accompaniment range NOTE • The Split Point can be specified from the FUNCTION dis- play. For details, refer to page 61.
-
 1
1 -
2
-
3
-
4
-
5
-
6
-
7
-
8
-
9
-
10
-
11
-
12
-
13
-
14
-
15
-
16
-
17
-
18
-
19
-
20
-
21
-
22
-
 23
23 -
 24
24 -
 25
25 -
 26
26 -
 27
27 -
 28
28 -
 29
29 -
 30
30 -
 31
31 -
 32
32 -
 33
33 -
34
-
35
-
36
-
37
-
38
-
39
-
40
-
41
-
42
-
43
-
44
-
45
-
46
-
47
-
48
-
49
-
50
-
51
-
52
-
53
-
54
-
55
-
56
-
57
-
58
-
59
-
60
-
61
-
62
-
63
-
64
-
65
-
66
-
67
-
68
-
69
-
70
-
71
-
72
-
73
-
74
-
75
-
76
-
77
-
78
-
79
-
80
-
81
-
82
-
83
-
84
-
85
-
86
 |
 |