Yamaha DGX-650 Owner's Manual - Page 41
Basic Guide, To hear the newly recorded perfor
 |
View all Yamaha DGX-650 manuals
Add to My Manuals
Save this manual to your list of manuals |
Page 41 highlights
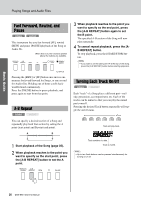
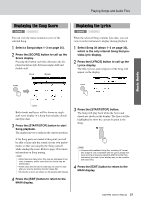
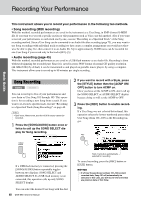
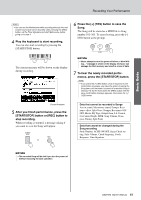
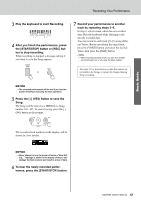
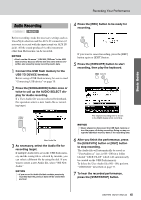
Basic Guide Recording Your Performance NOTE • You can use the Metronome while recording although the met- ronome sound will not be recorded. After pressing the [REC] button, set the Time Signature and start Metronome before going on to step 4. 4 Play the keyboard to start recording. You can also start recording by pressing the [START/STOP] button. 6 Press the [+] (YES) button to save the Song. The Song will be stored as a MIDI file to Song number 101-105. To cancel saving, press the [-] (NO) button at the prompt. The current measure will be shown on the display during recording. NOTICE • Never attempt to turn the power off when a "Now Writing..." message is shown in the display. Doing so can damage the flash memory and result in a loss of data. 7 To hear the newly recorded performance, press the [START/STOP] button. NOTE • If you press the [-] (NO) button once in response to the confirmation message, you have the option of saving the Song later until the power is turned off or another Song is selected. To do this hold down the [REC] button until the save confirmation message appears, then press the [+] (YES) button. Current measure 5 After you finish performance, press the [START/STOP] button or [REC] button to stop recording. When recording is stopped, a message asking if you want to save the Song will appear. or Data that cannot be recorded to Songs Aux in sound, Metronome sound, Damper Resonance effect, Split Voice, Damper Resonance ON/ OFF, Master EQ Type, Output Gain, I.A.Control, I.A.Control Depth, MDB, Song Volume, Transpose, Tuning, Split Point Data that cannot be changed during the Song recording Style Number, ACMP ON/OFF, Smart Chord setting, Style Volume, Chord Fingering, Touch Response, Time Signature NOTICE • The recorded Song will be lost if you turn the power off without executing the save operation. DGX-650 Owner's Manual 41
-
 1
1 -
2
-
3
-
4
-
5
-
6
-
7
-
8
-
9
-
10
-
11
-
12
-
13
-
14
-
15
-
16
-
17
-
18
-
19
-
20
-
21
-
22
-
23
-
24
-
25
-
26
-
27
-
28
-
29
-
30
-
31
-
32
-
33
-
34
-
35
-
 36
36 -
 37
37 -
 38
38 -
 39
39 -
 40
40 -
 41
41 -
 42
42 -
 43
43 -
 44
44 -
 45
45 -
 46
46 -
47
-
48
-
49
-
50
-
51
-
52
-
53
-
54
-
55
-
56
-
57
-
58
-
59
-
60
-
61
-
62
-
63
-
64
-
65
-
66
-
67
-
68
-
69
-
70
-
71
-
72
-
73
-
74
-
75
-
76
-
77
-
78
-
79
-
80
-
81
-
82
-
83
-
84
-
85
-
86
 |
 |