Yamaha RX-V2065 Owner's Manual - Page 28
Basic Operation - codes
 |
UPC - 027108933948
View all Yamaha RX-V2065 manuals
Add to My Manuals
Save this manual to your list of manuals |
Page 28 highlights
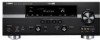
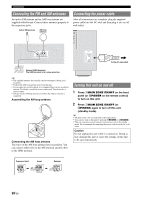
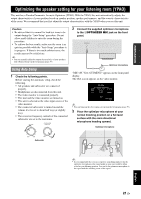
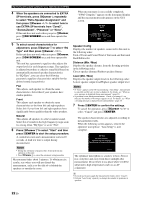
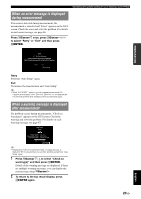
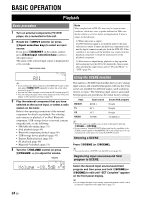
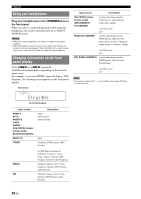
BASIC OPERATION Playback Basic procedure 1 Turn on external components (TV, DVD player, etc.) connected to this unit. 2 Rotate the TINPUT selector (or press dInput selection key) to select an input source. If you press dUSB/NET on the remote control, press xSub-input selection key to select a sub-input source. The name of the selected input source is displayed for a few seconds. Input source name VOL. AV1 y • If you connect two video monitors to the HDMI OUT jacks of this unit, press gHDMI OUT repeatedly to select the active video monitor(s) (page 53). • You can also select an input source from the GUI screen (page 25). • You can change the input source name displayed on the front panel display or GUI screen as necessary (page 64). 3 Play the external component that you have selected as the source input, or select a radio station on the tuner. Refer to the operating instructions of the external component for details on playback. For selecting radio stations or playback of an iPod, Bluetooth component, USB storage device or network contents using this unit, see the following. • FM/AM radio tuning (page 31) • iPod playback (page 44) • Bluetooth component playback (page 46) • USB storage device playback (page 47) • Internet Radio playback (page 50) • PC playback (page 48) • Rhapsody® playback (page 51) 4 Turn the KVOLUME control (or press tVOLUME +/-) to adjust the volume. Volume VOL. Volume -18.5dB SW L CR SL SR Note When you play back a DTS-CD, noise may be output in some conditions, which may cause a speaker malfunction. Make sure that the volume is set to low before starting playback. If noise is output, do the following. 1) When only noise is output If a DTS bitstream signal is not properly input to this unit, only noise is output. Connect the playback component to this unit by digital connection and play back the DTS-CD. If the condition is not improved, the problem may results from the playback component. Consult the manufacturer of the playback component. 2) When noise is output during playback or skip operation Before playing back the DTS-CD, display the Option menu after selecting the input source and set "Decoder Mode" to "DTS" (page 54). Using the SCENE function This unit has a SCENE function that allows you to change input sources and sound field programs with one key. Four scenes are available for different usages, such as playing movies or music. The following input sources and sound field programs are provided as the initial factory settings. Keys Input source Sound field program BD/DVD HDMI 1 Straight TV AV 1 Straight CD AV 3 Straight RADIO TUNER 7ch Enhancer y • When this unit is on standby, you can turn on this unit by pressing RSCENE (or hSCENE). • If you connect a Yamaha DVD/CD player that has the capability of the SCENE control signals to the REMOTE OUT jack of this unit, you can start playback on the player by using the SCENE function. Selecting a SCENE Press RSCENE (or hSCENE). y • You can also select a SCENE from the GUI screen (page 25). Registering input source/sound field program to SCENE Select the desired input source/sound field program and then press and hold RSCENE (or hSCENE) to edit until "SET Complete" appears on the front panel display. y • If you change the input source setting, register the remote control code of an external component to the input source (page 72). 24 En
-
 1
1 -
2
-
3
-
4
-
5
-
6
-
7
-
8
-
9
-
10
-
11
-
12
-
13
-
14
-
15
-
16
-
17
-
18
-
19
-
20
-
21
-
22
-
 23
23 -
 24
24 -
 25
25 -
 26
26 -
 27
27 -
 28
28 -
 29
29 -
 30
30 -
 31
31 -
 32
32 -
 33
33 -
34
-
35
-
36
-
37
-
38
-
39
-
40
-
41
-
42
-
43
-
44
-
45
-
46
-
47
-
48
-
49
-
50
-
51
-
52
-
53
-
54
-
55
-
56
-
57
-
58
-
59
-
60
-
61
-
62
-
63
-
64
-
65
-
66
-
67
-
68
-
69
-
70
-
71
-
72
-
73
-
74
-
75
-
76
-
77
-
78
-
79
-
80
-
81
-
82
-
83
-
84
-
85
-
86
-
87
-
88
-
89
-
90
-
91
-
92
-
93
-
94
-
95
-
96
-
97
-
98
-
99
-
100
-
101
-
102
-
103
-
104
-
105
-
106
-
107
-
108
-
109
-
110
-
111
-
112
-
113
-
114
 |
 |