Yamaha RX-V2065 Owner's Manual - Page 57
Other functions
 |
UPC - 027108933948
View all Yamaha RX-V2065 manuals
Add to My Manuals
Save this manual to your list of manuals |
Page 57 highlights
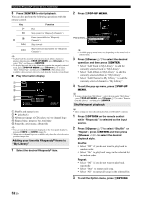
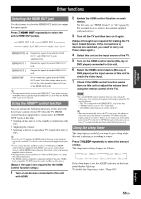
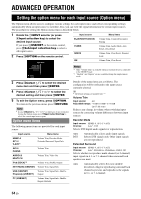
INTRODUCTION PREPARATION BASIC OPERATION Other functions Selecting the HDMI OUT jack Use this feature to select the HDMI OUT jack(s) to output the input signals. Press gHDMI OUT repeatedly to select the active HDMI OUT jack(s). HDMI OUT 1+2 HDMI OUT 1 HDMI OUT OFF HDMI OUT 2 • HDMI OUT1+2 Outputs the signals from both the HDMI OUT 1 and HDMI OUT 2 jacks simultaneously. HDMI OUT 1 Outputs the signals from the HDMI OUT 1 jack. HDMI OUT 2 Outputs the signals from the HDMI OUT 2 jack. HDMI OFF Not to output any signals from the HDMI OUT jacks. Select this setting when you do not use the video monitor connected to one of the HDMI OUT jacks. y • This unit automatically activates the HDMI OUT 1 jack when receiving an HDMI control signal through the HDMI OUT 1 jack while the HDMI OUT 1 jack is not selected. Using the HDMI™ control function You can operate the following functions of this unit with the remote control of your TV when the TV (HDMI control function supported) is connected to the HDMI OUT 1 jack of this unit. • Turning on this unit or to the standby (conjunction with TV) • Adjusting the volume • Selecting a device to reproduce TV sounds (this unit or TV) y • Even if your TV supports the HDMI control function, some functions may not be available. For details, refer to the manual supplied with your TV. • If you connect this unit and Blu-ray player or DVD player (HDMI control function supported) with HDMI, you can also control those devices with the HDMI control function. For details, refer to the manual supplied with each device. • We suggest that you use products (TV, Blu-ray/DVD player, etc.) from the same manufacturer. • The HDMI control-compatible components include Panasonic VIERA Link compatible TV, DVD player/recorder and Blu-ray Disc player. (Steps 1 through 3 are required for the HDMI control function setup.) 1 Turn on all devices connected to this unit with HDMI. 2 Enable the HDMI control function on each device. For this unit, set "HDMI Control" to "On" (page 62). For external devices, refer to the manual supplied with each device. 3 Turn off the TV and then turn on it again. (Steps 4 through 6 are required for making the TV learn linked devices. If the connections or devices are switched, you need to carry out these steps again.) 4 Select this unit as the input source of the TV. 5 Turn on the HDMI control device (Blu-ray or DVD player) connected to this unit. 6 Select the HDMI control device (Blu-ray or DVD player) as the input source of this unit to check the video input. 7 Check if the HDMI control function works (turn on this unit or adjust the volume level using the remote control of the TV). Note • In case the HDMI control function does not work, check the followings. Also, turning off (unplug) and turning on (plug) the TV may be effective. - The TV is connected to the HDMI OUT 1 jack of this unit. - "HDMI Control" is set to "On" on this unit. - The HDMI control function is enables on the TV. y • This unit automatically selects the TV scene (page 24) when you select this unit as the device to reproduce TV sounds using the remote control of your TV. That is, if you connect an audio output jack of your TV to the AV 1 (OPTICAL) jack of this unit, you can enjoy TV sounds with the specified sound field program soon. Using the sleep timer The sleep timer is useful if you want to go to sleep while this unit is playing or recording a source. Press qSLEEP repeatedly to select the amount of time. The sleep timer setting changes as follows. Sleep 120min. Sleep 90min. Sleep Off Sleep 30min. Sleep 60min. If the sleep timer is set, the SLEEP indicator on the front panel display lights up. To disable the sleep timer, select "Sleep Off". ADVANCED OPERATION ADDITIONAL INFORMATION APPENDIX English 53 En
-
 1
1 -
2
-
3
-
4
-
5
-
6
-
7
-
8
-
9
-
10
-
11
-
12
-
13
-
14
-
15
-
16
-
17
-
18
-
19
-
20
-
21
-
22
-
23
-
24
-
25
-
26
-
27
-
28
-
29
-
30
-
31
-
32
-
33
-
34
-
35
-
36
-
37
-
38
-
39
-
40
-
41
-
42
-
43
-
44
-
45
-
46
-
47
-
48
-
49
-
50
-
51
-
 52
52 -
 53
53 -
 54
54 -
 55
55 -
 56
56 -
 57
57 -
 58
58 -
 59
59 -
 60
60 -
 61
61 -
 62
62 -
63
-
64
-
65
-
66
-
67
-
68
-
69
-
70
-
71
-
72
-
73
-
74
-
75
-
76
-
77
-
78
-
79
-
80
-
81
-
82
-
83
-
84
-
85
-
86
-
87
-
88
-
89
-
90
-
91
-
92
-
93
-
94
-
95
-
96
-
97
-
98
-
99
-
100
-
101
-
102
-
103
-
104
-
105
-
106
-
107
-
108
-
109
-
110
-
111
-
112
-
113
-
114
 |
 |
