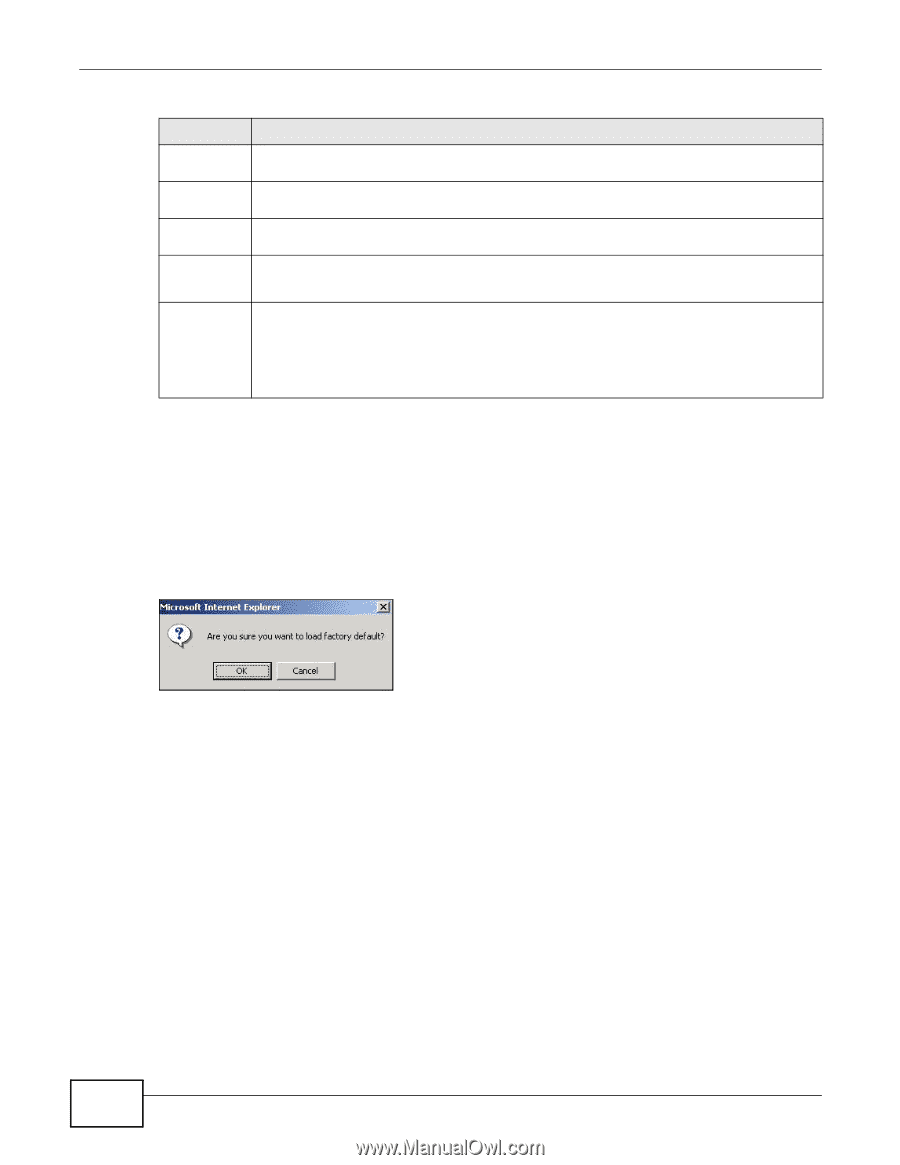
ZyXEL GS2200-8 User Guide - Page 256
Load Factory Default, Save Configuration
 |
View all ZyXEL GS2200-8 manuals
Add to My Manuals
Save this manual to your list of manuals |
Page 256 highlights
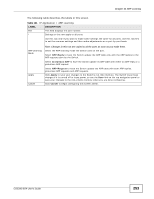
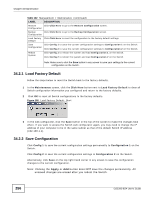
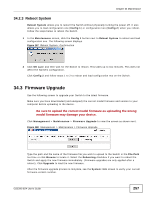
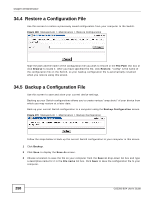
Chapter 34 Maintenance Table 102 Management > Maintenance (continued) LABEL DESCRIPTION Restore Click Click Here to go to the Restore Configuration screen. Configuration Backup Click Click Here to go to the Backup Configuration screen. Configuration Load Factory Click Click Here to reset the configuration to the factory default settings. Default Save Click Config 1 to save the current configuration settings to Configuration 1 on the Switch. Configuration Click Config 2 to save the current configuration settings to Configuration 2 on the Switch. Reboot System Click Config 1 to reboot the system and load Configuration 1 on the Switch. Click Config 2 to reboot the system and load Configuration 2 on the Switch. Note: Make sure to click the Save button in any screen to save your settings to the current configuration on the Switch. 34.2.1 Load Factory Default Follow the steps below to reset the Switch back to the factory defaults. 1 In the Maintenance screen, click the Click Here button next to Load Factory Default to clear all Switch configuration information you configured and return to the factory defaults. 2 Click OK to reset all Switch configurations to the factory defaults. Figure 166 Load Factory Default: Start 3 In the web configurator, click the Save button in the top of the screen to make the changes take effect. If you want to access the Switch web configurator again, you may need to change the IP address of your computer to be in the same subnet as that of the default Switch IP address (192.168.1.1). 34.2.2 Save Configuration Click Config 1 to save the current configuration settings permanently to Configuration 1 on the Switch. Click Config 2 to save the current configuration settings to Configuration 2 on the Switch. Alternatively, click Save on the top right-hand corner in any screen to save the configuration changes to the current configuration. Note: Clicking the Apply or Add button does NOT save the changes permanently. All unsaved changes are erased after you reboot the Switch. 256 GS2200-8/24 User's Guide
-
 1
1 -
2
-
3
-
4
-
5
-
6
-
7
-
8
-
9
-
10
-
11
-
12
-
13
-
14
-
15
-
16
-
17
-
18
-
19
-
20
-
21
-
22
-
23
-
24
-
25
-
26
-
27
-
28
-
29
-
30
-
31
-
32
-
33
-
34
-
35
-
36
-
37
-
38
-
39
-
40
-
41
-
42
-
43
-
44
-
45
-
46
-
47
-
48
-
49
-
50
-
51
-
52
-
53
-
54
-
55
-
56
-
57
-
58
-
59
-
60
-
61
-
62
-
63
-
64
-
65
-
66
-
67
-
68
-
69
-
70
-
71
-
72
-
73
-
74
-
75
-
76
-
77
-
78
-
79
-
80
-
81
-
82
-
83
-
84
-
85
-
86
-
87
-
88
-
89
-
90
-
91
-
92
-
93
-
94
-
95
-
96
-
97
-
98
-
99
-
100
-
101
-
102
-
103
-
104
-
105
-
106
-
107
-
108
-
109
-
110
-
111
-
112
-
113
-
114
-
115
-
116
-
117
-
118
-
119
-
120
-
121
-
122
-
123
-
124
-
125
-
126
-
127
-
128
-
129
-
130
-
131
-
132
-
133
-
134
-
135
-
136
-
137
-
138
-
139
-
140
-
141
-
142
-
143
-
144
-
145
-
146
-
147
-
148
-
149
-
150
-
151
-
152
-
153
-
154
-
155
-
156
-
157
-
158
-
159
-
160
-
161
-
162
-
163
-
164
-
165
-
166
-
167
-
168
-
169
-
170
-
171
-
172
-
173
-
174
-
175
-
176
-
177
-
178
-
179
-
180
-
181
-
182
-
183
-
184
-
185
-
186
-
187
-
188
-
189
-
190
-
191
-
192
-
193
-
194
-
195
-
196
-
197
-
198
-
199
-
200
-
201
-
202
-
203
-
204
-
205
-
206
-
207
-
208
-
209
-
210
-
211
-
212
-
213
-
214
-
215
-
216
-
217
-
218
-
219
-
220
-
221
-
222
-
223
-
224
-
225
-
226
-
227
-
228
-
229
-
230
-
231
-
232
-
233
-
234
-
235
-
236
-
237
-
238
-
239
-
240
-
241
-
242
-
243
-
244
-
245
-
246
-
247
-
248
-
249
-
250
-
 251
251 -
 252
252 -
 253
253 -
 254
254 -
 255
255 -
 256
256 -
 257
257 -
 258
258 -
 259
259 -
 260
260 -
 261
261 -
262
-
263
-
264
-
265
-
266
-
267
-
268
-
269
-
270
-
271
-
272
-
273
-
274
-
275
-
276
-
277
-
278
-
279
-
280
-
281
-
282
-
283
-
284
-
285
-
286
-
287
-
288
-
289
-
290
-
291
-
292
-
293
-
294
-
295
-
296
-
297
-
298
-
299
-
300
-
301
-
302
-
303
-
304
-
305
-
306
-
307
-
308
-
309
-
310
-
311
-
312
-
313
-
314
-
315
-
316
-
317
-
318
-
319
-
320
-
321
-
322
-
323
-
324
-
325
-
326
-
327
-
328
-
329
-
330
-
331
-
332
 |
 |