Acer R5250-Q2000 Configuration Guide - Page 131
Configuring Onboard Sata Raid, Appendix A: Onboard, Sata Raid, Configuration Utility
 |
UPC - 750519188644
View all Acer R5250-Q2000 manuals
Add to My Manuals
Save this manual to your list of manuals |
Page 131 highlights
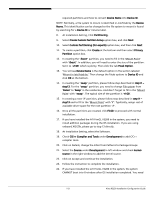
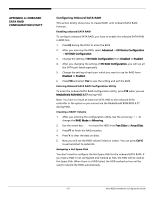
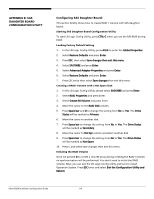
APPENDIX A: ONBOARD SATA RAID CONFIGURATION UTILITY Configuring Onboard SATA RAID This section briefly shows how to create RAID1 with onboard SATA RAID function. Enabling onboard SATA RAID To configure onboard SATA RAID, you have to enable the onboard SATA RAID in BIOS first. 1. Press F2 during the POST to enter the BIOS 2. After you entering the BIOS, select Advanced -> I/O Device Configuration -> NV RAID Configuration 3. Change the setting of NV RAID Configuration from Disabled to Enabled. 4. After you changing the setting of NV RAID Configuration, you will see all the SATA port listed separately. 5. Change the setting of each port which you want to use for RAID form Disabled to Enabled. 6. Press F10 and select Yes to save the setting and exit the BIOS. Entering Onboard SATA RAID Configuration Utility To enter the onboard SATA RAID configuration utility, press F10 when you see MediaShield ROM BIOS 6.77 during POST. Note. You have to install at least one SATA HDD to the onboard SATA controller in the system or you cannot see the MediaShield ROM BIOS 6.77 during POST. Creating a RAID1 Volume 1. After you entering the configuration utility, Use the arrow key ↑↓ to change the RAID Mode to Mirroring. 2. Use the arrow key ← → to move the HDD from Free Disks to Array Disks. 3. Press F7 to finish the RAID creation. 4. Press Y to clear the data on disks. 5. Now you will see the RAID volume listed on screen. You can press Ctrl-X to exit and start to install OS Assigning a Hot Spare Disk You don't need to configure the Hot Spare Disk for the onboard SATA RAID. If you have a HDD is not configured and marked as free, the HDD will be used as Hot Spare Disk. When there is a HDD failed, the HDD marked as free will be used to rebuild the RAID automatically. 115 Altos R5250 Installation Configuration Guide
-
 1
1 -
2
-
3
-
4
-
5
-
6
-
7
-
8
-
9
-
10
-
11
-
12
-
13
-
14
-
15
-
16
-
17
-
18
-
19
-
20
-
21
-
22
-
23
-
24
-
25
-
26
-
27
-
28
-
29
-
30
-
31
-
32
-
33
-
34
-
35
-
36
-
37
-
38
-
39
-
40
-
41
-
42
-
43
-
44
-
45
-
46
-
47
-
48
-
49
-
50
-
51
-
52
-
53
-
54
-
55
-
56
-
57
-
58
-
59
-
60
-
61
-
62
-
63
-
64
-
65
-
66
-
67
-
68
-
69
-
70
-
71
-
72
-
73
-
74
-
75
-
76
-
77
-
78
-
79
-
80
-
81
-
82
-
83
-
84
-
85
-
86
-
87
-
88
-
89
-
90
-
91
-
92
-
93
-
94
-
95
-
96
-
97
-
98
-
99
-
100
-
101
-
102
-
103
-
104
-
105
-
106
-
107
-
108
-
109
-
110
-
111
-
112
-
113
-
114
-
115
-
116
-
117
-
118
-
119
-
120
-
121
-
122
-
123
-
124
-
125
-
 126
126 -
 127
127 -
 128
128 -
 129
129 -
 130
130 -
 131
131 -
 132
132 -
 133
133 -
 134
134 -
 135
135 -
 136
136 -
137
-
138
 |
 |