Acer R5250-Q2000 Configuration Guide - Page 132
Configuring SAS Daughter Board, APPENDIX B: SAS, DAUGHTER BOARD, CONFIGURATION UTILITY
 |
UPC - 750519188644
View all Acer R5250-Q2000 manuals
Add to My Manuals
Save this manual to your list of manuals |
Page 132 highlights
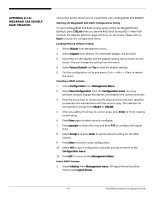
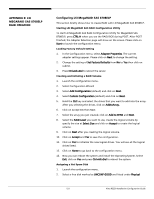
APPENDIX B: SAS DAUGHTER BOARD CONFIGURATION UTILITY Configuring SAS Daughter Board: This section briefly shows how to create RAID 1 volume with SAS daughter board. Starting SAS Daughter Board Configuration Utility To start LSI Logic Config Utility, press CTRL-C when you see the SAS BIOS during POST. Loading Factory Default Setting 1. In the LSI Logic Config Utility, press Alt-N to enter the Global Properties. 2. Select Restore Defaults and press Enter. 3. Press ESC, then select Save changes then exit this menu. 4. Select SAS1068E and press Enter. 5. Select Advanced Adapter Properties and press Enter. 6. Select Restore Defaults and press Enter. 7. Press ESC twice then select Save changes then exit this menu. Creating a RAID1 Volume with a Hot Spare Disk 1. In the LSI Logic Config Utility, please select SAS1068E and press Enter. 2. Select RAID Properties and press Enter. 3. Select Create IM Volume and press Enter 4. Move the cursor to the RAID Disk column. 5. Press Space bar and D to change the setting form No to Yes. The Drive Status will be marked as Primary. 6. Move the cursor to another disk. 7. Press Space bar to change the setting from No to Yes. The Drive Status will be marked as Secondary. 8. Move the cursor to Hot Spr column and select another disk. 9. Press Spare bar to change the setting from No to Yes. The Drive Status will be marked as Hot Spare. 10. Press C and select Save changes then exit this menu. Initialing the RAID Volume Since we pressed D to create a new IM array during creating the RAID1 volume, no synchronization will be performed. You don't need to initial the RAID volume. Now, you can exit the LSI Logic Config utility and start to install Operation System. Press ESC twice and select Exit the Configuration Utility and Reboot. Altos R5250 Installation Configuration Guide 116
-
 1
1 -
2
-
3
-
4
-
5
-
6
-
7
-
8
-
9
-
10
-
11
-
12
-
13
-
14
-
15
-
16
-
17
-
18
-
19
-
20
-
21
-
22
-
23
-
24
-
25
-
26
-
27
-
28
-
29
-
30
-
31
-
32
-
33
-
34
-
35
-
36
-
37
-
38
-
39
-
40
-
41
-
42
-
43
-
44
-
45
-
46
-
47
-
48
-
49
-
50
-
51
-
52
-
53
-
54
-
55
-
56
-
57
-
58
-
59
-
60
-
61
-
62
-
63
-
64
-
65
-
66
-
67
-
68
-
69
-
70
-
71
-
72
-
73
-
74
-
75
-
76
-
77
-
78
-
79
-
80
-
81
-
82
-
83
-
84
-
85
-
86
-
87
-
88
-
89
-
90
-
91
-
92
-
93
-
94
-
95
-
96
-
97
-
98
-
99
-
100
-
101
-
102
-
103
-
104
-
105
-
106
-
107
-
108
-
109
-
110
-
111
-
112
-
113
-
114
-
115
-
116
-
117
-
118
-
119
-
120
-
121
-
122
-
123
-
124
-
125
-
126
-
 127
127 -
 128
128 -
 129
129 -
 130
130 -
 131
131 -
 132
132 -
 133
133 -
 134
134 -
 135
135 -
 136
136 -
 137
137 -
138
 |
 |