Brother International HL 4040CN Network Users Manual - English - Page 118
Wired menu options, TCP/IP
 |
UPC - 012502617785
View all Brother International HL 4040CN manuals
Add to My Manuals
Save this manual to your list of manuals |
Page 118 highlights
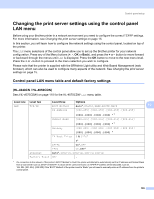
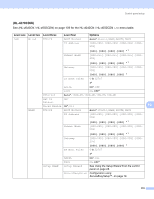
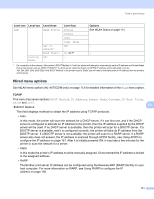
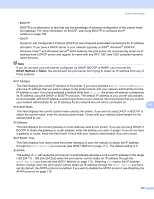
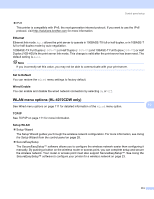
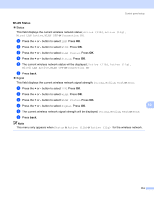
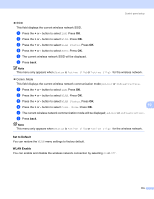
Control panel setup Level one Level two Level three LAN WLAN Status Factory Reset Set to Default WLAN Enable OK? Level four Status Signal SSID Comm. Mode OK? On, Off* - Options See WLAN Status on page 114. - 1 On connection to the network, if the printer's 'BOOT Method' is 'Auto' the printer will attempt to automatically set the IP address and Subnet Mask from a boot server such as DHCP or BOOTP. If a boot server cannot be found, an APIPA IP address will be allocated, such as 169. 254. [001-254]. [000-255]. If the 'BOOT Method' of the printer is set to 'Static' you will need to manually enter an IP address from the printer's control panel. Wired menu options 10 See WLAN menu options (HL-4070CDW only) on page 113 for detailed information of the WLAN menu option. TCP/IP 10 This menu has seven sections: BOOT Method, IP Address, Subnet Mask, Gateway, IP Boot Tries, APIPA and IPv6. „ BOOT Method 10 This field displays methods to obtain the IP address using TCP/IP protocols. • Auto In this mode, the printer will scan the network for a DHCP server, if it can find one, and if the DHCP server is configured to allocate an IP address to the printer, then the IP address supplied by the DHCP server will be used. If no DHCP server is available, then the printer will scan for a BOOTP server. If a BOOTP server is available, and it is configured correctly, the printer will take its IP address from the BOOTP server. If a BOOTP server is not available, the printer will scan for a RARP server. If a RARP server also does not answer, the IP address is scanned through APIPA facility, see Using APIPA to configure the IP address on page 161. After it is initially powered ON, it may take a few minutes for the printer to scan the network for a server. • Static In this mode the printer's IP address must be manually assigned. Once entered the IP address is locked to the assigned address. • RARP The Brother print server IP address can be configured using the Reverse ARP (RARP) facility on your host computer. For more information on RARP, see Using RARP to configure the IP address on page 160. 111
-
 1
1 -
2
-
3
-
4
-
5
-
6
-
7
-
8
-
9
-
10
-
11
-
12
-
13
-
14
-
15
-
16
-
17
-
18
-
19
-
20
-
21
-
22
-
23
-
24
-
25
-
26
-
27
-
28
-
29
-
30
-
31
-
32
-
33
-
34
-
35
-
36
-
37
-
38
-
39
-
40
-
41
-
42
-
43
-
44
-
45
-
46
-
47
-
48
-
49
-
50
-
51
-
52
-
53
-
54
-
55
-
56
-
57
-
58
-
59
-
60
-
61
-
62
-
63
-
64
-
65
-
66
-
67
-
68
-
69
-
70
-
71
-
72
-
73
-
74
-
75
-
76
-
77
-
78
-
79
-
80
-
81
-
82
-
83
-
84
-
85
-
86
-
87
-
88
-
89
-
90
-
91
-
92
-
93
-
94
-
95
-
96
-
97
-
98
-
99
-
100
-
101
-
102
-
103
-
104
-
105
-
106
-
107
-
108
-
109
-
110
-
111
-
112
-
 113
113 -
 114
114 -
 115
115 -
 116
116 -
 117
117 -
 118
118 -
 119
119 -
 120
120 -
 121
121 -
 122
122 -
 123
123 -
124
-
125
-
126
-
127
-
128
-
129
-
130
-
131
-
132
-
133
-
134
-
135
-
136
-
137
-
138
-
139
-
140
-
141
-
142
-
143
-
144
-
145
-
146
-
147
-
148
-
149
-
150
-
151
-
152
-
153
-
154
-
155
-
156
-
157
-
158
-
159
-
160
-
161
-
162
-
163
-
164
-
165
-
166
-
167
-
168
-
169
-
170
-
171
-
172
-
173
-
174
-
175
-
176
-
177
 |
 |
