Brother International MFC-9970CDW Advanced Users Manual - English - Page 35
Paging
 |
UPC - 012502625131
View all Brother International MFC-9970CDW manuals
Add to My Manuals
Save this manual to your list of manuals |
Page 35 highlights
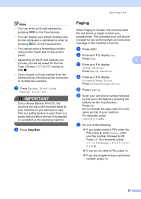
Note • You can enter an E-mail address by pressing on the Touchscreen. • You can display your stored numbers and E-mail addresses in alphabetical order by pressing on the Touchscreen. • You cannot enter a forwarding number using a One Touch key on the control panel. • Depending on the E-mail address you choose, you will be asked for the File Type. Choose TIFF or PDF and go to step g. • If you choose a Group number from the Address Book, the faxes will be forwarded to multiple fax numbers. g Press Backup Print:On or Backup Print:Off. IMPORTANT If you choose Backup Print On, the machine will also print received faxes at your machine so you will have a copy. This is a safety feature in case there is a power failure before the fax is forwarded or a problem at the receiving machine. h Press Stop/Exit. Receiving a fax Paging 4 When Paging is chosen, the machine dials the cell phone or pager number you programmed. This activates your cell phone or pager so you will know that you have a fax message in the machine's memory. a Press MENU. b Press a or b to display Fax. Press Fax. 4 c Press a or b to display Setup Receive. Press Setup Receive. d Press a or b to display Forward/Page/Store. Press Forward/Page/Store. e Press Paging. f Enter your cell phone number followed by # # (up to 20 digits) by pressing the buttons on the Touchscreen. Press OK. Do not include the area code if it is the same as that of your machine. For example, press 18005551234##. g Do one of the following: If you pager needs a PIN, enter the PIN, press #, press Pause, enter your fax number followed by ##. Press OK. (For example, press: 1 2 3 4 5 # Pause 1 8 0 0 5 5 5 6 7 8 9 # #) If you do not need a PIN, press OK. If you are programming a cell phone number, press OK. 29
-
 1
1 -
2
-
3
-
4
-
5
-
6
-
7
-
8
-
9
-
10
-
11
-
12
-
13
-
14
-
15
-
16
-
17
-
18
-
19
-
20
-
21
-
22
-
23
-
24
-
25
-
26
-
27
-
28
-
29
-
 30
30 -
 31
31 -
 32
32 -
 33
33 -
 34
34 -
 35
35 -
 36
36 -
 37
37 -
 38
38 -
 39
39 -
 40
40 -
41
-
42
-
43
-
44
-
45
-
46
-
47
-
48
-
49
-
50
-
51
-
52
-
53
-
54
-
55
-
56
-
57
-
58
-
59
-
60
-
61
-
62
-
63
-
64
-
65
-
66
-
67
-
68
-
69
-
70
-
71
-
72
-
73
-
74
-
75
-
76
-
77
-
78
-
79
-
80
-
81
-
82
-
83
-
84
-
85
-
86
-
87
-
88
-
89
-
90
-
91
-
92
-
93
-
94
-
95
-
96
-
97
-
98
-
99
-
100
-
101
-
102
-
103
-
104
-
105
-
106
-
107
-
108
-
109
-
110
 |
 |