Brother International MFC-J5910DW Network Users Manual - English - Page 41
WPS w/PIN Code, WLAN Status, Status, Signal, SSID, Comm.Mode - mac
 |
View all Brother International MFC-J5910DW manuals
Add to My Manuals
Save this manual to your list of manuals |
Page 41 highlights
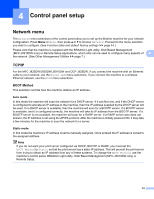
Control panel setup WPS w/PIN Code 4 If your WLAN access point/router supports Wi-Fi Protected Setup (PIN Method), you can configure the machine easily without a computer. (See Configuration using the PIN Method of Wi-Fi Protected Setup uu page 19.) WLAN Status 4 Status This field displays the current wireless network status. 4 4 Signal 4 This field displays the current wireless network signal strength. SSID 4 This field displays the current wireless network SSID. The display shows up to 32 characters of the SSID name. Comm.Mode 4 This field displays the current wireless network communication mode. Ethernet (For MFC-J825DW/J835DW/J5910DW and DCP-J925DW) 4 Ethernet link mode. Auto allows the print server to operate in 100BASE-TX full or half duplex, or in 10BASE-T full or half duplex mode by auto negotiation. Note If you set this value incorrectly, you may not be able to communicate with your print server. MAC Address 4 The MAC address is a unique number assigned for the machine's network interface. You can check your machine's MAC address from the control panel. E-mail / IFAX (Available when IFAX is downloaded) (MFC-J5910DW only) 4 This menu has five selections: Email Address, Setup Server, Setup Mail RX, Setup Mail TX and Setup Relay. As this section requires you to enter a lot of text characters, you may find that it is more convenient to use Web Based Management and your favorite web browser to configure these settings (see Web Based Management (MFC-J5910DW only) uu page 53). These settings must be configured for the IFAX feature to work. (For more details about Internet fax, see Internet fax (MFC-J5910DW only) uu page 61.) You can also access the character you want by repeatedly pressing the appropriate number key using the machine's control panel. (For entering text, see the Quick Setup Guide.) 37
-
 1
1 -
2
-
3
-
4
-
5
-
6
-
7
-
8
-
9
-
10
-
11
-
12
-
13
-
14
-
15
-
16
-
17
-
18
-
19
-
20
-
21
-
22
-
23
-
24
-
25
-
26
-
27
-
28
-
29
-
30
-
31
-
32
-
33
-
34
-
35
-
 36
36 -
 37
37 -
 38
38 -
 39
39 -
 40
40 -
 41
41 -
 42
42 -
 43
43 -
 44
44 -
 45
45 -
 46
46 -
47
-
48
-
49
-
50
-
51
-
52
-
53
-
54
-
55
-
56
-
57
-
58
-
59
-
60
-
61
-
62
-
63
-
64
-
65
-
66
-
67
-
68
-
69
-
70
-
71
-
72
-
73
-
74
-
75
-
76
-
77
-
78
-
79
-
80
-
81
-
82
-
83
-
84
-
85
 |
 |
