Canon EOS 20D EOS DIGITAL Software Instruction Manual (EOS Viewer Utility 1.2. - Page 110
Troubleshooting
 |
UPC - 013803044430
View all Canon EOS 20D manuals
Add to My Manuals
Save this manual to your list of manuals |
Page 110 highlights
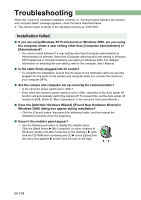
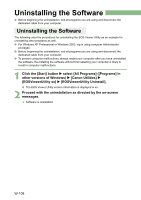
Troubleshooting When the "Could not complete installation correctly" or "Communication between the camera and computer failed" message appears, check the items described below. O The camera name is shown in the operation screens as "EOS XXX". Installation failed. O If you are using Windows XP Professional or Windows 2000, are you using the computer under a user setting other than [Computer administrator] or [Administrator]? J You cannot install software if a user setting other than [Computer administrator] or [Administrator] is selected. Select the [Computer administrator] user setting in Windows XP Professional or the [Administrator] user setting in Windows 2000. For detailed information on selecting the user setting, refer to the computer User's Manual. O Is the cable firmly plugged into its socket? J To complete the installation, ensure that the plugs on the dedicated cable are securely plugged into the ports on the camera and computer when you connect the camera to your computer (W-8). O Are the camera and computer set up correctly for communication? J Is the camera's power switch set to ? J Even when the camera's power switch is set to , operation of the Auto power off function will automatically switch the camera off. To prevent this, set the Auto power off function to [Off]. (Refer to "Menu Operations" in the camera's Instruction Manual.) O Does the [Add New Hardware Wizard] ([Found New Hardware Wizard] in Windows 2000) dialog box appear during installation? J Click the [Cancel] button, disconnect the dedicated cable, and then repeat the installation procedure from the beginning. O Doesn't the installer panel appear? J Use the following procedure to display the installer panel. Click the [Start] button X [My Computer]. (In other versions of Windows, double-click [My Computer] on the desktop.) X rightclick the CD-ROM drive containing the CD X select [Open] from the menu that appears X double-click the icon on the right. W-104
-
 1
1 -
2
-
3
-
4
-
5
-
6
-
7
-
8
-
9
-
10
-
11
-
12
-
13
-
14
-
15
-
16
-
17
-
18
-
19
-
20
-
21
-
22
-
23
-
24
-
25
-
26
-
27
-
28
-
29
-
30
-
31
-
32
-
33
-
34
-
35
-
36
-
37
-
38
-
39
-
40
-
41
-
42
-
43
-
44
-
45
-
46
-
47
-
48
-
49
-
50
-
51
-
52
-
53
-
54
-
55
-
56
-
57
-
58
-
59
-
60
-
61
-
62
-
63
-
64
-
65
-
66
-
67
-
68
-
69
-
70
-
71
-
72
-
73
-
74
-
75
-
76
-
77
-
78
-
79
-
80
-
81
-
82
-
83
-
84
-
85
-
86
-
87
-
88
-
89
-
90
-
91
-
92
-
93
-
94
-
95
-
96
-
97
-
98
-
99
-
100
-
101
-
102
-
103
-
104
-
 105
105 -
 106
106 -
 107
107 -
 108
108 -
 109
109 -
 110
110 -
 111
111 -
 112
112 -
 113
113 -
 114
114 -
 115
115 -
116
-
117
-
118
-
119
-
120
-
121
-
122
-
123
-
124
-
125
-
126
-
127
-
128
-
129
-
130
-
131
-
132
-
133
-
134
-
135
-
136
-
137
-
138
-
139
-
140
-
141
-
142
-
143
-
144
-
145
-
146
-
147
-
148
-
149
-
150
-
151
-
152
-
153
-
154
-
155
-
156
-
157
-
158
-
159
-
160
-
161
-
162
-
163
-
164
-
165
-
166
-
167
-
168
-
169
-
170
-
171
-
172
-
173
-
174
-
175
-
176
-
177
-
178
-
179
-
180
-
181
-
182
-
183
-
184
-
185
-
186
-
187
-
188
-
189
-
190
-
191
-
192
-
193
-
194
-
195
-
196
-
197
-
198
-
199
-
200
-
201
-
202
-
203
-
204
-
205
-
206
-
207
-
208
-
209
-
210
-
211
-
212
-
213
-
214
-
215
-
216
-
217
-
218
-
219
-
220
-
221
-
222
 |
 |
