Canon PIXMA mini260 Photo Printing Guide - Page 14
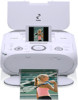
Loading Paper, Turn on the printer., Flatten the four corners of the paper before loading it.
 |
View all Canon PIXMA mini260 manuals
Add to My Manuals
Save this manual to your list of manuals |
Page 14 highlights
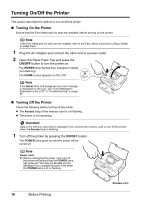
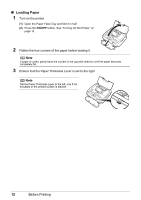
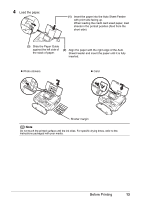
Loading Paper 1 Turn on the printer. (1) Open the Paper Feed Tray and fold it in half. (2) Press the ON/OFF button. See "Turning On the Printer" on page 10. 2 Flatten the four corners of the paper before loading it. Note If paper is curled, gently bend the corners in the opposite direction until the paper becomes completely flat. 3 Ensure that the Paper Thickness Lever is set to the right. Note Set the Paper Thickness Lever to the left, only if ink smudges or the printed surface is stained. 12 Before Printing
-
 1
1 -
2
-
3
-
4
-
5
-
6
-
7
-
8
-
 9
9 -
 10
10 -
 11
11 -
 12
12 -
 13
13 -
 14
14 -
 15
15 -
 16
16 -
 17
17 -
 18
18 -
 19
19 -
20
-
21
-
22
-
23
-
24
-
25
-
26
-
27
-
28
-
29
-
30
-
31
-
32
-
33
-
34
-
35
-
36
-
37
-
38
-
39
-
40
-
41
-
42
-
43
-
44
-
45
-
46
-
47
-
48
-
49
-
50
-
51
-
52
-
53
-
54
-
55
-
56
-
57
-
58
-
59
-
60
-
61
-
62
-
63
-
64
-
65
-
66
-
67
-
68
-
69
-
70
-
71
-
72
-
73
-
74
-
75
-
76
-
77
-
78
-
79
-
80
-
81
-
82
-
83
-
84
-
85
-
86
-
87
-
88
-
89
-
90
-
91
-
92
 |
 |

12
Before Printing
±
Loading Paper
1
Turn on the printer.
(1)
Open the Paper Feed Tray and fold it in half.
(2)
Press the
ON/OFF
button. See “Turning On the Printer” on
page 10.
2
Flatten the four corners of the paper before loading it.
3
Ensure that the Paper Thickness Lever is set to the right.
Note
If paper is curled, gently bend the corners in the opposite direction until the paper becomes
completely flat.
Note
Set the Paper Thickness Lever to the left, only if ink
smudges or the printed surface is stained.