Canon PIXMA mini260 Photo Printing Guide - Page 48
Aligning the Print Head, Settings, Maintenance, Auto head align - troubleshooting
 |
View all Canon PIXMA mini260 manuals
Add to My Manuals
Save this manual to your list of manuals |
Page 48 highlights
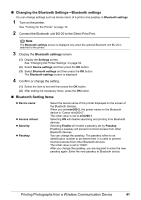
„ Aligning the Print Head If print quality is poor, adjust the Print Head position. It may solve the problem. 1 Prepare to print. (1) Turn on the printer. See "Turning On the Printer" on page 10. (2) Load two sheets of supplied paper or Canon genuine 4"×6"/101.6×152.4mm paper in the Auto Sheet Feeder. Note The following papers are recommended. z Matte Photo Paper z Photo Paper Plus Glossy 2 Print the Pattern. (1) Display the Settings screen. (2) Select Maintenance and then press the OK button. (3) Select Auto head align and then press the OK button. Note Press Head alignment print to print the Head alignment value is printed. The pattern print confirmation screen is displayed. (4) Confirm a message on the LCD, select Yes. and then press the OK button. The pattern is printed and the Print Head is aligned automatically. This takes about 2 minutes. Note z The pattern is printed in black and blue. When the Auto head align was not succeeded: When the Auto head align was not succeeded, the "Auto head align has failed." error message is displayed on the LCD. See "Error Message Is Displayed on the LCD" in "Troubleshooting" on page 55. 46 Printing Maintenance
-
 1
1 -
2
-
3
-
4
-
5
-
6
-
7
-
8
-
9
-
10
-
11
-
12
-
13
-
14
-
15
-
16
-
17
-
18
-
19
-
20
-
21
-
22
-
23
-
24
-
25
-
26
-
27
-
28
-
29
-
30
-
31
-
32
-
33
-
34
-
35
-
36
-
37
-
38
-
39
-
40
-
41
-
42
-
 43
43 -
 44
44 -
 45
45 -
 46
46 -
 47
47 -
 48
48 -
 49
49 -
 50
50 -
 51
51 -
 52
52 -
 53
53 -
54
-
55
-
56
-
57
-
58
-
59
-
60
-
61
-
62
-
63
-
64
-
65
-
66
-
67
-
68
-
69
-
70
-
71
-
72
-
73
-
74
-
75
-
76
-
77
-
78
-
79
-
80
-
81
-
82
-
83
-
84
-
85
-
86
-
87
-
88
-
89
-
90
-
91
-
92
 |
 |
