Canon PIXMA mini260 Photo Printing Guide - Page 15
Load the paper., Slide the Paper Guide
 |
View all Canon PIXMA mini260 manuals
Add to My Manuals
Save this manual to your list of manuals |
Page 15 highlights
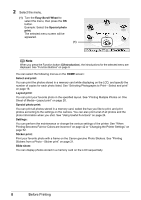
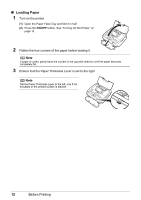
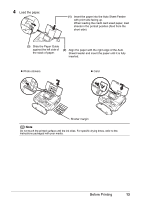
4 Load the paper. (1) Insert the paper into the Auto Sheet Feeder with print side facing up. When loading the credit card sized paper, load sheets in the portrait position (feed from the short side). (3) Slide the Paper Guide against the left side of the stack of paper. (2) Align the paper with the right edge of the Auto Sheet Feeder and insert the paper until it is fully inserted. Photo stickers Card Shorter margin Note Do not touch the printed surface until the ink dries. For specific drying times, refer to the instructions packaged with your media. Before Printing 13
-
 1
1 -
2
-
3
-
4
-
5
-
6
-
7
-
8
-
9
-
 10
10 -
 11
11 -
 12
12 -
 13
13 -
 14
14 -
 15
15 -
 16
16 -
 17
17 -
 18
18 -
 19
19 -
 20
20 -
21
-
22
-
23
-
24
-
25
-
26
-
27
-
28
-
29
-
30
-
31
-
32
-
33
-
34
-
35
-
36
-
37
-
38
-
39
-
40
-
41
-
42
-
43
-
44
-
45
-
46
-
47
-
48
-
49
-
50
-
51
-
52
-
53
-
54
-
55
-
56
-
57
-
58
-
59
-
60
-
61
-
62
-
63
-
64
-
65
-
66
-
67
-
68
-
69
-
70
-
71
-
72
-
73
-
74
-
75
-
76
-
77
-
78
-
79
-
80
-
81
-
82
-
83
-
84
-
85
-
86
-
87
-
88
-
89
-
90
-
91
-
92
 |
 |

13
Before Printing
4
Load the paper.
Note
Do not touch the printed surface until the ink dries. For specific drying times, refer to the
instructions packaged with your media.
(1)
Insert the paper into the Auto Sheet Feeder
with print side facing up.
When loading the credit card sized paper, load
sheets in the portrait position (feed from the
short side).
(2)
Align the paper with the right edge of the Auto
Sheet Feeder and insert the paper until it is fully
inserted.
(3)
Slide the Paper Guide
against the left side of
the stack of paper.
z
Photo stickers
z
Card
Shorter margin