Canon iP6600D iP6600D Direct Printing Guide - Page 57
Install the ink tank., Close the inner cover and the cover. - print head cleaning
 |
UPC - 013803048889
View all Canon iP6600D manuals
Add to My Manuals
Save this manual to your list of manuals |
Page 57 highlights
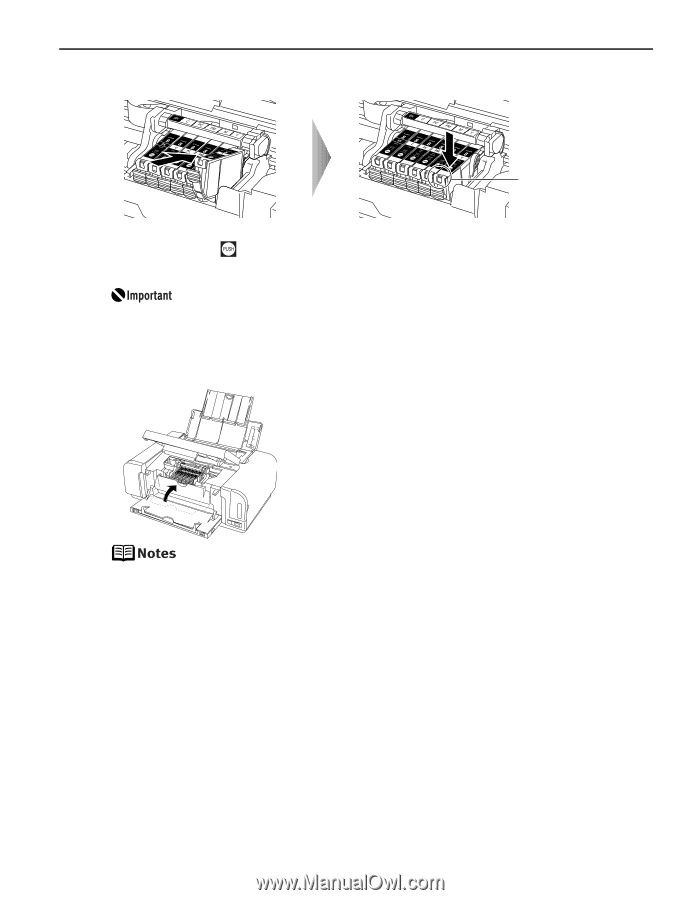
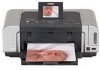
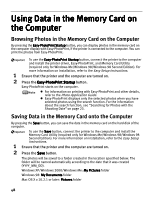
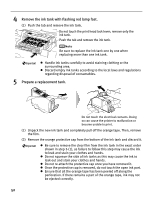
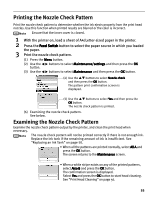
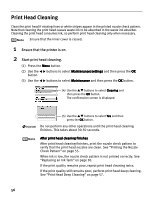
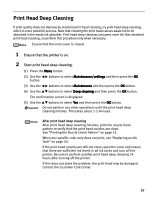
6 Install the ink tank. The lamp lights red. (1) Insert the ink tank in the print head holder. (2) Press on the mark until the ink tank snaps firmly into place. (3) Ensure that the ink tank lamp lights red. Ensure that the ink tanks are installed in the order directed by the label. The printer cannot be used unless all the ink tanks are installed. 7 Close the inner cover and the cover. The print head holder moves to the right. The ink tank installation process is now complete. Ensure that the inner cover is closed. Printing will not occur if the inner cover is open. The Alarm lamp still lights after the cover is closed if an ink tank is not installed properly. Open the cover and make sure that all the ink tanks are installed in the correct order directed on the label. To maintain optimal print quality, use an ink tank within six months of its first use. Once an ink tank has been used, do not remove it from the printer and leave it out in the open. This will cause the ink tank to dry out and the printer may not operate properly when it is reinstalled. Color ink consumption may occur even when black-and-white or grayscale printing is specified. Color ink is consumed in the head cleaning and deep cleaning, which are necessary to maintain the printer. When you start printing after replacing the ink tank, the printer executes print head cleaning automatically. Do not perform any other operations until the print head cleaning finishes. 53
-
 1
1 -
2
-
3
-
4
-
5
-
6
-
7
-
8
-
9
-
10
-
11
-
12
-
13
-
14
-
15
-
16
-
17
-
18
-
19
-
20
-
21
-
22
-
23
-
24
-
25
-
26
-
27
-
28
-
29
-
30
-
31
-
32
-
33
-
34
-
35
-
36
-
37
-
38
-
39
-
40
-
41
-
42
-
43
-
44
-
45
-
46
-
47
-
48
-
49
-
50
-
51
-
 52
52 -
 53
53 -
 54
54 -
 55
55 -
 56
56 -
 57
57 -
 58
58 -
 59
59 -
 60
60 -
 61
61 -
 62
62 -
63
-
64
-
65
-
66
-
67
-
68
-
69
-
70
-
71
-
72
-
73
-
74
-
75
-
76
-
77
-
78
-
79
-
80
 |
 |