Canon iP6600D iP6600D Direct Printing Guide - Page 60
Print Head Cleaning - waste ink absorber
 |
UPC - 013803048889
View all Canon iP6600D manuals
Add to My Manuals
Save this manual to your list of manuals |
Page 60 highlights
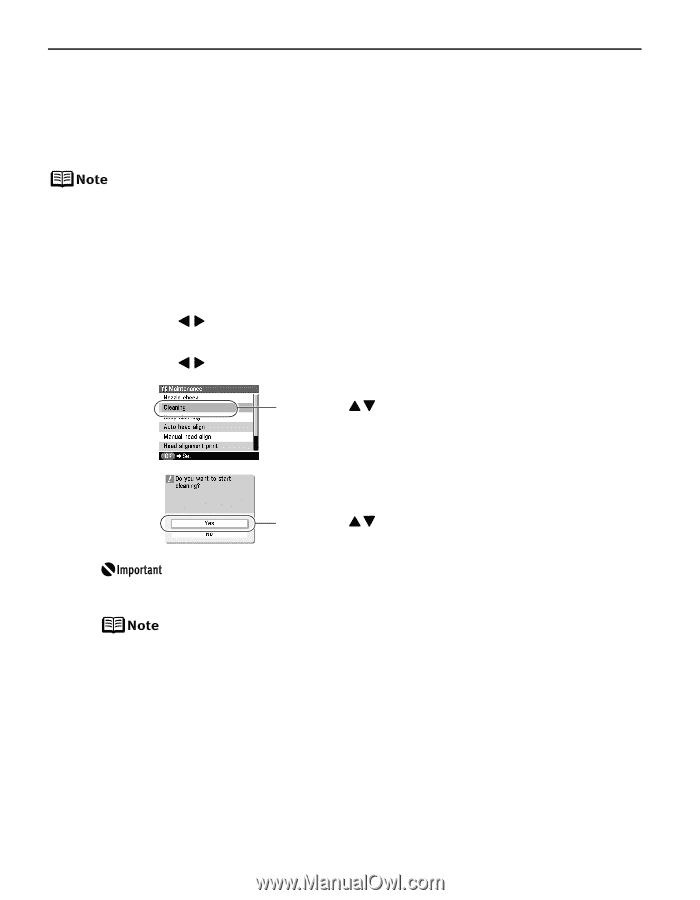
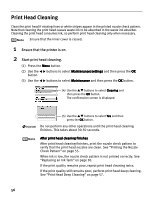
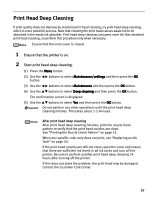
Print Head Cleaning Clean the print head if missing lines or white stripes appear in the printed nozzle check pattern. Note that cleaning the print head causes waste ink to be absorbed in the waste ink absorber. Cleaning the print head consumes ink, so perform print head cleaning only when necessary. Ensure that the inner cover is closed. 1 Ensure that the printer is on. 2 Start print head cleaning. (1) Press the Menu button. (2) Use the button. buttons to select Maintenance/settings and then press the OK (3) Use the buttons to select Maintenance and then press the OK button. (4) Use the buttons to select Cleaning and then press the OK button. The confirmation screen is displayed. (5) Use the buttons to select Yes and then press the OK button. Do not perform any other operations until the print head cleaning finishes. This takes about 30-50 seconds. After print head cleaning finishes After print head cleaning finishes, print the nozzle check pattern to verify that the print head nozzles are clean. See "Printing the Nozzle Check Pattern" on page 55. When ink is low, the nozzle check pattern is not printed correctly. See "Replacing an Ink Tank" on page 50. If the print quality remains poor, repeat print head cleaning twice. If the print quality still remains poor, perform print head deep cleaning. See "Print Head Deep Cleaning" on page 57. 56
-
 1
1 -
2
-
3
-
4
-
5
-
6
-
7
-
8
-
9
-
10
-
11
-
12
-
13
-
14
-
15
-
16
-
17
-
18
-
19
-
20
-
21
-
22
-
23
-
24
-
25
-
26
-
27
-
28
-
29
-
30
-
31
-
32
-
33
-
34
-
35
-
36
-
37
-
38
-
39
-
40
-
41
-
42
-
43
-
44
-
45
-
46
-
47
-
48
-
49
-
50
-
51
-
52
-
53
-
54
-
 55
55 -
 56
56 -
 57
57 -
 58
58 -
 59
59 -
 60
60 -
 61
61 -
 62
62 -
 63
63 -
 64
64 -
 65
65 -
66
-
67
-
68
-
69
-
70
-
71
-
72
-
73
-
74
-
75
-
76
-
77
-
78
-
79
-
80
 |
 |