Canon iP6600D iP6600D Direct Printing Guide - Page 67
Printer Does Not Start/Ink Does Not Come Out/Printing is Blurred, Colors are Wrong/White Streaks
 |
UPC - 013803048889
View all Canon iP6600D manuals
Add to My Manuals
Save this manual to your list of manuals |
Page 67 highlights
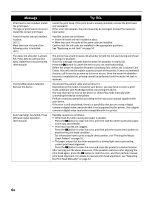
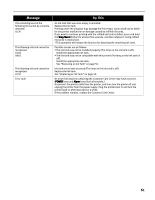
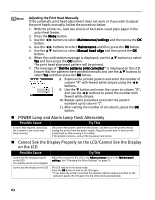
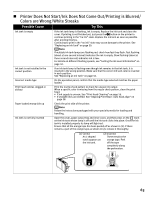
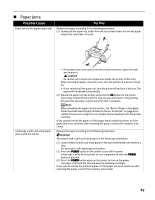
Printer Does Not Start/Ink Does Not Come Out/Printing is Blurred/ Colors are Wrong/White Streaks Possible Cause Try This Ink tank is empty If the ink tank lamp is flashing, ink is empty. Replace the ink tank and close the cover. If printing is not finished yet, just press the OK button on the printer to continue printing in the "no ink" state. Replace the ink tank as soon as possible after printing finishes. Continuing to print in the "no ink" state may cause damage to the printer. See "Replacing an Ink Tank" on page 50. Ink tank is not installed in the correct position Incorrect media type Print head nozzles clogged or shifted Paper loaded wrong side up If multiple ink tank lamps are flashing red, check how fast they flash. Fast flashing (about at one second interval) indicates the ink is empty. Slow flashing (about at three second intervals) indicates ink is low. For details on different flashing speeds, see "Getting the Ink Level Information" on page 50. If an ink tank lamp is flashing even though ink remains in that ink tank, it is inserted in the wrong position. Make sure that the correct ink tank color is inserted in each position. See "Replacing an Ink Tank" on page 50. On the operation panel, confirm that the media type selected matches the paper loaded. Print the nozzle check pattern to check for uneven ink output. When a specific color is missing from the nozzle check pattern, clean the print head. • If ink supply is uneven: See "Print Head Cleaning" on page 56. • If straight lines are shifted: See "Aligning Print Head - Auto head align" on page 58. Check the print side of the printer. Ink tank is not fully inserted Follow the instructions packaged with your specialty media for loading and handling. Open the cover, paper output tray and inner cover, and then press on the mark on the ink tank whose lamp is off until the ink tank clicks into place. Once the ink tank is installed properly its lamp will light red. Ensure that all the orange tape has been peeled off as shown in (1). If there remains a part of the orange tape as shown in (2), remove it thoroughly. (1) Correct An L shaped notch appears on the ink tank. (2) Incorrect There remains the orange tape. Peel off the tape completely along the perforation. 63
-
 1
1 -
2
-
3
-
4
-
5
-
6
-
7
-
8
-
9
-
10
-
11
-
12
-
13
-
14
-
15
-
16
-
17
-
18
-
19
-
20
-
21
-
22
-
23
-
24
-
25
-
26
-
27
-
28
-
29
-
30
-
31
-
32
-
33
-
34
-
35
-
36
-
37
-
38
-
39
-
40
-
41
-
42
-
43
-
44
-
45
-
46
-
47
-
48
-
49
-
50
-
51
-
52
-
53
-
54
-
55
-
56
-
57
-
58
-
59
-
60
-
61
-
 62
62 -
 63
63 -
 64
64 -
 65
65 -
 66
66 -
 67
67 -
 68
68 -
 69
69 -
 70
70 -
 71
71 -
 72
72 -
73
-
74
-
75
-
76
-
77
-
78
-
79
-
80
 |
 |
