Canon imageCLASS MF4150 MF4100 Series Scanner Driver Guide - Page 33
Add/Delete the Output Size, Simple Mode Toolbar
 |
View all Canon imageCLASS MF4150 manuals
Add to My Manuals
Save this manual to your list of manuals |
Page 33 highlights
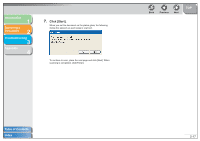
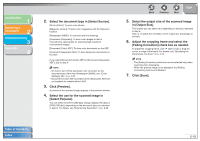
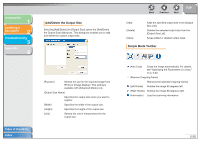
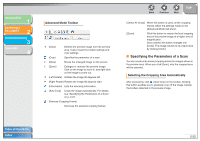
Introduction 1 Scanning a Document 2 Troubleshooting 3 Appendix 4 Add/Delete the Output Size Selecting [Add/Delete] for [Output Size] opens the [Add/Delete the Output Size] dialog box. This dialog box enables you to add and delete the custom output size. Table of Contents Index [Purpose] Selects the use for the scanned image from [Print] or [Image Display]. This setting is available with [Advanced Mode] only. [Output Size Name] Specifies the output size name you want to register. [Width] Specifies the width of the output size. [Height] Specifies the height of the output size. [Unit] Selects the unit of measurement for the output size. Back Previous Next TOP [Add] [Delete] [Save] Adds the specified output size to the [Output Size List]. Deletes the selected output size from the [Output Size List]. Saves added or deleted output sizes. Simple Mode Toolbar (Auto Crop) Crops the image automatically. For details, see "Specifying the Parameters of a Scan," on p. 2-22. (Remove Cropping Frame) Removes the selected cropping frames. (Left Rotate) Rotates the image 90 degrees left. (Right Rotate) Rotates the image 90 degrees right. (Information) Lists the scanning information. 2-20
-
 1
1 -
2
-
3
-
4
-
5
-
6
-
7
-
8
-
9
-
10
-
11
-
12
-
13
-
14
-
15
-
16
-
17
-
18
-
19
-
20
-
21
-
22
-
23
-
24
-
25
-
26
-
27
-
 28
28 -
 29
29 -
 30
30 -
 31
31 -
 32
32 -
 33
33 -
 34
34 -
 35
35 -
 36
36 -
 37
37 -
 38
38 -
39
-
40
-
41
-
42
-
43
-
44
-
45
-
46
-
47
-
48
-
49
-
50
-
51
-
52
-
53
-
54
-
55
-
56
-
57
-
58
-
59
-
60
-
61
-
62
-
63
-
64
-
65
-
66
-
67
-
68
-
69
-
70
-
71
-
72
-
73
-
74
-
75
-
76
 |
 |
