Canon imageCLASS MF4150 MF4100 Series Scanner Driver Guide - Page 40
Image Settings, Reduce Dust and Scratches]
 |
View all Canon imageCLASS MF4150 manuals
Add to My Manuals
Save this manual to your list of manuals |
Page 40 highlights
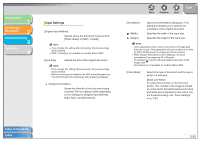
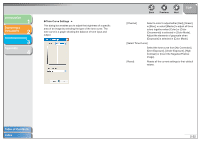
Introduction 1 Scanning a Document 2 Troubleshooting 3 Appendix 4 Table of Contents Index Image Settings [Auto Tone] Set to [ON] to automatically adjust the tone of the image. You can apply this setting when the preview image is displayed. NOTE This setting is available when [Color], [Color (Documents)] or [Grayscale] is selected in [Color Mode], and [Color Correction] is set to [Recommended] or [Color Matching] in the [Preferences] dialog box (see p. 2-37). [Unsharp Mask] Set to [ON] to emphasize the outline of an image and make it sharper. It is effective for scanning photos etc., which have a soft focus. NOTE This setting is available when [Color], [Color (Documents)] or [Grayscale] is selected in [Color Mode]. [Descreen] Set to [ON] to reduce the distorted pattern (moire) when scanning printed photographs and pictures. NOTE - This setting is available when [Color], [Color (Documents)] or [Grayscale] is selected in [Color Mode]. - Even if [Descreen] is set to [ON], some moire effect may remain if [Unsharp Mask] is also set to [ON]. In this case, disable [Unsharp Mask]. - A change in this setting is reflected after [Scan] is clicked. Back Previous Next TOP [Reduce Dust and Scratches] Reduces the dust and scratches on photos. [None]: No reduction of dust and scratches will be made. [Low]: Reduces only small dust and scratch marks. [Medium]: Normally this setting is recommended. [High]: Reduces large dust and scratch marks. This may remove delicate parts of the image. NOTE This setting is available when [Color], [Color (Documents)] or [Grayscale] is selected in [Color Mode]. 2-27
-
 1
1 -
2
-
3
-
4
-
5
-
6
-
7
-
8
-
9
-
10
-
11
-
12
-
13
-
14
-
15
-
16
-
17
-
18
-
19
-
20
-
21
-
22
-
23
-
24
-
25
-
26
-
27
-
28
-
29
-
30
-
31
-
32
-
33
-
34
-
 35
35 -
 36
36 -
 37
37 -
 38
38 -
 39
39 -
 40
40 -
 41
41 -
 42
42 -
 43
43 -
 44
44 -
 45
45 -
46
-
47
-
48
-
49
-
50
-
51
-
52
-
53
-
54
-
55
-
56
-
57
-
58
-
59
-
60
-
61
-
62
-
63
-
64
-
65
-
66
-
67
-
68
-
69
-
70
-
71
-
72
-
73
-
74
-
75
-
76
 |
 |
