Canon imageCLASS MF4150 MF4100 Series Scanner Driver Guide - Page 36
Creating a Cropping Frame, Creating Multiple Cropping Frames Only when, Using the Platen Glass
 |
View all Canon imageCLASS MF4150 manuals
Add to My Manuals
Save this manual to your list of manuals |
Page 36 highlights
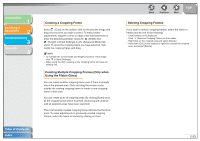
Introduction 1 Scanning a Document 2 Troubleshooting 3 Appendix 4 Table of Contents Index Creating a Cropping Frame Select (Crop) on the toolbar, click on the preview image and drag over the area you wish to select. To make further adjustments, drag the corner or edge of the selected frame or enter the desired parameter values for (Width) and (Height) in [Input Settings] on the [Advanced Mode] tab sheet. To move the cropping frame you have selected, click inside the cropping frame and drag. NOTE - To maintain the current width and height proportion of the image, click in [Input Settings]. - When using the ADF, creating a new cropping frame will erase an existing one. Creating Multiple Cropping Frames (Only when Using the Platen Glass) You can create another cropping frame even if there is already one in the preview area. Click and drag the mouse cursor outside the existing cropping frame to create a new cropping frame in that area. You can create up to 10 cropping areas. By clicking [Scan] once, all the cropped areas will be scanned. (Scanning will continue until all selected areas have been scanned.) The most recently created cropping frame will become the focal point. To make adjustments to previously created cropping frames, select the frame or frames by clicking on them. Back Previous Next TOP Deleting Cropping Frames If you want to remove cropping frames, select the frame or frames and do one of the following: - Click [Delete] on the keyboard. - Click (Remove Cropping Frame) on the toolbar. - Right-click on the cropped area and select [Delete]. - Hold down [Ctrl] on the keyboard, right-click outside the cropped area, and select [Delete]. 2-23
-
 1
1 -
2
-
3
-
4
-
5
-
6
-
7
-
8
-
9
-
10
-
11
-
12
-
13
-
14
-
15
-
16
-
17
-
18
-
19
-
20
-
21
-
22
-
23
-
24
-
25
-
26
-
27
-
28
-
29
-
30
-
 31
31 -
 32
32 -
 33
33 -
 34
34 -
 35
35 -
 36
36 -
 37
37 -
 38
38 -
 39
39 -
 40
40 -
 41
41 -
42
-
43
-
44
-
45
-
46
-
47
-
48
-
49
-
50
-
51
-
52
-
53
-
54
-
55
-
56
-
57
-
58
-
59
-
60
-
61
-
62
-
63
-
64
-
65
-
66
-
67
-
68
-
69
-
70
-
71
-
72
-
73
-
74
-
75
-
76
 |
 |