Canon imageCLASS MF4150 MF4100 Series Scanner Driver Guide - Page 39
Output Settings, Red, Green and Blue.
 |
View all Canon imageCLASS MF4150 manuals
Add to My Manuals
Save this manual to your list of manuals |
Page 39 highlights
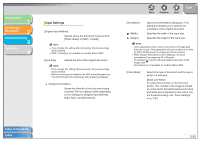
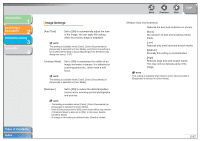
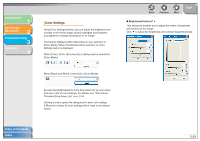
Introduction 1 Scanning a Document 2 Troubleshooting 3 Appendix 4 Table of Contents Index [Grayscale]: To scan black and white photos or monochrome images. The image is expressed in a 0-255 scale of black and white. [Color]: To scan color photos. The image is expressed in 256 levels (8 bit) of R(ed), G(reen) and B(lue). [Color (Documents)]: To scan color documents that include texts or charts in addition to color photos. The image is expressed in 256 levels (8 bit) of R(ed), G(reen) and B(lue). [Text Enhanced]: To scan texts crisply, particularly to process it with OCR software. The image is displayed in black and white. Output Settings [Output Resolution] Specifies the resolution for the scan. You can select a resolution from the drop-down list, or enter any value between 25-9600 dpi. If you are using the ADF, enter a resolution between 25-600 dpi. For details, see "Determining Resolution," on p. 2-39. Back Previous Next TOP [Output Size] [Data Size] Selects the output size of the scanned image. If you select [Add/Delete], the [Add/ Delete the Output Size] dialog box will appear and you can add and delete the custom output size (see p. 2-20). If [Flexible] is selected, enter values in (Width), (Height) or [%] (Scale). The resolution when you actually scan will change in accordance with the value of [%]. The ratio of (Width) and (Height) is linked to (Width) and (Height) in [Input Settings]. You can enter the value for [%] between 25 and 38400, but the upper limit varies depending on the value of [Output Resolution]. Click to switch the orientation of the output size (landscape or portrait). This button is invalid when [Flexible] is selected. Shows the data size of the scanned image according to your settings. 2-26
-
 1
1 -
2
-
3
-
4
-
5
-
6
-
7
-
8
-
9
-
10
-
11
-
12
-
13
-
14
-
15
-
16
-
17
-
18
-
19
-
20
-
21
-
22
-
23
-
24
-
25
-
26
-
27
-
28
-
29
-
30
-
31
-
32
-
33
-
 34
34 -
 35
35 -
 36
36 -
 37
37 -
 38
38 -
 39
39 -
 40
40 -
 41
41 -
 42
42 -
 43
43 -
 44
44 -
45
-
46
-
47
-
48
-
49
-
50
-
51
-
52
-
53
-
54
-
55
-
56
-
57
-
58
-
59
-
60
-
61
-
62
-
63
-
64
-
65
-
66
-
67
-
68
-
69
-
70
-
71
-
72
-
73
-
74
-
75
-
76
 |
 |
