Canon imageCLASS MF4150 MF4100 Series Scanner Driver Guide - Page 35
Specifying the Parameters of a Scan, Advanced Mode Toolbar, Selecting the Cropping Area Automatically
 |
View all Canon imageCLASS MF4150 manuals
Add to My Manuals
Save this manual to your list of manuals |
Page 35 highlights
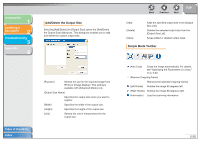
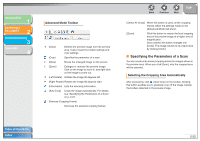
Introduction 1 Scanning a Document 2 Troubleshooting 3 Appendix 4 Advanced Mode Toolbar (Clear) Deletes the preview image from the preview area. It also resets the toolbar settings and color settings. (Crop) Specifies the parameter of a scan. (Move) Moves the enlarged image on the screen. (Zoom) Enlarges or reduces the preview image. Click on the image to zoom in, and right-click on the image to zoom out. (Left Rotate) Rotates the image 90 degrees left. (Right Rotate) Rotates the image 90 degrees right. (Information) Lists the scanning information. (Auto Crop) Crops the image automatically. For details, see "Specifying the Parameters of a Scan," on p. 2-22. (Remove Cropping Frame) Removes the selected cropping frames. Back Previous Next TOP [Select All Crops] When this button is used, all the cropping frames reflect the settings made on the [Advanced Mode] tab sheet. [Zoom] Click this button to rescan the focal cropping area of the preview image at a higher level of magnification. Once clicked, this button changes into [Undo]. The image retunes to its original size by clicking [Undo]. ■ Specifying the Parameters of a Scan You can create scan areas (cropping areas) for images shown in the preview area. When you click [Scan], only the cropped area will be scanned. Selecting the Cropping Area Automatically After previewing, click (Auto Crop) on the toolbar. Clicking this button enables you to gradually crop off the image outside the borders detected in the preview image. Table of Contents Index 2-22
-
 1
1 -
2
-
3
-
4
-
5
-
6
-
7
-
8
-
9
-
10
-
11
-
12
-
13
-
14
-
15
-
16
-
17
-
18
-
19
-
20
-
21
-
22
-
23
-
24
-
25
-
26
-
27
-
28
-
29
-
 30
30 -
 31
31 -
 32
32 -
 33
33 -
 34
34 -
 35
35 -
 36
36 -
 37
37 -
 38
38 -
 39
39 -
 40
40 -
41
-
42
-
43
-
44
-
45
-
46
-
47
-
48
-
49
-
50
-
51
-
52
-
53
-
54
-
55
-
56
-
57
-
58
-
59
-
60
-
61
-
62
-
63
-
64
-
65
-
66
-
67
-
68
-
69
-
70
-
71
-
72
-
73
-
74
-
75
-
76
 |
 |
