Cisco G1 Installation Guide - Page 25
Step 4, Push the release latches until they slip into the notch on the edge of the DIMM
 |
UPC - 746320679488
View all Cisco G1 manuals
Add to My Manuals
Save this manual to your list of manuals |
Page 25 highlights
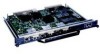
Chapter 7 NPE-G1 and NPE-G2 Installation and Configuration Information Installing the NPE-G1 or NPE-G2 Figure 7-13 Installing or Removing the DIMM on the NPE-G2 149068 Step 4 Step 5 Gently insert a DIMM into the DIMM socket. Push the release latches until they slip into the notch on the edge of the DIMM, holding it securely in place. You have finished replacing the DIMM. To install the NPE-G2 in the chassis, go to the "Inserting the NPE-G1 or NPE-G2 into the Router" section on page 7-28. OL-4448-12 Network Processing Engine and Network Services Engine Installation and Configuration 7-25
-
 1
1 -
2
-
3
-
4
-
5
-
6
-
7
-
8
-
9
-
10
-
11
-
12
-
13
-
14
-
15
-
16
-
17
-
18
-
19
-
 20
20 -
 21
21 -
 22
22 -
 23
23 -
 24
24 -
 25
25 -
 26
26 -
 27
27 -
 28
28 -
 29
29 -
 30
30 -
31
-
32
-
33
-
34
-
35
-
36
-
37
-
38
-
39
-
40
-
41
-
42
-
43
-
44
-
45
-
46
-
47
-
48
-
49
-
50
-
51
-
52
-
53
-
54
-
55
-
56
-
57
-
58
-
59
-
60
-
61
-
62
-
63
-
64
-
65
-
66
-
67
-
68
 |
 |

7-25
Network Processing Engine and Network Services Engine Installation and Configuration
OL-4448-12
Chapter 7
NPE-G1 and NPE-G2 Installation and Configuration Information
Installing the NPE-G1 or NPE-G2
Figure 7-13
Installing or Removing the DIMM on the NPE-G2
Step 4
Gently insert a DIMM into the DIMM socket.
Step 5
Push the release latches until they slip into the notch on the edge of the DIMM, holding it securely in
place.
You have finished replacing the DIMM. To install the NPE-G2 in the chassis, go to the
“Inserting the
NPE-G1 or NPE-G2 into the Router” section on page 7-28
.
149068