Cisco G1 Installation Guide - Page 27
Installing a SDRAM SODIMM, Removing or Installing an SDRAM SODIMM
 |
UPC - 746320679488
View all Cisco G1 manuals
Add to My Manuals
Save this manual to your list of manuals |
Page 27 highlights
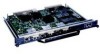
Chapter 7 NPE-G1 and NPE-G2 Installation and Configuration Information Figure 7-15 Removing or Installing an SDRAM SODIMM Installing the NPE-G1 or NPE-G2 1 66437 1 SODIMM Step 3 Step 4 Remove the SODIMM from the socket. Avoid touching the SODIMM as much as possible, particularly the traces, the metal fingers on the connector side of the SODIMM. Place the SODIMM in an antistatic shielding bag. Installing a SDRAM SODIMM Caution SODIMMs are sensitive components that are susceptible to ESD damage. Handle SODIMMs by the edges only; avoid touching the memory modules, pins, or traces (the metal fingers along the connector edge of the SODIMM). Step 1 Step 2 Step 3 Remove a new SODIMM from the antistatic container. Hold the SODIMM component-side-up, with the connector edge (the metal fingers) away from you. Align the new SODIMM notch with the connector and insert the SODIMM into the socket. Caution When inserting the SODIMM, use firm but not excessive pressure. If you damage a socket, you will have to return the NPE-G1 to the factory for repair. Step 4 Gently press on the SODIMM until the SODIMM spring latches snap into place. OL-4448-12 Network Processing Engine and Network Services Engine Installation and Configuration 7-27
-
 1
1 -
2
-
3
-
4
-
5
-
6
-
7
-
8
-
9
-
10
-
11
-
12
-
13
-
14
-
15
-
16
-
17
-
18
-
19
-
20
-
21
-
 22
22 -
 23
23 -
 24
24 -
 25
25 -
 26
26 -
 27
27 -
 28
28 -
 29
29 -
 30
30 -
 31
31 -
 32
32 -
33
-
34
-
35
-
36
-
37
-
38
-
39
-
40
-
41
-
42
-
43
-
44
-
45
-
46
-
47
-
48
-
49
-
50
-
51
-
52
-
53
-
54
-
55
-
56
-
57
-
58
-
59
-
60
-
61
-
62
-
63
-
64
-
65
-
66
-
67
-
68
 |
 |
