Cisco G1 Installation Guide - Page 29
Attaching the Rear Cable-Management Brackets and Cables (Optional)
 |
UPC - 746320679488
View all Cisco G1 manuals
Add to My Manuals
Save this manual to your list of manuals |
Page 29 highlights
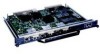
Chapter 7 NPE-G1 and NPE-G2 Installation and Configuration Information Installing the NPE-G1 or NPE-G2 Note The NPE-G1 or NPE-G2 is not fully seated in the router midplane until you tighten its captive installation screws. Step 4 Step 5 Step 6 If you removed power supplies from the router, replace the power supplies. (See the "Removing and Replacing an AC-Input or DC-Input Power Supply" section on page 10-14 when replacing a power supply in a Cisco 7200 VXR router.) If you slid the front of the router out of the rack, slowly guide the router back into the rack. Use a 3/16-inch flat-blade screwdriver to tighten the screws that secure the router to the front mounting strips of the rack. This completes the procedure for installing the NPE-G1 or NPE-G2 in a Cisco 7200 VXR router. Attaching the Rear Cable-Management Brackets and Cables (Optional) You may choose to use one of two types of cable-management brackets. One type is the same as is used on the front of the router for managing port adapter and I/O controller cables. The NPE-G1- or NPE-G2-specific bracket is used only on the NPE-G1 or NPE-G2, and provides more support for optical fiber cables. Depending on whether the router is front-mounted or rear-mounted in the rack, install the cable-management brackets to the router. Go to one of these sections for instructions on rear-mounting the cable-management brackets and attaching the cables: • Installing the NPE-G1 or NPE-G2 Cable-Management Brackets, page 7-29-This procedure applies to both the Cisco 7200 VXR routers and Cisco uBR7200 series routers. • Installing the Rear Cable-Management Brackets on a Front-Mounted Router (Optional), page 7-31-This procedure applies to only the Cisco 7200 VXR routers. • Installing the Rear Cable-Management Brackets on a Rear-Mounted Router (Optional), page 7-32-This procedure applies to only the Cisco 7200 VXR routers. • Installing the Default Cable-Management Bracket on a Cisco uBR7246VXR Router (Optional), page 7-34-This procedure applies to only the Cisco UBR 7246VXR universal broadband router. Installing the NPE-G1 or NPE-G2 Cable-Management Brackets If you are using the NPE-G1 or NPE-G2 and installing the cable-management bracket (Cisco Product Number MAS-7200-CBLMGMT), use the following instructions. Figure 7-17 illustrates installing the bracket on the NPE-G1 or NPE-G2 on the Cisco 7200 VXR routers. Figure 7-18 illustrates installing the bracket on the Cisco uBR7200-NPE-G1 or Cisco uBR7200-NPE-G2 on the Cisco uBR7200 series routers. Note The captive installation screws on the NPE-G1 or NPE-G2 must be fastened to allow the cable-management bracket to provide proper cable support and strain relief. Always ensure that the captive installation screws are properly tightened. OL-4448-12 Network Processing Engine and Network Services Engine Installation and Configuration 7-29
-
 1
1 -
2
-
3
-
4
-
5
-
6
-
7
-
8
-
9
-
10
-
11
-
12
-
13
-
14
-
15
-
16
-
17
-
18
-
19
-
20
-
21
-
22
-
23
-
 24
24 -
 25
25 -
 26
26 -
 27
27 -
 28
28 -
 29
29 -
 30
30 -
 31
31 -
 32
32 -
 33
33 -
 34
34 -
35
-
36
-
37
-
38
-
39
-
40
-
41
-
42
-
43
-
44
-
45
-
46
-
47
-
48
-
49
-
50
-
51
-
52
-
53
-
54
-
55
-
56
-
57
-
58
-
59
-
60
-
61
-
62
-
63
-
64
-
65
-
66
-
67
-
68
 |
 |
