Compaq Presario SR1000 Presario Desktop PCs - Getting Started Guide - Page 51
nView tab disabling, Ge Force tab disabling, Displays tab disabling
 |
View all Compaq Presario SR1000 manuals
Add to My Manuals
Save this manual to your list of manuals |
Page 51 highlights
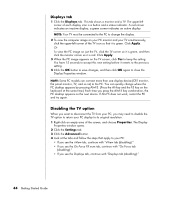
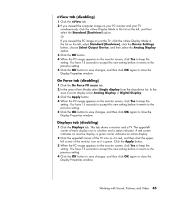
nView tab (disabling) 1 Click the nView tab. 2 If you viewed the computer image on your PC monitor and your TV simultaneously, click the nView Display Mode in the list on the left, and then select the Standard [Dualview] option. Or If you viewed the PC image on just the TV, click the nView Display Mode in the list on the left, select Standard [Dualview], click the Device Settings button, choose Select Output Device, and then select the Analog Display option. 3 Click the OK button. 4 When the PC image appears on the monitor screen, click Yes to keep the setting. You have 15 seconds to accept this new setting before it reverts to the previous setting. 5 Click the OK button to save changes, and then click OK again to close the Display Properties window. Ge Force tab (disabling) 1 Click the Ge Force FX xxxx tab. 2 In the area nView Modes select Single display from the drop-down list. In the area Current display select Analog Display or Digital Display. 3 Click the Apply button. 4 When the PC image appears on the monitor screen, click Yes to keep the setting. You have 15 seconds to accept this new setting before it reverts to the previous setting. 5 Click the OK button to save changes, and then click OK again to close the Display Properties window. Displays tab (disabling) 1 Click the Displays tab. This tab shows a monitor and a TV. The upper-left corner of each display icon is a button and a status indicator. A red corner indicates an inactive display; a green corner indicates an active display. 2 Click the upper-left corner of the TV icon so it is red, and then click the upperleft corner of the monitor icon so it is green. Click the Apply button. 3 When the PC image appears on the monitor screen, click Yes to keep the setting. You have 15 seconds to accept this new setting before it reverts to the previous setting. 4 Click the OK button to save changes, and then click OK again to close the Display Properties window. Working with Sound, Pictures, and Video 45
-
 1
1 -
2
-
3
-
4
-
5
-
6
-
7
-
8
-
9
-
10
-
11
-
12
-
13
-
14
-
15
-
16
-
17
-
18
-
19
-
20
-
21
-
22
-
23
-
24
-
25
-
26
-
27
-
28
-
29
-
30
-
31
-
32
-
33
-
34
-
35
-
36
-
37
-
38
-
39
-
40
-
41
-
42
-
43
-
44
-
45
-
 46
46 -
 47
47 -
 48
48 -
 49
49 -
 50
50 -
 51
51 -
 52
52 -
 53
53 -
 54
54 -
 55
55 -
 56
56 -
57
-
58
-
59
-
60
-
61
-
62
-
63
-
64
-
65
-
66
-
67
-
68
-
69
-
70
-
71
-
72
-
73
-
74
-
75
-
76
-
77
-
78
-
79
-
80
-
81
-
82
-
83
-
84
-
85
-
86
-
87
-
88
-
89
-
90
-
91
-
92
-
93
-
94
-
95
-
96
-
97
-
98
-
99
-
100
-
101
-
102
 |
 |
