Compaq Presario SR1000 Presario Desktop PCs - Getting Started Guide - Page 64
Storing Data Files on Disc, Copying a DVD or CD
 |
View all Compaq Presario SR1000 manuals
Add to My Manuals
Save this manual to your list of manuals |
Page 64 highlights
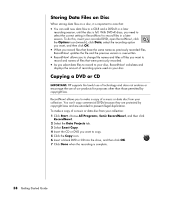
Storing Data Files on Disc When storing data files on a disc, it is important to note that: • You can add new data files to a CD-R and a DVD+R in a later recording session, until the disc is full. With DVD+R discs, you need to select the correct setting in RecordNow! to record files in a later session. To do this, insert your recorded DVD, open RecordNow!, click the Options icon (wrench), click Data, select the recording option you want, and then click OK. • When you record files that have the same name as previously recorded files, RecordNow! updates the file and the previous version is overwritten. • RecordNow! allows you to change file names and titles of files you want to record and names of files that were previously recorded. • As you select data files to record to your disc, RecordNow! calculates and displays the amount of recording space used on your disc. Copying a DVD or CD IMPORTANT: HP supports the lawful use of technology and does not endorse or encourage the use of our products for purposes other than those permitted by copyright law. RecordNow! allows you to make a copy of a music or data disc from your collection. You can't copy commercial DVDs because they are protected by copyright laws and are encoded to prevent illegal duplication. To make a copy of a music or data disc from your collection: 1 Click Start, choose All Programs, Sonic RecordNow!, and then click RecordNow!. 2 Select the Data Projects tab. 3 Select Exact Copy. 4 Insert the CD or DVD you want to copy. 5 Click the Copy icon. 6 Insert a blank DVD or CD into the drive, and then click OK. 7 Click Done when the recording is complete. 58 Getting Started Guide
-
 1
1 -
2
-
3
-
4
-
5
-
6
-
7
-
8
-
9
-
10
-
11
-
12
-
13
-
14
-
15
-
16
-
17
-
18
-
19
-
20
-
21
-
22
-
23
-
24
-
25
-
26
-
27
-
28
-
29
-
30
-
31
-
32
-
33
-
34
-
35
-
36
-
37
-
38
-
39
-
40
-
41
-
42
-
43
-
44
-
45
-
46
-
47
-
48
-
49
-
50
-
51
-
52
-
53
-
54
-
55
-
56
-
57
-
58
-
 59
59 -
 60
60 -
 61
61 -
 62
62 -
 63
63 -
 64
64 -
 65
65 -
 66
66 -
 67
67 -
 68
68 -
 69
69 -
70
-
71
-
72
-
73
-
74
-
75
-
76
-
77
-
78
-
79
-
80
-
81
-
82
-
83
-
84
-
85
-
86
-
87
-
88
-
89
-
90
-
91
-
92
-
93
-
94
-
95
-
96
-
97
-
98
-
99
-
100
-
101
-
102
 |
 |
