Epson EPL-N2000 User Manual - Page 80
Using a Serial Interface, Ready, On Line, Enter
 |
View all Epson EPL-N2000 manuals
Add to My Manuals
Save this manual to your list of manuals |
Page 80 highlights
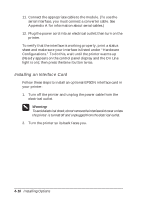
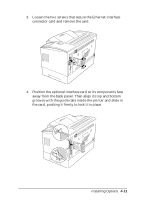
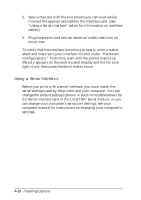
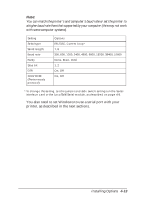
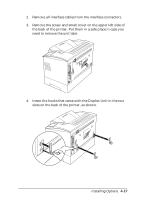
5. Secure the card with the two screws you removed earlier. Connect the appropriate cable to the interface card. (See "Using a Serial Interface" below for information on interface cables.) 6. Plug the power cord into an electrical outlet; then turn on the printer. To verify that the interface is working properly, print a status sheet and make sure your interface is listed under "Hardware Configurations." To do this, wait until the printer warms up (Ready appears on the control panel display and the On Line light is on); then press the Enter button twice. Using a Serial Interface Before you print with a serial interface, you must match the serial settings used by the printer and your computer. You can change the default settings (shown in bold in the table below) for the Serial interface card or the LocalTalk/Serial module, or you can change your computer's serial port settings; see your computer manual for instructions on changing your computer's settings. 4-12 Installing Options
-
 1
1 -
2
-
3
-
4
-
5
-
6
-
7
-
8
-
9
-
10
-
11
-
12
-
13
-
14
-
15
-
16
-
17
-
18
-
19
-
20
-
21
-
22
-
23
-
24
-
25
-
26
-
27
-
28
-
29
-
30
-
31
-
32
-
33
-
34
-
35
-
36
-
37
-
38
-
39
-
40
-
41
-
42
-
43
-
44
-
45
-
46
-
47
-
48
-
49
-
50
-
51
-
52
-
53
-
54
-
55
-
56
-
57
-
58
-
59
-
60
-
61
-
62
-
63
-
64
-
65
-
66
-
67
-
68
-
69
-
70
-
71
-
72
-
73
-
74
-
 75
75 -
 76
76 -
 77
77 -
 78
78 -
 79
79 -
 80
80 -
 81
81 -
 82
82 -
 83
83 -
 84
84 -
 85
85 -
86
-
87
-
88
-
89
-
90
-
91
-
92
-
93
-
94
-
95
-
96
-
97
-
98
-
99
-
100
-
101
-
102
-
103
-
104
-
105
-
106
-
107
-
108
-
109
-
110
-
111
-
112
-
113
-
114
-
115
-
116
-
117
-
118
-
119
-
120
-
121
-
122
-
123
-
124
-
125
-
126
-
127
-
128
-
129
-
130
-
131
-
132
-
133
-
134
-
135
-
136
-
137
-
138
-
139
-
140
-
141
-
142
-
143
-
144
-
145
 |
 |
