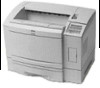
Epson EPL-N2000 User Manual - Page 84
Installing the Duplex Unit, F4, A4, B5, International B5, A5, Ledger, Legal, GLG, Letter
 |
View all Epson EPL-N2000 manuals
Add to My Manuals
Save this manual to your list of manuals |
Page 84 highlights
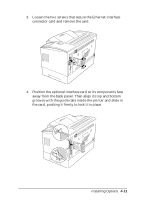
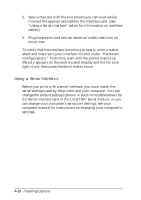
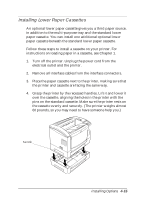
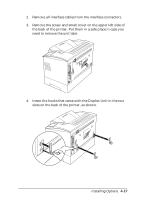
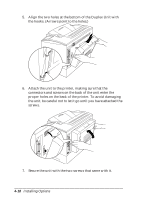
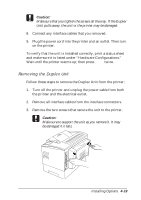
5. Connect the interface cable(s). 6. Make sure the printer's power switch is in the off position; then plug the power cable into the printer and into an electrical outlet. 7. Turn on the printer. 8. Now run the Windows printer driver to add the optional paper cassette to your available paper source list. See Chapter 2 for instructions. To verify that the paper cassette is installed correctly, print a status sheet and make sure the cassette is listed under "Hardware Configurations." To do this, wait until the printer warms up (Ready appears on the control panel display and the On Line light is on); then press the Enter button twice. Select the paper source in your application program. See your software documentation for more information. Note: If you use the Remote Control Panel utility or SelecType to control your printer, you need to select the optional paper cassette only when you are ready to print. See Chapter 3 or the Technical Information manual for instructions. Installing the Duplex Unit The optional Duplex Unit enables you to print on both sides of the paper. It is compatible with the following paper sizes: A3, B4, F4, A4, B5, International B5, A5, Ledger, Legal, GLG, Letter, GLT, Executive, HLT. Follow these steps to install the Duplex Unit: 1. Turn off the printer and unplug the power cable from both the printer and the electrical outlet. 4-16 Installing Options
-
 1
1 -
2
-
3
-
4
-
5
-
6
-
7
-
8
-
9
-
10
-
11
-
12
-
13
-
14
-
15
-
16
-
17
-
18
-
19
-
20
-
21
-
22
-
23
-
24
-
25
-
26
-
27
-
28
-
29
-
30
-
31
-
32
-
33
-
34
-
35
-
36
-
37
-
38
-
39
-
40
-
41
-
42
-
43
-
44
-
45
-
46
-
47
-
48
-
49
-
50
-
51
-
52
-
53
-
54
-
55
-
56
-
57
-
58
-
59
-
60
-
61
-
62
-
63
-
64
-
65
-
66
-
67
-
68
-
69
-
70
-
71
-
72
-
73
-
74
-
75
-
76
-
77
-
78
-
 79
79 -
 80
80 -
 81
81 -
 82
82 -
 83
83 -
 84
84 -
 85
85 -
 86
86 -
 87
87 -
 88
88 -
 89
89 -
90
-
91
-
92
-
93
-
94
-
95
-
96
-
97
-
98
-
99
-
100
-
101
-
102
-
103
-
104
-
105
-
106
-
107
-
108
-
109
-
110
-
111
-
112
-
113
-
114
-
115
-
116
-
117
-
118
-
119
-
120
-
121
-
122
-
123
-
124
-
125
-
126
-
127
-
128
-
129
-
130
-
131
-
132
-
133
-
134
-
135
-
136
-
137
-
138
-
139
-
140
-
141
-
142
-
143
-
144
-
145
 |
 |
