Epson TM U200D Technical Reference - Page 75
Using the Power switch cover, Maintenance, Periodic Checks - troubleshooting
 |
View all Epson TM U200D manuals
Add to My Manuals
Save this manual to your list of manuals |
Page 75 highlights
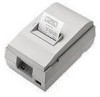
Using the Power switch cover You can use the provided Cover, power switch to protect the power switch from accidental or improper operation. Attach the cover as shown in the illustration below. You can turn the power on or off with the switch cover attached by inserting a pointed object (like a ball point pen) through either of the two small holes on the switch cover. CAUTION: If an accident occurs when the Power switch cover is attached, pull the AC adapter cord out of the outlet immediately; otherwise the printer may be damaged. Maintenance Periodic Checks Perform the following periodic checks every six months: Periodic checks Checkpoints Standards Remedies Dust, paper particles, or dirt No dust, paper particles, or dirt should be Clean the printer thoroughly with a on and in the printer. allowed to build up on or in the printer. vacuum cleaner. No small pieces of paper should be left in Remove any pieces of paper from the the paper path. paper path. Lubrication See the Lubrication section. Lubricate the points listed in Lubrication points section. Operation check When each printer component is observed, no abnormalities should be found. Check the printer following the Troubleshooting flowcharts in Chapter 4. Shape of the springs No spring should be bent or deformed. Replace any deformed springs. Ribbon cassette The ribbon cassette should be properly installed in the printer. See "Replacing the Ribbon Cassette" in this chapter. 3-8 Handling and Maintenance Rev.B
-
 1
1 -
2
-
3
-
4
-
5
-
6
-
7
-
8
-
9
-
10
-
11
-
12
-
13
-
14
-
15
-
16
-
17
-
18
-
19
-
20
-
21
-
22
-
23
-
24
-
25
-
26
-
27
-
28
-
29
-
30
-
31
-
32
-
33
-
34
-
35
-
36
-
37
-
38
-
39
-
40
-
41
-
42
-
43
-
44
-
45
-
46
-
47
-
48
-
49
-
50
-
51
-
52
-
53
-
54
-
55
-
56
-
57
-
58
-
59
-
60
-
61
-
62
-
63
-
64
-
65
-
66
-
67
-
68
-
69
-
 70
70 -
 71
71 -
 72
72 -
 73
73 -
 74
74 -
 75
75 -
 76
76 -
 77
77 -
 78
78 -
 79
79 -
 80
80 -
81
-
82
-
83
-
84
-
85
-
86
-
87
-
88
-
89
-
90
-
91
-
92
-
93
-
94
-
95
-
96
-
97
-
98
-
99
-
100
-
101
-
102
-
103
-
104
-
105
-
106
-
107
-
108
-
109
-
110
-
111
-
112
-
113
-
114
-
115
-
116
-
117
-
118
-
119
-
120
-
121
-
122
-
123
-
124
-
125
-
126
-
127
-
128
-
129
-
130
-
131
-
132
-
133
-
134
-
135
-
136
-
137
-
138
-
139
-
140
-
141
-
142
-
143
-
144
-
145
-
146
-
147
-
148
-
149
-
150
-
151
-
152
-
153
-
154
-
155
-
156
-
157
-
158
-
159
-
160
-
161
-
162
-
163
-
164
-
165
-
166
-
167
-
168
-
169
 |
 |
