Garmin Map 60 Owner's Manual - Page 11
Battery Installation and, Start Up
 |
UPC - 689076190107
View all Garmin Map 60 manuals
Add to My Manuals
Save this manual to your list of manuals |
Page 11 highlights
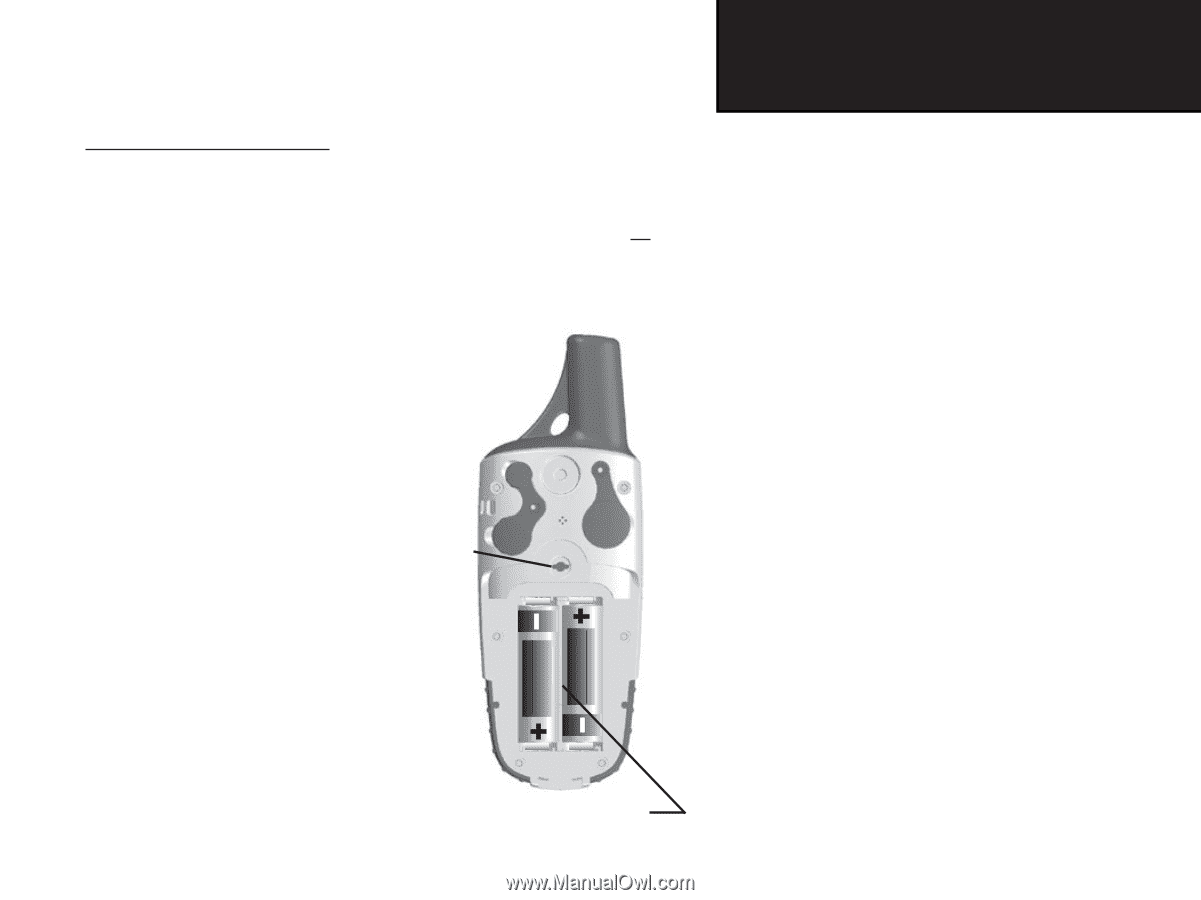
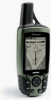
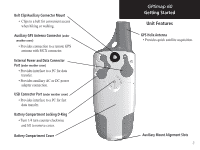
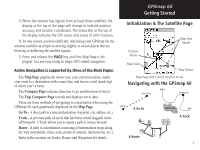
Installing the Batteries The GPSmap 60 operates on two "AA" batteries (not included), which are located in the back of the unit. Alkaline or NiMH batteries may be used (see page 45 for setting the battery type.) Stored data will not be lost when batteries are removed. To install batteries: 1. Remove the battery cover from the back of the unit by turning the D-Ring 1/4 turn counter-clockwise and pulling out. 2. Insert the batteries, observing the proper polarity. A polarity diagram can be found molded into Locking the battery compartment. Pin Slot 3. Reinstall the battery cover by inserting the bottom slot over the tab at the base of the unit and reinserting the locking pin in the back of the unit. Turn the D-Ring 1/4 turn clockwise to lock in place. USE BY: 2009 USE BY: 2009 GPSmap 60 Getting Started Battery Installation and Start Up Important Note When replacing batteries, use only new or fully charged batteries. Do not mix Alkaline and NiMH batteries. Rechargeable batteries may typically display less capacity than disposable batteries. Remove the batteries from the unit if you don't plan to use it for several months. Storing batteries in the unit for prolonged periods may result in leakage and damage to the battery compartment. Follow the manufacturer's instructions for proper care and disposal of used batteries. Do not incinerate used batteries, as internal materials may ignite with explosive violence. Extensive use of backlighting and/or WAAS as well as key beep tones will significantly reduce battery life. To set backlighting intensity and timeout, see page 46. To disable WAAS, see page 45. To mute the beep tones, see page 48. Battery Compartment 1
-
 1
1 -
2
-
3
-
4
-
5
-
 6
6 -
 7
7 -
 8
8 -
 9
9 -
 10
10 -
 11
11 -
 12
12 -
 13
13 -
 14
14 -
 15
15 -
 16
16 -
17
-
18
-
19
-
20
-
21
-
22
-
23
-
24
-
25
-
26
-
27
-
28
-
29
-
30
-
31
-
32
-
33
-
34
-
35
-
36
-
37
-
38
-
39
-
40
-
41
-
42
-
43
-
44
-
45
-
46
-
47
-
48
-
49
-
50
-
51
-
52
-
53
-
54
-
55
-
56
-
57
-
58
-
59
-
60
-
61
-
62
-
63
-
64
-
65
-
66
-
67
-
68
-
69
-
70
-
71
-
72
-
73
-
74
-
75
-
76
-
77
-
78
-
79
-
80
-
81
-
82
-
83
-
84
-
85
-
86
-
87
-
88
-
89
-
90
-
91
-
92
-
93
-
94
 |
 |