HP 4200n HP LaserJet 4200 and 4300 series printer - User Guide - Page 130
Repeating image, Misformed characters, skew, Curl or wave, FUSER MODE
 |
UPC - 808736313971
View all HP 4200n manuals
Add to My Manuals
Save this manual to your list of manuals |
Page 130 highlights
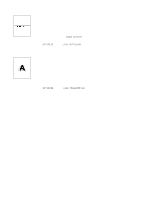
Repeating image This type of defect might occur when using preprinted forms or a large quantity of narrow paper. 1 Print a few more pages to see if the problem corrects itself. 2 Make sure that type and quality of the paper you are using meet HP specifications. (See "Paper specifications" on page 182.) 3 Maintenance might be due. Check this by printing a copy of the supplies status page. (See "Supplies status page" on page 85.) If maintenance is due, order and install the printer maintenance kit. (See "Performing preventative maintenance" on page 91.) 4 If the distance between defects is 38 mm (1.5 inches) or 94 mm (3.76 inches), the print cartridge might need to be replaced. Misformed characters 1 Print a few more pages to see if the problem corrects itself. 2 Make sure that the environmental specifications for the printer are being met. (See "General specifications" on page 195.) 3 The printer might be due for maintenance. Check this by printing a copy of the supplies status page. (See "Supplies status page" on page 85.) If maintenance is due, order and install the printer maintenance kit. (See "Performing preventative maintenance" on page 91.) Page skew 1 Print a few more pages to see if the problem corrects itself. 2 Verify that there are no torn pieces of paper inside the printer. 3 Make sure that paper is loaded correctly and that all adjustments have been made. (See "Loading trays" on page 42.) Make sure that the guides in the tray are not too tight or too loose against the paper. 4 Turn over the stack of paper in the tray. Also, try rotating the paper 180 o. 5 Make sure that the type and quality of the paper you are using meet HP specifications. (See "Paper specifications" on page 182.) 6 Make sure that the environmental specifications for the printer are being met. (See "General specifications" on page 195.) 7 The printer might be due for maintenance. (See "Performing preventative maintenance" on page 91.) Curl or wave 1 Turn over the stack of paper in the tray. Also, try rotating the paper 180 o. 2 Make sure that the type and quality of the paper you are using meet HP specifications. (See "Paper specifications" on page 182.) 3 Make sure that the environmental specifications for the printer are being met. (See "Printer specifications" on page 193.) 4 Try printing to a different output bin. 5 If paper is lightweight and smooth, open the Configure Device menu at the printer control panel. On the Print Quality submenu, select FUSER MODES, and then select the paper type you are using. Change the setting to LOW, which helps reduce the heat in the fusing process. (See "FUSER MODES" on page 160.) You must also set the type of paper for the tray you are using. (See "Printing by type and size of paper (locking trays)" on page 48.) 128 4 Problem solving ENWW
-
 1
1 -
2
-
3
-
4
-
5
-
6
-
7
-
8
-
9
-
10
-
11
-
12
-
13
-
14
-
15
-
16
-
17
-
18
-
19
-
20
-
21
-
22
-
23
-
24
-
25
-
26
-
27
-
28
-
29
-
30
-
31
-
32
-
33
-
34
-
35
-
36
-
37
-
38
-
39
-
40
-
41
-
42
-
43
-
44
-
45
-
46
-
47
-
48
-
49
-
50
-
51
-
52
-
53
-
54
-
55
-
56
-
57
-
58
-
59
-
60
-
61
-
62
-
63
-
64
-
65
-
66
-
67
-
68
-
69
-
70
-
71
-
72
-
73
-
74
-
75
-
76
-
77
-
78
-
79
-
80
-
81
-
82
-
83
-
84
-
85
-
86
-
87
-
88
-
89
-
90
-
91
-
92
-
93
-
94
-
95
-
96
-
97
-
98
-
99
-
100
-
101
-
102
-
103
-
104
-
105
-
106
-
107
-
108
-
109
-
110
-
111
-
112
-
113
-
114
-
115
-
116
-
117
-
118
-
119
-
120
-
121
-
122
-
123
-
124
-
 125
125 -
 126
126 -
 127
127 -
 128
128 -
 129
129 -
 130
130 -
 131
131 -
 132
132 -
 133
133 -
 134
134 -
 135
135 -
136
-
137
-
138
-
139
-
140
-
141
-
142
-
143
-
144
-
145
-
146
-
147
-
148
-
149
-
150
-
151
-
152
-
153
-
154
-
155
-
156
-
157
-
158
-
159
-
160
-
161
-
162
-
163
-
164
-
165
-
166
-
167
-
168
-
169
-
170
-
171
-
172
-
173
-
174
-
175
-
176
-
177
-
178
-
179
-
180
-
181
-
182
-
183
-
184
-
185
-
186
-
187
-
188
-
189
-
190
-
191
-
192
-
193
-
194
-
195
-
196
-
197
-
198
-
199
-
200
-
201
-
202
-
203
-
204
-
205
-
206
-
207
-
208
-
209
-
210
-
211
-
212
-
213
-
214
-
215
-
216
-
217
-
218
 |
 |
