HP CP6015dn HP Color LaserJet CP6015 Series Printers - Software Technical Refe - Page 319
Setting up a printer with Mac OS X v10.3, Printer Setup Utility
 |
UPC - 883585363018
View all HP CP6015dn manuals
Add to My Manuals
Save this manual to your list of manuals |
Page 319 highlights
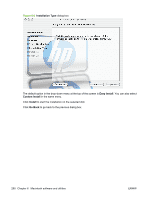
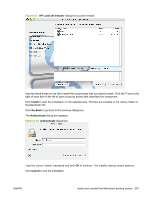
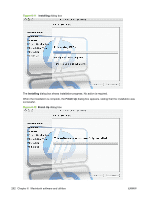
Setting up a printer with Mac OS X v10.3 Complete these steps after completing the printing-system software installation. 1. If you are installing the product using a USB connection, connect the USB cable between the product and the computer. Turn on the product. If you are installing using a network connection, verify that the network cable is connected to the product and that the product is on. 2. In the Applications folder, open the Utilities folder, and then run the Printer Setup Utility. 3. If you are installing the product using a USB connection, verify that the product appears in the printer list. The Kind column in the printer list same change as before should display the product name. If this is the case, the setup is complete. If the Product does not appear, or if the correct information does not appear in the Kind field, see Troubleshooting the product setup on page 296. If you are installing the product using a network connection, continue with the following steps. 4. Click Add and then click Add to open the add printer screen. 5. Select the network connection protocol in the top pull-down menu. The two supported protocols are Rendezvous and IP Printing. NOTE: Rendezvous is the easiest method and is the best method to use if the product is installed on your local network. IP Printing must be used if you are installing the product on a different network. If you are using Rendezvous, carry out the following step: Select the product in the Name list. The Printer Model and Model Name are selected automatically. NOTE: If you are on a network that has more than one product, print a configuration page and match the Rendezvous Printer Name to the name on the list to identify the product that you are installing. NOTE: If the product does not appear in the list, verify that the product is on and connected to the network. If it still does not appear, try turning the product off and then on again. Finally, turn the computer off and then on again, then restart the setup process. For more troubleshooting information, see Troubleshooting the product setup on page 296. NOTE: If the automatic selection fails, or if you want to manually select a .PPD file, click the Printer Model pull-down menu, select HP, and then select the .PPD file that you want to add. If the product PPD does not appear in the Model Name list, turn the computer off and then on again and restart the setup process. If you are using IP Printing, carry out the following steps: a. Choose Socket/HP Jet Direct from the Printer Type pull-down menu. This is the recommended setting for HP products. b. Follow these directions to print the product configuration pages. ENWW Install and uninstall the Macintosh printing system 295
-
 1
1 -
2
-
3
-
4
-
5
-
6
-
7
-
8
-
9
-
10
-
11
-
12
-
13
-
14
-
15
-
16
-
17
-
18
-
19
-
20
-
21
-
22
-
23
-
24
-
25
-
26
-
27
-
28
-
29
-
30
-
31
-
32
-
33
-
34
-
35
-
36
-
37
-
38
-
39
-
40
-
41
-
42
-
43
-
44
-
45
-
46
-
47
-
48
-
49
-
50
-
51
-
52
-
53
-
54
-
55
-
56
-
57
-
58
-
59
-
60
-
61
-
62
-
63
-
64
-
65
-
66
-
67
-
68
-
69
-
70
-
71
-
72
-
73
-
74
-
75
-
76
-
77
-
78
-
79
-
80
-
81
-
82
-
83
-
84
-
85
-
86
-
87
-
88
-
89
-
90
-
91
-
92
-
93
-
94
-
95
-
96
-
97
-
98
-
99
-
100
-
101
-
102
-
103
-
104
-
105
-
106
-
107
-
108
-
109
-
110
-
111
-
112
-
113
-
114
-
115
-
116
-
117
-
118
-
119
-
120
-
121
-
122
-
123
-
124
-
125
-
126
-
127
-
128
-
129
-
130
-
131
-
132
-
133
-
134
-
135
-
136
-
137
-
138
-
139
-
140
-
141
-
142
-
143
-
144
-
145
-
146
-
147
-
148
-
149
-
150
-
151
-
152
-
153
-
154
-
155
-
156
-
157
-
158
-
159
-
160
-
161
-
162
-
163
-
164
-
165
-
166
-
167
-
168
-
169
-
170
-
171
-
172
-
173
-
174
-
175
-
176
-
177
-
178
-
179
-
180
-
181
-
182
-
183
-
184
-
185
-
186
-
187
-
188
-
189
-
190
-
191
-
192
-
193
-
194
-
195
-
196
-
197
-
198
-
199
-
200
-
201
-
202
-
203
-
204
-
205
-
206
-
207
-
208
-
209
-
210
-
211
-
212
-
213
-
214
-
215
-
216
-
217
-
218
-
219
-
220
-
221
-
222
-
223
-
224
-
225
-
226
-
227
-
228
-
229
-
230
-
231
-
232
-
233
-
234
-
235
-
236
-
237
-
238
-
239
-
240
-
241
-
242
-
243
-
244
-
245
-
246
-
247
-
248
-
249
-
250
-
251
-
252
-
253
-
254
-
255
-
256
-
257
-
258
-
259
-
260
-
261
-
262
-
263
-
264
-
265
-
266
-
267
-
268
-
269
-
270
-
271
-
272
-
273
-
274
-
275
-
276
-
277
-
278
-
279
-
280
-
281
-
282
-
283
-
284
-
285
-
286
-
287
-
288
-
289
-
290
-
291
-
292
-
293
-
294
-
295
-
296
-
297
-
298
-
299
-
300
-
301
-
302
-
303
-
304
-
305
-
306
-
307
-
308
-
309
-
310
-
311
-
312
-
313
-
 314
314 -
 315
315 -
 316
316 -
 317
317 -
 318
318 -
 319
319 -
 320
320 -
 321
321 -
 322
322 -
 323
323 -
 324
324 -
325
-
326
-
327
-
328
-
329
-
330
-
331
-
332
-
333
-
334
-
335
-
336
-
337
-
338
-
339
-
340
-
341
-
342
-
343
-
344
-
345
-
346
-
347
-
348
-
349
-
350
-
351
-
352
-
353
-
354
-
355
-
356
-
357
-
358
-
359
-
360
-
361
-
362
-
363
-
364
-
365
-
366
-
367
-
368
-
369
-
370
-
371
-
372
-
373
-
374
-
375
-
376
-
377
-
378
 |
 |
