HP Photosmart Premium Fax All-in-One Printer - C309 Basics Guide - Page 12
Change the HP Photosmart from a USB connection to a network connection
 |
View all HP Photosmart Premium Fax All-in-One Printer - C309 manuals
Add to My Manuals
Save this manual to your list of manuals |
Page 12 highlights
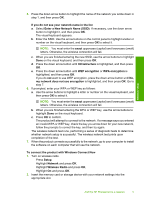
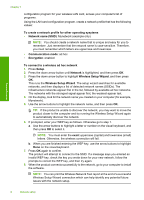
Network setup Chapter 1 Change the HP Photosmart from a USB connection to a network connection If you first install the HP Photosmart with a USB connection, you can later change to either a wireless or Ethernet network connection. If you already understand how to connect to a network, you can use the general directions below. NOTE: For optimal performance and security in your wireless network, use an access point (such as a wireless router) to connect the HP Photosmart. To change a USB connection to a wired (Ethernet) connection 1. Unplug the USB connection from the back of the product. 2. Connect an Ethernet cable from the Ethernet port on the back of the product to an available Ethernet port on the router or switch. 3. Install the software for a network connection, choose Add a device, and then choose Through the network. 4. When the installation is complete, open Printers and Faxes (or Printers) in the Control Panel and delete the printers from the previous USB installation. To change a USB connection to an integrated wireless WLAN 802.11 connection 1. Unplug the USB connection from the back of the product. 2. Press Setup. 3. Press the down arrow button until Network is highlighted, and then press OK. 4. Press the down arrow button to highlight Wireless Setup Wizard, and then press OK. This runs the Wireless Setup Wizard. 5. Install the software for a network connection, choose Add a Device, and then choose Through the network. 6. When the installation is complete, open Printers and Faxes (or Printers) in the Control Panel and delete the printers for the USB installation. Configure your firewall to work with HP products A personal firewall, which is security software running on your computer, can block network communication between your HP product and your computer. If you are having problems such as: • Printer not found when installing HP software • Unable to print, print job stuck in queue or printer goes offline • Scan communication errors or scanner busy messages • Unable to see printer status on your computer The firewall might be preventing your HP product from notifying computers on your network where it can be found. If the HP software cannot find the HP product during installation (and you know the HP product is on the network), or you have already successfully installed HP software and experience problems, try the following: 10 Network setup
-
 1
1 -
2
-
3
-
4
-
5
-
6
-
 7
7 -
 8
8 -
 9
9 -
 10
10 -
 11
11 -
 12
12 -
 13
13 -
 14
14 -
 15
15 -
 16
16 -
 17
17 -
18
-
19
-
20
-
21
-
22
-
23
-
24
-
25
-
26
-
27
-
28
-
29
-
30
-
31
-
32
-
33
-
34
-
35
-
36
-
37
-
38
-
39
-
40
-
41
-
42
-
43
-
44
-
45
-
46
-
47
-
48
-
49
-
50
-
51
-
52
-
53
-
54
-
55
-
56
-
57
-
58
-
59
-
60
-
61
-
62
-
63
-
64
-
65
-
66
-
67
-
68
-
69
-
70
-
71
-
72
-
73
-
74
-
75
-
76
-
77
-
78
-
79
-
80
-
81
-
82
-
83
-
84
-
85
 |
 |
