IBM 8479 User Reference - Page 47
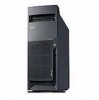
Removing the side cover, power cords.
 |
UPC - 087944653912
View all IBM 8479 manuals
Add to My Manuals
Save this manual to your list of manuals |
Page 47 highlights
5. Rotate the foot outward until the foot locks into place. 6. Complete steps 2 through 5 for each foot. Note: When you need to access the inside of the server to install options, you might find it easier to lay the server on its side. If you do so, make sure the feet are in the horizontal position (see the previous steps). Otherwise, the feet might break off the server because of the weight of the server. Removing the side cover The following information describes how to remove the side cover. Note: The illustrations in this document might differ slightly from your hardware. Cover-release latch Key lock Complete the following steps to remove the side cover of the server. 1. Review the information in "Before you begin" on page 26 and the safety precautions listed in Statement 1 and Statement 5 in "Safety information" on page 28. 2. Turn off the server and peripheral devices and disconnect all external cables and power cords. 3. If necessary, unlock the server cover. 4. Pull out on the cover-release latch, which will slide the cover toward the rear of the server about 12.7 mm (0.5 in.). Then, remove the cover from the server and set it aside. To replace the side cover, see "Installing the cover" on page 50. Chapter 5. Installing options 33
-
 1
1 -
2
-
3
-
4
-
5
-
6
-
7
-
8
-
9
-
10
-
11
-
12
-
13
-
14
-
15
-
16
-
17
-
18
-
19
-
20
-
21
-
22
-
23
-
24
-
25
-
26
-
27
-
28
-
29
-
30
-
31
-
32
-
33
-
34
-
35
-
36
-
37
-
38
-
39
-
40
-
41
-
 42
42 -
 43
43 -
 44
44 -
 45
45 -
 46
46 -
 47
47 -
 48
48 -
 49
49 -
 50
50 -
 51
51 -
 52
52 -
53
-
54
-
55
-
56
-
57
-
58
-
59
-
60
-
61
-
62
-
63
-
64
-
65
-
66
-
67
-
68
-
69
-
70
-
71
-
72
-
73
-
74
-
75
-
76
-
77
-
78
-
79
-
80
-
81
-
82
-
83
-
84
-
85
-
86
-
87
-
88
-
89
-
90
-
91
-
92
-
93
-
94
-
95
-
96
-
97
-
98
-
99
-
100
-
101
-
102
-
103
-
104
-
105
-
106
-
107
-
108
-
109
-
110
-
111
-
112
-
113
-
114
-
115
-
116
-
117
-
118
-
119
-
120
-
121
-
122
-
123
-
124
-
125
-
126
-
127
-
128
 |
 |
