Konica Minolta bizhub 25 bizhub 25 User Guide - Page 77
Click [OK]., Start printing in the application software.
 |
View all Konica Minolta bizhub 25 manuals
Add to My Manuals
Save this manual to your list of manuals |
Page 77 highlights
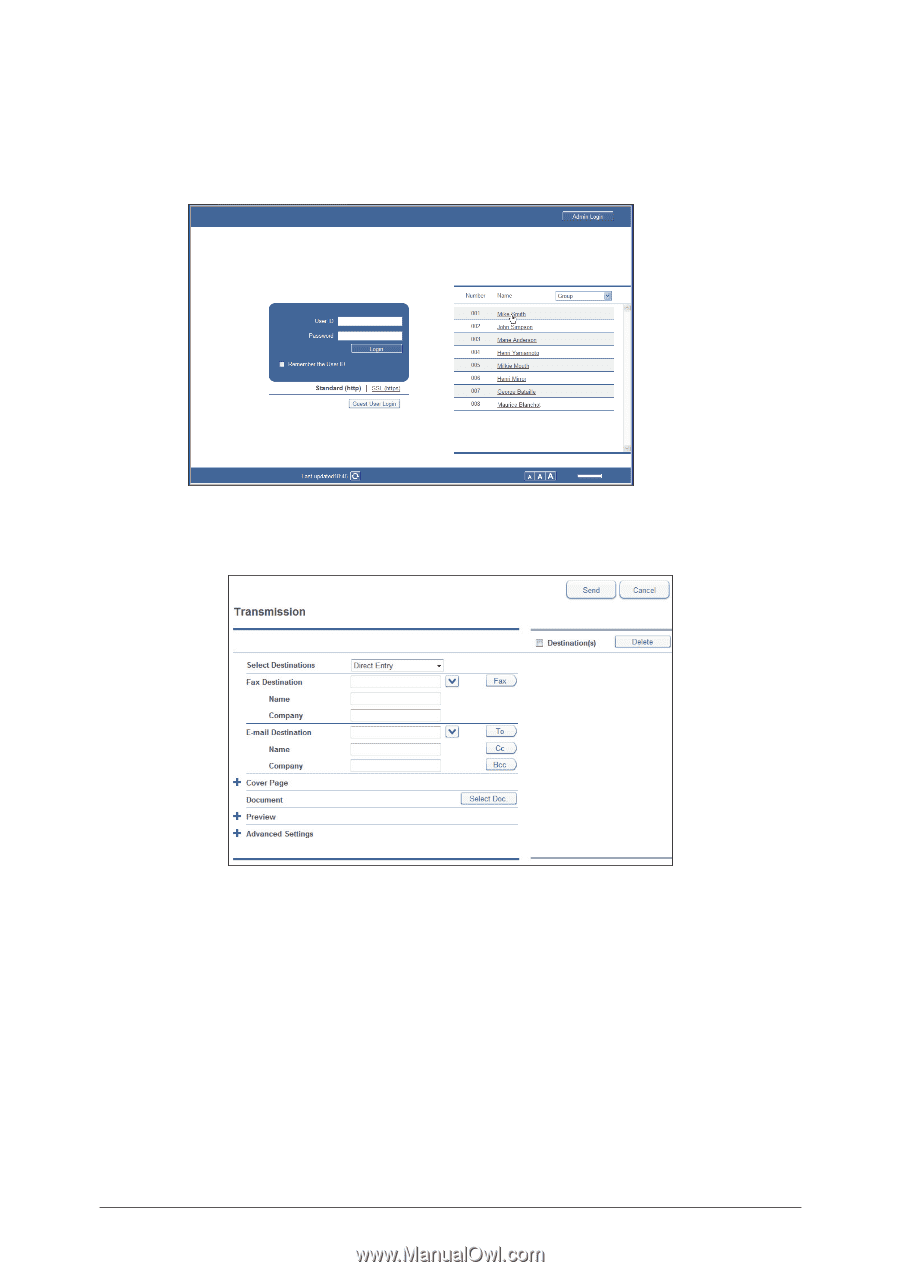
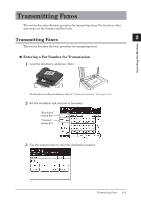
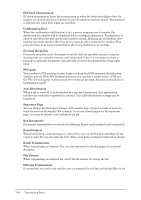
99 Click [OK]. 111Start printing in the application software. When no user is selected in step 7, the login screen is displayed. Log in to Message Board. When you have selected a user in step 7, proceed to step 11. 111Enter the fax number in the "Fax Destination" entry box, and click [FAX]. ••Pauses and other dialing options can be also entered using the keyboard. For details on dialing options, refer to Chapter 3, "Basic Transmission Settings" in the Scanner and Fax Guide. ••When you select "Share Address Book" from the "Select Destinations" list, you can select destinations from the registered Address Book. Click [Back] to return to this screen. 111Enter the e-mail address in the "E-mail Destination" entry box, and click [TO]. ••Press [CC] or [BCC] to set the destination as a CC or BCC destination. ••When you select "Share Address Book" from the "Select Destinations" list, you can select destinations from the registered Address Book. Click [Back] to return to this screen. 111Repeat steps 11 and 12 to specify all the destinations. 2-24 Transmitting Faxes
-
 1
1 -
2
-
3
-
4
-
5
-
6
-
7
-
8
-
9
-
10
-
11
-
12
-
13
-
14
-
15
-
16
-
17
-
18
-
19
-
20
-
21
-
22
-
23
-
24
-
25
-
26
-
27
-
28
-
29
-
30
-
31
-
32
-
33
-
34
-
35
-
36
-
37
-
38
-
39
-
40
-
41
-
42
-
43
-
44
-
45
-
46
-
47
-
48
-
49
-
50
-
51
-
52
-
53
-
54
-
55
-
56
-
57
-
58
-
59
-
60
-
61
-
62
-
63
-
64
-
65
-
66
-
67
-
68
-
69
-
70
-
71
-
 72
72 -
 73
73 -
 74
74 -
 75
75 -
 76
76 -
 77
77 -
 78
78 -
 79
79 -
 80
80 -
 81
81 -
 82
82 -
83
-
84
-
85
-
86
-
87
-
88
-
89
-
90
-
91
-
92
-
93
-
94
-
95
-
96
-
97
-
98
-
99
-
100
-
101
-
102
-
103
-
104
-
105
-
106
-
107
-
108
-
109
-
110
-
111
-
112
-
113
-
114
-
115
-
116
-
117
-
118
-
119
-
120
-
121
-
122
 |
 |