Kyocera ECOSYS FS-1135MFP FS-1135MFP Fax Operation Guide - Page 125
Cassette 1 Size, Legal, Statement, Rough, Recycled, Letter, Plain
 |
View all Kyocera ECOSYS FS-1135MFP manuals
Add to My Manuals
Save this manual to your list of manuals |
Page 125 highlights
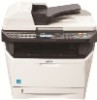
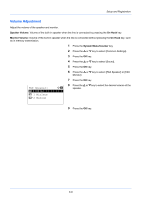
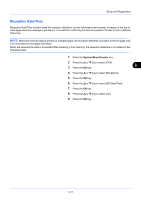
Setup and Registration Cassette 1 Size: a b *1**L*e*t*t*e*r*a************ 2 Legala 3 Statementa 8 Press the or key to select [Cassette 1 Size], [Cassette 2 Size] or [Cassette 3 Size]. 9 Press the OK key. 10 Press the or key to select the desired paper size. 11 Press the OK key. The previous screen reappears. 12 Press the or key to select [Cassette 1 Type], [Cassette 2 Type] or [Cassette 3 Type]. 6 13 Press the OK key. Cassette 1 Type: a b *1 **P*l*a*i*n 2 Rough 3 Recycled 14 Press the or key to select the desired paper type. 15 Press the OK key. The previous screen reappears. 16 Press the Back key to return to the default System Menu screen. 17 Now, make the FAX-receiving settings. Refer to Media Type for Print Output on page 6-12 for the setting procedure. Select the same paper type as that selected in step 14. 6-13
-
 1
1 -
2
-
3
-
4
-
5
-
6
-
7
-
8
-
9
-
10
-
11
-
12
-
13
-
14
-
15
-
16
-
17
-
18
-
19
-
20
-
21
-
22
-
23
-
24
-
25
-
26
-
27
-
28
-
29
-
30
-
31
-
32
-
33
-
34
-
35
-
36
-
37
-
38
-
39
-
40
-
41
-
42
-
43
-
44
-
45
-
46
-
47
-
48
-
49
-
50
-
51
-
52
-
53
-
54
-
55
-
56
-
57
-
58
-
59
-
60
-
61
-
62
-
63
-
64
-
65
-
66
-
67
-
68
-
69
-
70
-
71
-
72
-
73
-
74
-
75
-
76
-
77
-
78
-
79
-
80
-
81
-
82
-
83
-
84
-
85
-
86
-
87
-
88
-
89
-
90
-
91
-
92
-
93
-
94
-
95
-
96
-
97
-
98
-
99
-
100
-
101
-
102
-
103
-
104
-
105
-
106
-
107
-
108
-
109
-
110
-
111
-
112
-
113
-
114
-
115
-
116
-
117
-
118
-
119
-
 120
120 -
 121
121 -
 122
122 -
 123
123 -
 124
124 -
 125
125 -
 126
126 -
 127
127 -
 128
128 -
 129
129 -
 130
130 -
131
-
132
-
133
-
134
-
135
-
136
-
137
-
138
-
139
-
140
-
141
-
142
-
143
-
144
-
145
-
146
-
147
-
148
-
149
-
150
-
151
-
152
-
153
-
154
-
155
-
156
-
157
-
158
-
159
-
160
-
161
-
162
-
163
-
164
-
165
-
166
-
167
-
168
-
169
-
170
-
171
-
172
-
173
-
174
-
175
-
176
-
177
-
178
-
179
-
180
 |
 |