Kyocera ECOSYS FS-1135MFP FS-1135MFP Fax Operation Guide - Page 71
Forwarding Time Setting, File Format Setting for Each Requirement
 |
View all Kyocera ECOSYS FS-1135MFP manuals
Add to My Manuals
Save this manual to your list of manuals |
Page 71 highlights
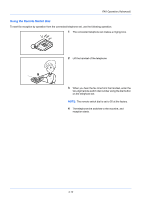
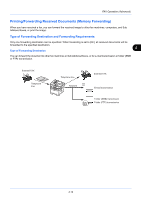
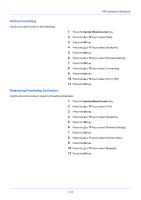
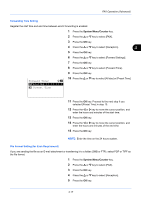
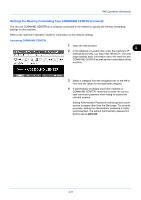
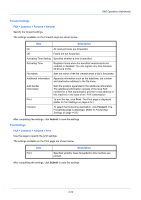
FAX Operation (Advanced) Forwarding Time Setting Register the start time and end time between which forwarding is enabled. 1 Press the System Menu/Counter key. 2 Press the or key to select [FAX]. 3 Press the OK key. 4 Press the or key to select [Reception]. 4 5 Press the OK key. 6 Press the or key to select [Forward Settings]. 7 Press the OK key. 8 Press the or key to select [Forward Time]. Forward Time: a b *1**A*l*l**d*a*y************ 2 Preset Time 9 Press the OK key. 10 Press the or key to select [All day] or [Preset Time]. 11 Press the OK key. Proceed to the next step if you selected [Preset Time] in step 10. 12 Press the or key to move the cursor position, and enter the hours and minutes of the start time. 13 Press the OK key. 14 Press the or key to move the cursor position, and enter the hours and minutes of the end time. 15 Press the OK key. NOTE: Enter the time on the 24 hours system. File Format Setting (for Each Requirement) If you are sending the file as an E-mail attachment or transferring it to a folder (SMB or FTP), select PDF or TIFF as the file format. 1 Press the System Menu/Counter key. 2 Press the or key to select [FAX]. 3 Press the OK key. 4 Press the or key to select [Reception]. 5 Press the OK key. 4-17
-
 1
1 -
2
-
3
-
4
-
5
-
6
-
7
-
8
-
9
-
10
-
11
-
12
-
13
-
14
-
15
-
16
-
17
-
18
-
19
-
20
-
21
-
22
-
23
-
24
-
25
-
26
-
27
-
28
-
29
-
30
-
31
-
32
-
33
-
34
-
35
-
36
-
37
-
38
-
39
-
40
-
41
-
42
-
43
-
44
-
45
-
46
-
47
-
48
-
49
-
50
-
51
-
52
-
53
-
54
-
55
-
56
-
57
-
58
-
59
-
60
-
61
-
62
-
63
-
64
-
65
-
 66
66 -
 67
67 -
 68
68 -
 69
69 -
 70
70 -
 71
71 -
 72
72 -
 73
73 -
 74
74 -
 75
75 -
 76
76 -
77
-
78
-
79
-
80
-
81
-
82
-
83
-
84
-
85
-
86
-
87
-
88
-
89
-
90
-
91
-
92
-
93
-
94
-
95
-
96
-
97
-
98
-
99
-
100
-
101
-
102
-
103
-
104
-
105
-
106
-
107
-
108
-
109
-
110
-
111
-
112
-
113
-
114
-
115
-
116
-
117
-
118
-
119
-
120
-
121
-
122
-
123
-
124
-
125
-
126
-
127
-
128
-
129
-
130
-
131
-
132
-
133
-
134
-
135
-
136
-
137
-
138
-
139
-
140
-
141
-
142
-
143
-
144
-
145
-
146
-
147
-
148
-
149
-
150
-
151
-
152
-
153
-
154
-
155
-
156
-
157
-
158
-
159
-
160
-
161
-
162
-
163
-
164
-
165
-
166
-
167
-
168
-
169
-
170
-
171
-
172
-
173
-
174
-
175
-
176
-
177
-
178
-
179
-
180
 |
 |