Kyocera TASKalfa 180 180/220 Operation Guide Rev-2 - Page 93
Auto Cassette Switching, Auto Sizing, Entering Custom Sizes, System Menu, AutoCassetSel, PriorAutoZoom
 |
View all Kyocera TASKalfa 180 manuals
Add to My Manuals
Save this manual to your list of manuals |
Page 93 highlights
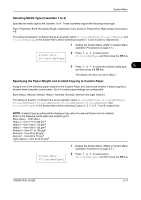
System Menu Auto Cassette Switching When the optional Paper Feeder has been installed, select whether or not to use the Auto Cassette Switching function. 1 Display the System Menu. (Refer to System Menu Operation Procedures on page 5-7.) System Menu: 17.AutoCassetSel 2 Press or to select select 17.AutoCassetSel, and then press the OK key. 3 Press or to select Disting. paper when the Auto Cassette Switching function is to be used and Not disting. when it will not be used, and then press the OK key. The display will return to that of Step 2. 5 Auto Sizing Sets whether or not to use automatic sizing (zoom/reduction percentage) when a paper cassette has been selected. 1 Display the System Menu. (Refer to System Menu Operation Procedures on page 5-7.) System Menu: 18.PriorAutoZoom 2 Press or to select select 18.PriorAutoZoom, and then press the OK key. 3 Press or to select On when the Automatic Sizing function is to be used and Off when copies are to be made using a 1:1 ratio, and then press the OK key. The display will return to that of Step 2. Entering Custom Sizes Sizes that are not displayed on the Operation Panel are registered as Custom Sizes. The setting of Custom Size 1 is shown here as an example. To set Custom Size 2 select 25.Custom Size 2 in the System Menu and then perform the same settings. 1 Display the System Menu. (Refer to System Menu Operation Procedures on page 5-7.) System Menu: 24.Custom Size1 2 Press or to select select 24.Custom Size1, and then press the OK key. OPERATION GUIDE 5-15
-
 1
1 -
2
-
3
-
4
-
5
-
6
-
7
-
8
-
9
-
10
-
11
-
12
-
13
-
14
-
15
-
16
-
17
-
18
-
19
-
20
-
21
-
22
-
23
-
24
-
25
-
26
-
27
-
28
-
29
-
30
-
31
-
32
-
33
-
34
-
35
-
36
-
37
-
38
-
39
-
40
-
41
-
42
-
43
-
44
-
45
-
46
-
47
-
48
-
49
-
50
-
51
-
52
-
53
-
54
-
55
-
56
-
57
-
58
-
59
-
60
-
61
-
62
-
63
-
64
-
65
-
66
-
67
-
68
-
69
-
70
-
71
-
72
-
73
-
74
-
75
-
76
-
77
-
78
-
79
-
80
-
81
-
82
-
83
-
84
-
85
-
86
-
87
-
 88
88 -
 89
89 -
 90
90 -
 91
91 -
 92
92 -
 93
93 -
 94
94 -
 95
95 -
 96
96 -
 97
97 -
 98
98 -
99
-
100
-
101
-
102
-
103
-
104
-
105
-
106
-
107
-
108
-
109
-
110
-
111
-
112
-
113
-
114
-
115
-
116
-
117
-
118
-
119
-
120
-
121
-
122
-
123
-
124
-
125
-
126
-
127
-
128
-
129
-
130
-
131
-
132
-
133
-
134
-
135
-
136
-
137
-
138
-
139
-
140
-
141
-
142
-
143
-
144
-
145
-
146
-
147
-
148
-
149
-
150
-
151
-
152
-
153
-
154
-
155
-
156
-
157
-
158
-
159
-
160
-
161
-
162
-
163
-
164
 |
 |
