Lexmark Z65n Online User’s Guide for Mac OS X 10.0.3 to 10.1 - Page 25
Step 3, Print your document
 |
View all Lexmark Z65n manuals
Add to My Manuals
Save this manual to your list of manuals |
Page 25 highlights
Lexmark Z65 Lexmark Z65n Printer overview Basic printing Printing ideas Maintenance Troubleshooting Notices Index Basic printing 21 Step 3: Print your document After you load the paper and customize the printer settings (if necessary), you are ready to print: 1 From the software application File menu, choose Print. 2 Click Print. Note: The paper exit tray holds 150 sheets of paper. If you want to print more than 150 sheets, make sure you remove the first 150 sheets before you continue printing. Using this Guide... www.lexmark.com
-
 1
1 -
2
-
3
-
4
-
5
-
6
-
7
-
8
-
9
-
10
-
11
-
12
-
13
-
14
-
15
-
16
-
17
-
18
-
19
-
 20
20 -
 21
21 -
 22
22 -
 23
23 -
 24
24 -
 25
25 -
 26
26 -
 27
27 -
 28
28 -
 29
29 -
 30
30 -
31
-
32
-
33
-
34
-
35
-
36
-
37
-
38
-
39
-
40
-
41
-
42
-
43
-
44
-
45
-
46
-
47
-
48
-
49
-
50
-
51
-
52
-
53
-
54
-
55
-
56
-
57
-
58
-
59
-
60
-
61
-
62
-
63
-
64
-
65
-
66
-
67
-
68
-
69
-
70
-
71
-
72
-
73
-
74
-
75
-
76
-
77
-
78
-
79
-
80
-
81
-
82
-
83
-
84
-
85
-
86
-
87
-
88
-
89
-
90
-
91
-
92
-
93
-
94
-
95
-
96
-
97
-
98
-
99
-
100
-
101
-
102
-
103
-
104
-
105
-
106
-
107
-
108
-
109
-
110
-
111
 |
 |

21
Basic printing
Printer overview
Basic printing
Printing ideas
Maintenance
Troubleshooting
Notices
Index
Lexmark Z65
Lexmark Z65n
Using this
Guide...
www.lexmark.com
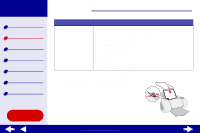
Step 3:
Print your document
After you load the paper and customize the printer settings (if necessary), you are ready to
print:
1
From the software application File menu, choose Print.
2
Click Print.
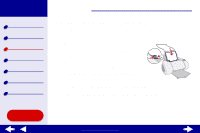
Note:
The paper exit tray holds 150 sheets of paper. If you want to print more
than 150 sheets, make sure you remove the first 150 sheets before you
continue printing.