Magnavox MDR537H Owners Manual - Page 117
Function Setup, Editing, Playback, Recording, Basic Setup, Connections, Introduction, Español, Others
 |
View all Magnavox MDR537H manuals
Add to My Manuals
Save this manual to your list of manuals |
Page 117 highlights
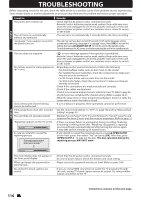
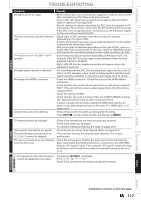
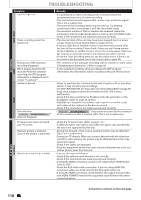
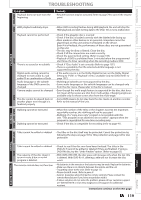
Introduction Connections Basic Setup GENERAL Recording TROUBLESHOOTING Symptom DV signal cannot be input. The DVC cannot be operated with this unit. Certain functions of the DVC cannot operate. DV audio signal cannot be switched. No image from HDMI connection. Setup menu cannot be called up. Remedy • Before connection, turn on the power supplies for both this unit and the DVC, and make sure that these units have stopped. • Only a "DVC-SD" signal can be input from the DVC to this unit. Other types of signals are not supported. • Do not connect any device other than the DVC. Even if a recorder or PC with another DV terminal is connected, the DV function will not operate. • If the DVC is not recognized after connection, turn off the power supply for the unit and re-connect the DVC. • Signal input or DVC operation from this unit may be disabled depending on the type of DVC. • If a DVC signal cannot be input, use an external input (L1/L2) for analog connection via audio/video cables. • DVC control may be disabled depending on the type of DVC, even in a mode other than camera mode. In this case, switch to HDD/DVD control and execute the normal recording procedure while operating the DVC. • Some functions may not operate depending on the type of DVC. For example, if the DVC does not support slow playback mode, the slow playback function is disabled. • With L3(DV-IN), the disc display menu does not appear unless disc playback is executed. • For recording with the DVC, the recording audio signal can be set to 12 bits or 16 bits. However, when 16-bit recording mode is selected, audio signal cannot be switched. To record an audio signal, set it to 12 bits. • Check the HDMI connection. (Check the status of the HDMI related indications.) • Check whether the connected monitor device or other device supports HDCP. (This unit will not output a video signal unless the other device supports HDCP.) • Check the setting of HDMI. • Check whether the output format of this unit (HDMI FORMAT) matches the supported input format of other connected device. • If above remedies do not work, unplug the HDMI cable and the AC power cords, then plug them back in the order of 1: HDMI cable, 2: AC power cord. • Setup menus cannot be called up during DVD recording. • Press [STOP C] on the remote control, and then press [MENU]. TV channels cannot be changed. • Check if the connections are made securely and correctly. • Check if the cables are damaged. • Try channel setting by following the steps on pages 29-31. Only specific channels do not appear. • The channels may be set to be skipped. (Refer to pages 30-31.) The external input channels (such as • This unit does not skip the external input channels. This is not a L1, L2 or L3) cannot be skipped. malfunction. The unit is not picking up my channels • Check the Connections. Confirm the main source from the Antenna/ from the Auto Scan. Basic Cable/Cable Box/Satellite Receiver is connected to the ANTENNA IN by an "RF Coaxial" Cable. If not using the "RF Coaxial" cable and using an S-Video or RCA Audio/Video cable, the unit will need to be set on L1 or L2. The image from the external device • Try pressing [SOURCE] repeatedly. cannot be displayed or recorded. • Turn on all connected devices. • Check if the connections are made securely and correctly. Playback Editing CHANNEL Function Setup RECORDING GENERAL Others Español Instructions continue on the next page. EN 117
-
 1
1 -
2
-
3
-
4
-
5
-
6
-
7
-
8
-
9
-
10
-
11
-
12
-
13
-
14
-
15
-
16
-
17
-
18
-
19
-
20
-
21
-
22
-
23
-
24
-
25
-
26
-
27
-
28
-
29
-
30
-
31
-
32
-
33
-
34
-
35
-
36
-
37
-
38
-
39
-
40
-
41
-
42
-
43
-
44
-
45
-
46
-
47
-
48
-
49
-
50
-
51
-
52
-
53
-
54
-
55
-
56
-
57
-
58
-
59
-
60
-
61
-
62
-
63
-
64
-
65
-
66
-
67
-
68
-
69
-
70
-
71
-
72
-
73
-
74
-
75
-
76
-
77
-
78
-
79
-
80
-
81
-
82
-
83
-
84
-
85
-
86
-
87
-
88
-
89
-
90
-
91
-
92
-
93
-
94
-
95
-
96
-
97
-
98
-
99
-
100
-
101
-
102
-
103
-
104
-
105
-
106
-
107
-
108
-
109
-
110
-
111
-
 112
112 -
 113
113 -
 114
114 -
 115
115 -
 116
116 -
 117
117 -
 118
118 -
 119
119 -
 120
120 -
 121
121 -
 122
122 -
123
-
124
-
125
-
126
-
127
-
128
-
129
-
130
-
131
-
132
 |
 |