Magnavox MDR537H Owners Manual - Page 29
CHANNEL SETTING, Auto Channel Scan
 |
View all Magnavox MDR537H manuals
Add to My Manuals
Save this manual to your list of manuals |
Page 29 highlights
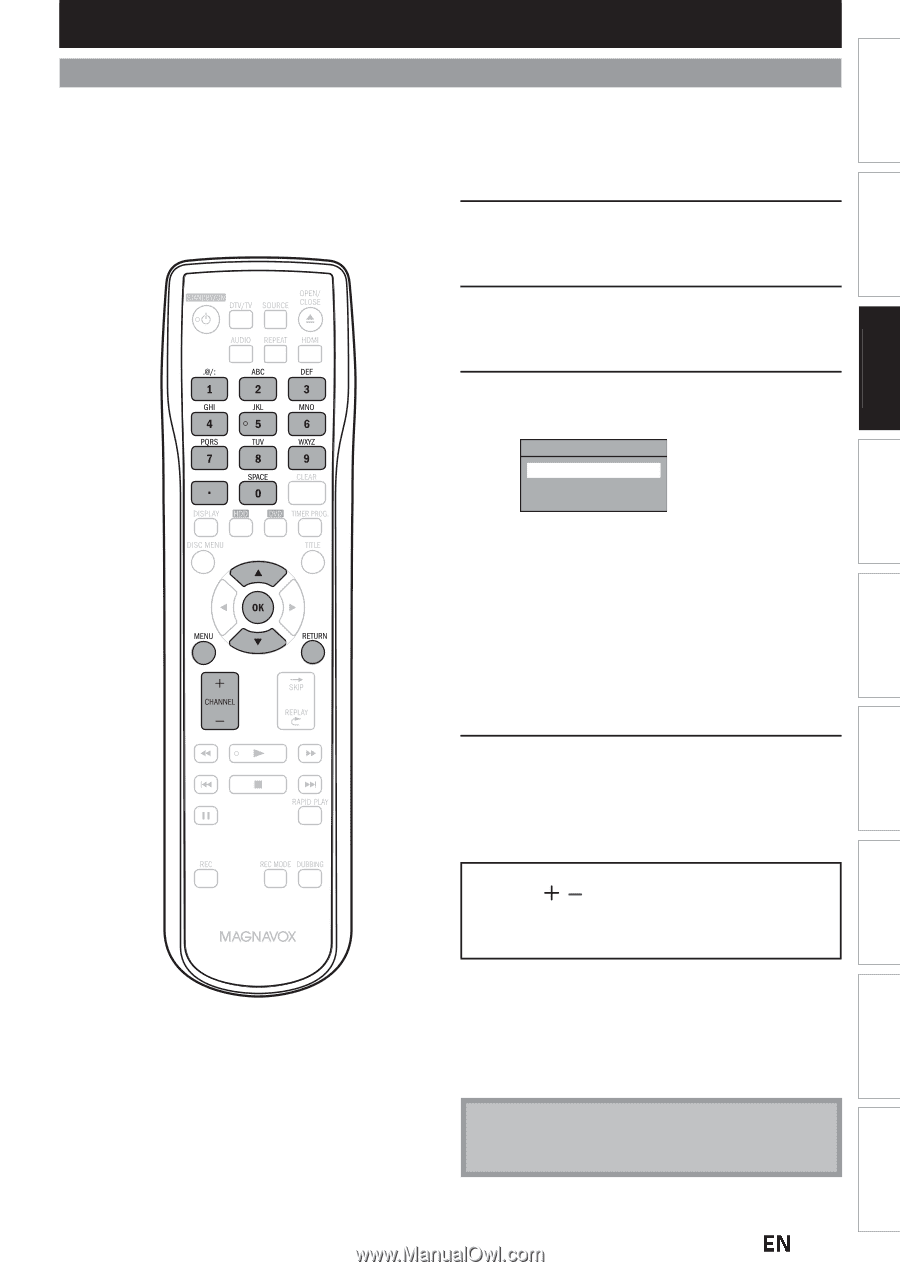
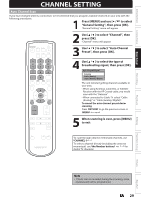
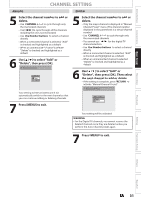
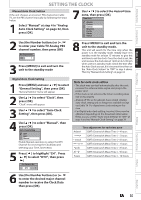
Introduction Connections Basic Setup Recording Playback CHANNEL SETTING Auto Channel Scan If you have changed antenna connection, we recommend that you program available channels in your area with the following procedures. 1 Press [MENU] and use [K / L] to select "General Setting", then press [OK]. "General Setting" menu will appear. 2 Use [K / L] to select "Channel", then press [OK]. "Channel" menu will appear. 3 Use [K / L] to select "Auto Channel Preset", then press [OK]. 4 Use [K / L] to select the type of broadcasting signal, then press [OK]. Auto Channel Preset Antenna Cable (Analog) Cable (Analog / Digital) The unit will start getting channels available in your area. • When using Antenna, Cable Box, or Satellite Receiver with the RF Coaxial cable, you would scan with the "Antenna". • When connected to Cable TV, select "Cable (Analog)" or "Cable (Analog / Digital)". To cancel the auto channel preset during scanning: Press [RETURN] to go the previous screen or [MENU] to cancel. 5 When scanning is over, press [MENU] to exit. To cycle through only the memorized channels, use [CHANNEL / ]. To select a channel directly (including the ones not memorized), use [the Number buttons] and [ • ] (for digital TV channels). Note • If Auto Scan is cancelled during the scanning, some channels will not be programmed. EN 29 Editing Function Setup Others Español
-
 1
1 -
2
-
3
-
4
-
5
-
6
-
7
-
8
-
9
-
10
-
11
-
12
-
13
-
14
-
15
-
16
-
17
-
18
-
19
-
20
-
21
-
22
-
23
-
 24
24 -
 25
25 -
 26
26 -
 27
27 -
 28
28 -
 29
29 -
 30
30 -
 31
31 -
 32
32 -
 33
33 -
 34
34 -
35
-
36
-
37
-
38
-
39
-
40
-
41
-
42
-
43
-
44
-
45
-
46
-
47
-
48
-
49
-
50
-
51
-
52
-
53
-
54
-
55
-
56
-
57
-
58
-
59
-
60
-
61
-
62
-
63
-
64
-
65
-
66
-
67
-
68
-
69
-
70
-
71
-
72
-
73
-
74
-
75
-
76
-
77
-
78
-
79
-
80
-
81
-
82
-
83
-
84
-
85
-
86
-
87
-
88
-
89
-
90
-
91
-
92
-
93
-
94
-
95
-
96
-
97
-
98
-
99
-
100
-
101
-
102
-
103
-
104
-
105
-
106
-
107
-
108
-
109
-
110
-
111
-
112
-
113
-
114
-
115
-
116
-
117
-
118
-
119
-
120
-
121
-
122
-
123
-
124
-
125
-
126
-
127
-
128
-
129
-
130
-
131
-
132
 |
 |