Magnavox MDR537H Owners Manual - Page 43
BEFORE RECORDING, Make Recording Compatible, Setting for Auto Recording the DTV Closed
 |
View all Magnavox MDR537H manuals
Add to My Manuals
Save this manual to your list of manuals |
Page 43 highlights
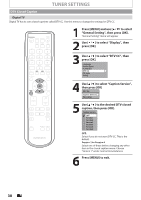
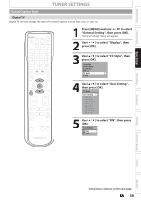
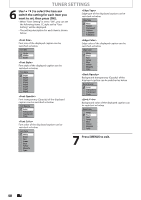
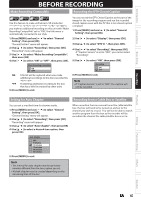
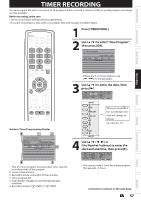
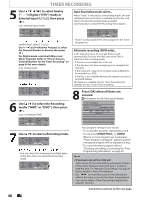
Introduction Connections Basic Setup Recording BEFORE RECORDING Make Recording Compatible Recording the DTV Closed Caption Use this feature to make unfinalized +VR mode discs recorded on another unit recordable on this unit. When you make an additional recording on this unit with "Make Recording Compatible" set to "ON", the title menu is automatically converted to our style. 1) Press [MENU] and use [K / L] to select "General Setting", then press [OK]. "General Setting" menu will appear. 2) Use [K / L] to select "Recording", then press [OK]. "Recording" menu will appear. 3) Use [K / L] to select "Make Recording Compatible", then press [OK]. 4) Use [K / L] to select "ON" or "OFF", then press [OK]. Make Recording Compatible ON OFF ON: Title list will be replaced when you make additional recordings to the discs recorded by other units. OFF: Prohibiting additional recording to the disc that has a title list created by other units. 5) Press [MENU] to exit. You can record the DTV Closed Caption as the part of the image for the recording program and see the recorded closed caption even with the TV that is not closed caption compliant. 1) Press [MENU] and use [K / L] to select "General Setting", then press [OK]. 2) Use [K / L] to select "Display", then press [OK]. 3) Use [K / L] to select "DTV CC", then press [OK]. 4) Use [K / L] to select "Recording", then press [OK]. • If "Caption Service" is set to "OFF", you cannot select "Recording". 5) Use [K / L] to select "ON", then press [OK]. Recording ON OFF 6) Press [MENU] to exit. Note • If "Caption Service" is set to "OFF", the caption will not be recorded. Setting for Auto Chapter Recording from a Cable Box or Satellite You can set a specified time for chapter marks. 1) Press [MENU] and use [K / L] to select "General Setting", then press [OK]. "General Setting" menu will appear. 2) Use [K / L] to select "Recording", then press [OK]. "Recording" menu will appear. 3) Use [K / L] to select "Auto Chapter", then press [OK]. 4) Use [K / L] to select a desired time option, then press [OK]. When recording from an external tuner like cable/satellite box, the box will need to be turned on and set to the channel you wish to record. You will not be able to watch another program from the box as the recorder will be recording the channel the cable/satellite box is set to. Auto Chapter OFF 5 minutes 10 minutes 15 minutes 30 minutes 60 minutes 5) Press [MENU] to exit. Note • The interval for auto chapter may be up to two minutes different from the time option you set. • A blank chapter may be created depending on the remaining time of the disc. Playback Editing Function Setup Others Español EN 43
-
 1
1 -
2
-
3
-
4
-
5
-
6
-
7
-
8
-
9
-
10
-
11
-
12
-
13
-
14
-
15
-
16
-
17
-
18
-
19
-
20
-
21
-
22
-
23
-
24
-
25
-
26
-
27
-
28
-
29
-
30
-
31
-
32
-
33
-
34
-
35
-
36
-
37
-
 38
38 -
 39
39 -
 40
40 -
 41
41 -
 42
42 -
 43
43 -
 44
44 -
 45
45 -
 46
46 -
 47
47 -
 48
48 -
49
-
50
-
51
-
52
-
53
-
54
-
55
-
56
-
57
-
58
-
59
-
60
-
61
-
62
-
63
-
64
-
65
-
66
-
67
-
68
-
69
-
70
-
71
-
72
-
73
-
74
-
75
-
76
-
77
-
78
-
79
-
80
-
81
-
82
-
83
-
84
-
85
-
86
-
87
-
88
-
89
-
90
-
91
-
92
-
93
-
94
-
95
-
96
-
97
-
98
-
99
-
100
-
101
-
102
-
103
-
104
-
105
-
106
-
107
-
108
-
109
-
110
-
111
-
112
-
113
-
114
-
115
-
116
-
117
-
118
-
119
-
120
-
121
-
122
-
123
-
124
-
125
-
126
-
127
-
128
-
129
-
130
-
131
-
132
 |
 |