Magnavox MDR537H Owners Manual - Page 93
Deleting a Scene of a Title
 |
View all Magnavox MDR537H manuals
Add to My Manuals
Save this manual to your list of manuals |
Page 93 highlights
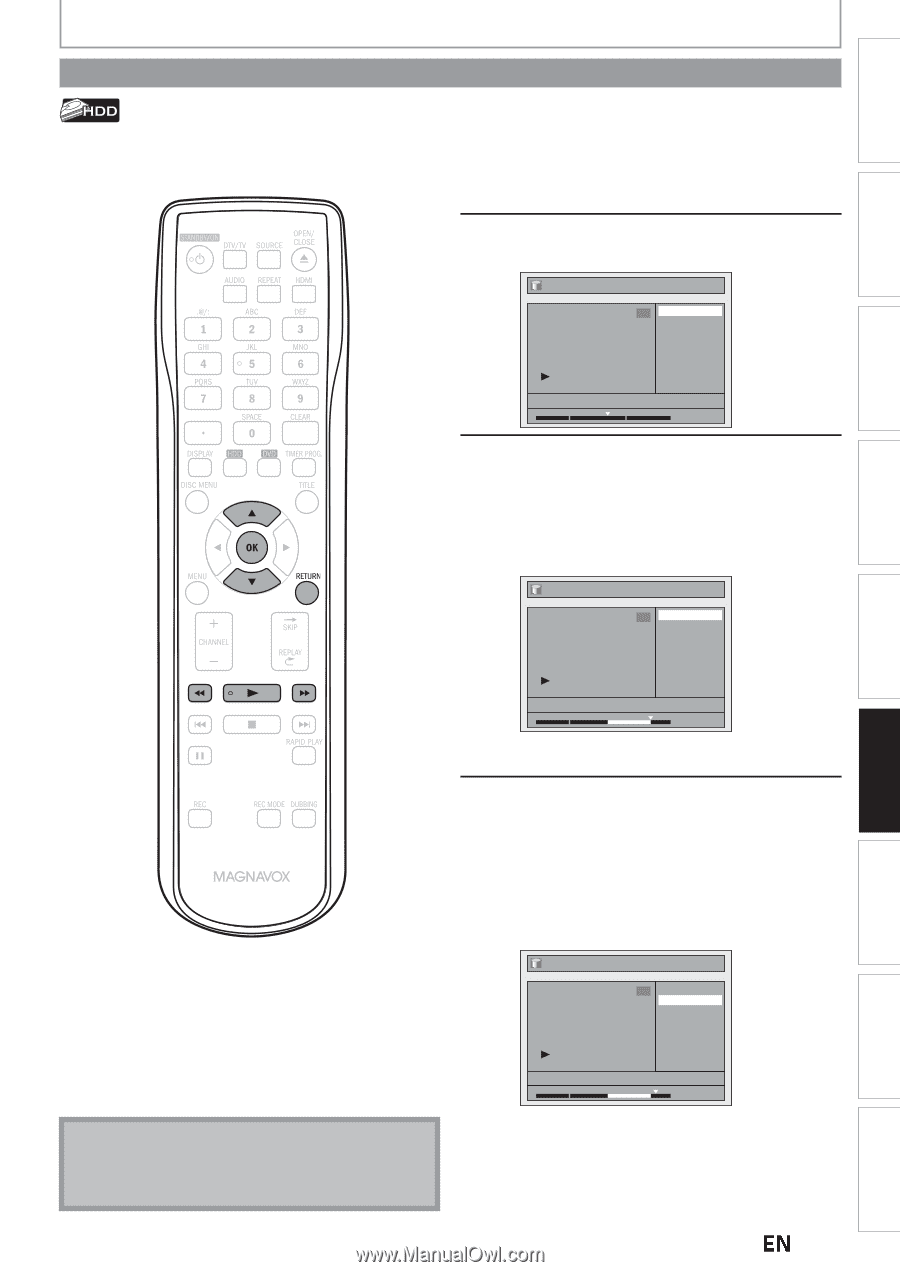
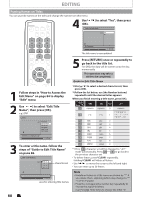
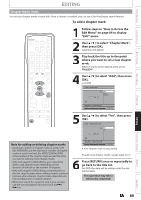
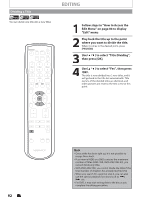
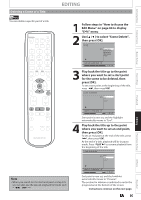
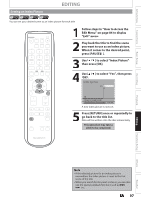
Deleting a Scene of a Title EDITING Introduction Connections Basic Setup You can delete a specific part of a title. 1 Follow steps in "How to Access the Edit Menu" on page 84 to display "Edit" menu. 2 Use [K / L] to select "Scene Delete", then press [OK]. Edit 1 Scene Delete Edit Title Name Chapter Mark Title Dividing Protect JAN/ 9/12 12:00AM CH10 LP 1 : 05 : 00 3 Play back the title up to the point where you want to set a start point for the scene to be deleted, then press [OK]. To set a start point at the beginning of the title, press [E], then press [OK]. Edit - Scene Delete 1 Start End Preview Delete Recording Playback Editing Function Setup JAN/ 9/12 12:00AM CH10 LP 1 : 20 : 00 Start point is now set, and the highlight automatically moves to "End". 4 Play back the title up to the point where you want to set an end point, then press [OK]. To set an end point at the end of the title, press [D], then press [OK]. At the end of a title, playback will be in pause mode. Press [PLAY B] to resume playback from the beginning of the title. Edit - Scene Delete 1 Start End Preview Delete Others Español Note • When you search for the start/end point at step 3/4, you can also use the special playback functions such as [G], [D] etc. JAN/ 9/12 12:00AM CH10 LP 1 : 30 : 00 End point is now set, and the highlight automatically moves to "Preview". The portion for deletion is indicated in red in the progress bar at the bottom of the screen. Instructions continue on the next page. EN 93
-
 1
1 -
2
-
3
-
4
-
5
-
6
-
7
-
8
-
9
-
10
-
11
-
12
-
13
-
14
-
15
-
16
-
17
-
18
-
19
-
20
-
21
-
22
-
23
-
24
-
25
-
26
-
27
-
28
-
29
-
30
-
31
-
32
-
33
-
34
-
35
-
36
-
37
-
38
-
39
-
40
-
41
-
42
-
43
-
44
-
45
-
46
-
47
-
48
-
49
-
50
-
51
-
52
-
53
-
54
-
55
-
56
-
57
-
58
-
59
-
60
-
61
-
62
-
63
-
64
-
65
-
66
-
67
-
68
-
69
-
70
-
71
-
72
-
73
-
74
-
75
-
76
-
77
-
78
-
79
-
80
-
81
-
82
-
83
-
84
-
85
-
86
-
87
-
 88
88 -
 89
89 -
 90
90 -
 91
91 -
 92
92 -
 93
93 -
 94
94 -
 95
95 -
 96
96 -
 97
97 -
 98
98 -
99
-
100
-
101
-
102
-
103
-
104
-
105
-
106
-
107
-
108
-
109
-
110
-
111
-
112
-
113
-
114
-
115
-
116
-
117
-
118
-
119
-
120
-
121
-
122
-
123
-
124
-
125
-
126
-
127
-
128
-
129
-
130
-
131
-
132
 |
 |