Nextar ME ME Software Manual - Page 58
Creating a multi-point route appending a new, destination
 |
UPC - 714129881579
View all Nextar ME manuals
Add to My Manuals
Save this manual to your list of manuals |
Page 58 highlights
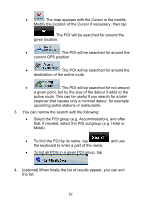
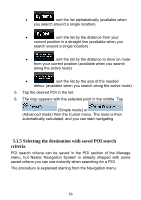
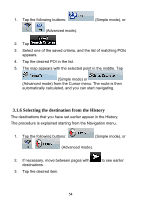
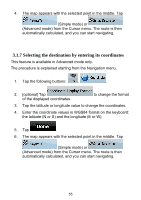
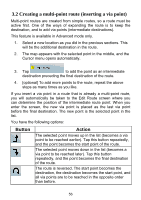
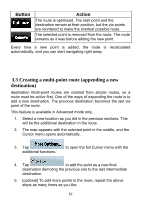
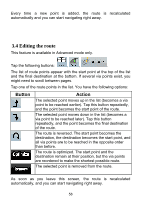
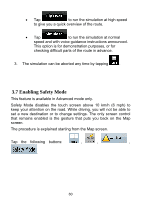
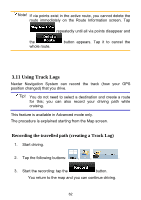
Button Action The route is optimized. The start point and the destination remain at their position, but the via points are reordered to make the shortest possible route. The selected point is removed from the route. The route remains as it was before adding the new point. Every time a new point is added, the route is recalculated automatically, and you can start navigating right away. 3.3 Creating a multi-point route (appending a new destination) destination Multi-point routes are created from simple routes, so a route must be active first. One of the ways of expanding the route is to add a new destination. The previous destination becomes the last via point of the route. This feature is available in Advanced mode only. 1. Select a new location as you did in the previous sections. This will be the additional destination in the route. 2. The map appears with the selected point in the middle, and the Cursor menu opens automatically. 3. Tap additional functions. to open the full Cursor menu with the 4. Tap to add the point as a new final destination demoting the previous one to the last intermediate destination. 5. [optional] To add more points to the route, repeat the above steps as many times as you like. 57
-
 1
1 -
2
-
3
-
4
-
5
-
6
-
7
-
8
-
9
-
10
-
11
-
12
-
13
-
14
-
15
-
16
-
17
-
18
-
19
-
20
-
21
-
22
-
23
-
24
-
25
-
26
-
27
-
28
-
29
-
30
-
31
-
32
-
33
-
34
-
35
-
36
-
37
-
38
-
39
-
40
-
41
-
42
-
43
-
44
-
45
-
46
-
47
-
48
-
49
-
50
-
51
-
52
-
 53
53 -
 54
54 -
 55
55 -
 56
56 -
 57
57 -
 58
58 -
 59
59 -
 60
60 -
 61
61 -
 62
62 -
 63
63 -
64
-
65
-
66
-
67
-
68
-
69
-
70
-
71
-
72
-
73
-
74
-
75
-
76
-
77
-
78
-
79
-
80
-
81
-
82
-
83
-
84
-
85
-
86
-
87
-
88
-
89
-
90
-
91
-
92
-
93
-
94
-
95
-
96
-
97
-
98
-
99
-
100
-
101
-
102
-
103
-
104
-
105
-
106
-
107
-
108
-
109
-
110
-
111
-
112
-
113
-
114
-
115
-
116
-
117
-
118
-
119
-
120
-
121
-
122
-
123
-
124
-
125
-
126
-
127
 |
 |