Olympus D-100 D-100 Instruction Manual
Olympus D-100 Manual
 |
View all Olympus D-100 manuals
Add to My Manuals
Save this manual to your list of manuals |
Olympus D-100 manual content summary:
- Olympus D-100 | D-100 Instruction Manual - Page 1
Manual Ⅵ Thank you for purchasing this Olympus digital camera. Ⅵ Before using your new digital camera, please carefully read this instruction manual and separately provided "Safety Precautions" and "Battery Handling Precautions". Ⅵ We recommend that you take test shots to make sure that the camera - Olympus D-100 | D-100 Instruction Manual - Page 2
data resulting from servicing by a third party who is not designated by Olympus or from other causes. ⅷ The quality of the images shot with this product differs from that of the images shot with ordinary film-based cameras. Copyright ©2001 OLYMPUS CO., LTD. Radio and Television Interference Change - Olympus D-100 | D-100 Instruction Manual - Page 3
Model Number: D-100/C-1 Trade Name: OLYMPUS Responsible Party: Olympus America Inc. Address cause undesired operation. This Class B digital apparatus meets all requirements of the this manual are trademarks or registered trademarks of their respective owners. Ⅵ The DCF (Design rule for Camera - Olympus D-100 | D-100 Instruction Manual - Page 4
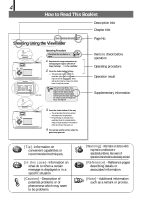
Release your finger from the shutter button, hold the camera securely again and half press the button again. If case]···Information on what do to when a certain message is displayed or in a specific situation. [Caution]···Description of potential problems or of phenomena which may seem to be problems - Olympus D-100 | D-100 Instruction Manual - Page 5
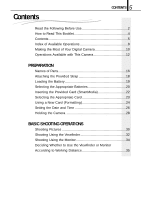
the Most of Your Digital Camera 10 Operations Available with This Camera 12 PREPARATION Names of Parts 16 Attaching the Provided Strap 18 Loading the Battery 19 Selecting the Appropriate Batteries 20 Inserting the Provided Card (SmartMedia 22 Selecting the Appropriate Card 23 Using a New - Olympus D-100 | D-100 Instruction Manual - Page 6
6 CONTENTS Checking the Camera Status Indication Next to the Viewfinder or on the Monitor (in Shooting SHOOTING FEATURES Selecting the Image Quality (Record Mode 54 Using the Flash 56 Zooming in on a Subject (Digital Zoom 59 Shooting a Close Subject (Macro Shooting 60 Using the Self-Timer 61 - Olympus D-100 | D-100 Instruction Manual - Page 7
PC 77 Downloading Image Data to Your PC 81 TROUBLESHOOTING Simplified Operation Chart 88 If an Alarm Message Is Displayed 89 If an Operation Does Not Work 90 If Image Quality Is Poor 93 Frequently Asked Questions 95 SPECIFICATIONS/GLOSSARY OF TERMS Specifications 98 Glossary of Terms 100 - Olympus D-100 | D-100 Instruction Manual - Page 8
8 INDEX OF AVAILABLE OPERATIONS This manual is organized by operating procedures, beginning with basic operations and moving forward to more advanced procedures. If there is any particular operation you want to - Olympus D-100 | D-100 Instruction Manual - Page 9
images P.76 Placing images in a document P.76 Processing images P.76 Printing images PP.72&74 ࡗAdditional Information Number of images you can shoot P.23 Usable batteries P.20 Color tone P.66 Brightness P.64 Unsatisfactory image quality P.93 Setting correct date and time P.26 - Olympus D-100 | D-100 Instruction Manual - Page 10
10 Making the Most of Your Digital Camera Video cable C-1/D-100 Card (SmartMedia) USB cable - Olympus D-100 | D-100 Instruction Manual - Page 11
11 A variety of optional accessories make possible many different ways to view and enjoy the images you shoot with your camera. In some cases, you will need a personal computer to take full advantage of these features. Television Digital color printer P-400/P-200/P-330N(E)/P-330(E) Viewing images - Olympus D-100 | D-100 Instruction Manual - Page 12
Digital zoom lets you magnify the image by up to 2X. ⅷ The provided 8 MB SmartMedia card allows you to save up to about 36 images*1. ⅷ The SmartMedia card a TV screen using the video cable. ⅷ Images can be printed on photographic paper using the optional Olympus P-400/P-200/ P-330N(E)/P-330(E) - Olympus D-100 | D-100 Instruction Manual - Page 13
13 PREPARATION 4 Taking advantage of PC features ⅷ Images can be downloaded and stored on a PC. ⅷ Images can be stored on labs may not be equipped to print out digital images. *3 You cannot use this camera to attach and send images via e-mail. To do this, you must first download the images from the - Olympus D-100 | D-100 Instruction Manual - Page 14
14 - Olympus D-100 | D-100 Instruction Manual - Page 15
need to know before using the camera. Be sure to make the appropriate preparations to assure safe, enjoyable shooting. ⅷ Names of Parts ⅷ Attaching the Provided Strap ⅷ Loading the Battery ⅷ Selecting the Appropriate Batteries ⅷ Inserting the Provided Card (SmartMedia) ⅷ Selecting the Appropriate - Olympus D-100 | D-100 Instruction Manual - Page 16
barrier Connector cover (Open this to turn the camera on in the shooting mode) Card cover Strap attaching hole USB connector (Connect to a PC with a USB cable) A/V OUT jack (Connect to a TV with a video cable) DC IN jack (Connect the AC adapter) Battery compartment cover Tripod socket (Attach - Olympus D-100 | D-100 Instruction Manual - Page 17
(LCD panel displaying the image to be shot, played-back image and other various information) Arrow pad (For use in menu selection, frame number advance, digital telephoto operation, etc.) - Olympus D-100 | D-100 Instruction Manual - Page 18
18 PREPARATION Attaching the Provided Strap Strap eyelet 1. Attach the strap as shown. Attach the strap correctly as instructed above. Olympus cannot warrant or assume any liability for damage resulting from the camera being accidentally dropped because the strap has not been attached correctly. - Olympus D-100 | D-100 Instruction Manual - Page 19
The lens barrier is closed and nothing is displayed on the monitor. 1. Slide the battery compartment cover in the direction of the arrow 1. 2. Lift the battery compartment cover in the direction of the arrow 2. 3. Insert the battery in the direction shown in the figure. CR-V3x1orLR6x2 4. Close the - Olympus D-100 | D-100 Instruction Manual - Page 20
direction shown in the illustration on the right. The lithium battery pack is not rechargeable. Ⅵ This camera can be powered by rechargeable batteries, which can be used repeatedly. ⅷ The NiMH batteries from Olympus (including battery charger) are rechargeable and economical. You can recharge them - Olympus D-100 | D-100 Instruction Manual - Page 21
without any insulating sheet at all. Do not use these batteries under any circumstances. The following R6/AA batteries cannot be used ⅷ Batteries whose exterior is only partially covered, or not covered at all, by an insulating sheet. ⅷ Batteries whose œ terminals are raised, but not covered by an - Olympus D-100 | D-100 Instruction Manual - Page 22
be inserted. 3. Close the cover securely until it clicks. [Now the camera is ready for shooting. Never attempt to open the card cover or remove the card or batteries while the camera power is on. Otherwise, the image data on the card may be destroyed. Remember that it is impossible to restore image - Olympus D-100 | D-100 Instruction Manual - Page 23
with this camera. Use the Olympus brand card or a commercially available 3 V (3.3 V) card. This camera may not be able to recognize a card that is not manufactured by Olympus or Lexar or a card which has been formatted on another device such as a PC. To avoid problems, you should - Olympus D-100 | D-100 Instruction Manual - Page 24
24 PREPARATION Using a New Card (Formatting) Before using a non-Olympus card or a card which has been formatted or used with devices other than this camera (such as a PC), be sure to format the card on this camera. OK/menu button Operating Procedure Check that the camera is set to the playback - Olympus D-100 | D-100 Instruction Manual - Page 25
. [The orange lamp on the left of the viewfinder blinks and the monitor shows a bar indicating the processing status. If you are using an optional Olympus card, you do not need to format it. If the indicator shown on the left appears on the monitor, the - Olympus D-100 | D-100 Instruction Manual - Page 26
26 PREPARATION Setting the Date and Time OK/menu button Arrow pad Operating Procedure Check that a card is inserted and the lens barrier is closed. 1/3 SELECT NO OFF NO NO SET OK Playback mode menu 1/3 screen 1. Press the OK/menu button. [The - Olympus D-100 | D-100 Instruction Manual - Page 27
screen returns to the playback mode menu 3/3. 1. 2 .14 SELECT SET OK When the batteries are removed or battery power is exhausted, a screen prompting you to set the date and time will appear on the monitor. In this case, set the date and time before shooting. ⅷ The Year-Month Day display format - Olympus D-100 | D-100 Instruction Manual - Page 28
Vertically The right way to hold your camera: Hold the camera with both hands and keep your elbows tight to your body. Hold the camera firmly with your right hand and press the shutter button gently. Pay attention to the following when holding your camera: Make sure you don't block the lens - Olympus D-100 | D-100 Instruction Manual - Page 29
to take advantage of the many exciting possibilities offered by your camera. ⅷ Shooting Pictures ⅷ Shooting Using the Viewfinder ⅷ Shooting Using Use the Viewfinder or Monitor According to Working Distance ⅷ Checking the Camera Status Indication Next to the Viewfinder or on the Monitor (in Shooting - Olympus D-100 | D-100 Instruction Manual - Page 30
the lens barrier and open it again. ⅷ Press any of the arrow pad keys, OK/menu button and monitor button. ⅷ Images stored on the card are saved even after the camera turns off or the batteries are replaced. ⅷ Try to minimize power consumption as much as possible if you don't expect to use the - Olympus D-100 | D-100 Instruction Manual - Page 31
after it has been shot while the lens barrier is open (Quick-View Playback): 1. Press the monitor button twice (double clicking). [This switches the camera to the Playback mode; the image is displayed on the monitor. ( Page 42) 2. Press the shutter button or monitor button. [This returns the - Olympus D-100 | D-100 Instruction Manual - Page 32
may be incorrect. Release your finger from the shutter button, hold the camera securely again and half press the button again. If the subject cannot be of the viewfinder blinks (to indicate that the image is being recorded on the card) for a few seconds and then goes out. [When you take a picture, - Olympus D-100 | D-100 Instruction Manual - Page 33
being processed. ⅷ The length of time required before the camera is ready for the next shot and the number of images that can be shot vary depending on the record mode. Never attempt to open the card cover or take out the card or batteries while the orange lamp is blinking. Otherwise, the image - Olympus D-100 | D-100 Instruction Manual - Page 34
34 BASIC SHOOTING OPERATIONS Shooting Using the Monitor Monitor button Operating Procedure Check that the lens barrier is open. Monitor 1. Press the monitor button. [The monitor is illuminated. 2. Determine the image composition by observing your subject in the monitor. 3. Half-press the shutter - Olympus D-100 | D-100 Instruction Manual - Page 35
pressed close to your body, to prevent camera shake. Close-up of a person (approx. 0.5 to 1.5 m/1.6 to 4.9 ft) Use either the viewfinder or monitor Close-up images can usually be shot using the viewfinder, but using the monitor may be advantageous in certain cases. See the column on the next page - Olympus D-100 | D-100 Instruction Manual - Page 36
. The camera tends to shake more easily and the image will not be so clear when the surroundings are bright or dark. Also, battery power consumption meter/1.6 feet from the camera. Shooting is possible without using the Macro mode, but in some cases correct focus and exposure may not be achieved. - Olympus D-100 | D-100 Instruction Manual - Page 37
by pressing the shutter button all the way. The card is not ready in the following cases: ⅷ When no card is inserted in the camera. ⅷ When the write protect seal is attached to the card. ⅷ When the card cover is open. ⅷ When the card does not have enough space to store the image. When the - Olympus D-100 | D-100 Instruction Manual - Page 38
38 BASIC SHOOTING OPERATIONS 2 Monitor HQ When the monitor is turned on by pressing the monitor button, the information displays on the left are T shown on the monitor. W No. of images that can be shot Battery status Record mode Shows the approximate number of images you can shoot. (Green) - Olympus D-100 | D-100 Instruction Manual - Page 39
63) Macro mode T Digital zoom W Shows that the batteries in use. ⅷ When NiMH batteries are used, the battery alarm indicator will start blinking sooner than when a lithium battery pack is used. The monitor may also show other indicators such as the "!" indicator. In this case, refer to the error - Olympus D-100 | D-100 Instruction Manual - Page 40
(focus lock), and then shoot the image as described below. AF target Green lamp Operating procedure of focus lock 1. Open the lens barrier. [ The camera turns on in the shooting mode. 2. Look into the viewfinder and position the AF target mark ( ) over the subject. When shooting a hard-to-focus - Olympus D-100 | D-100 Instruction Manual - Page 41
VIEWING OR ERASING IMMEDIATELY AFTER SHOOTING This chapter describes how to view your saved images on the camera's monitor. For viewing on a TV or PC screen, or to print images, see the next chapter entitled "Viewing Options". ⅷ Viewing Pictures ⅷ Image Playback Operations ⅷ Erasing - Olympus D-100 | D-100 Instruction Manual - Page 42
is a problem with the card, the monitor shows the corresponding message. ( Page 89) ⅷ If the remaining battery power is low, the battery alarm indicator lights in red. 2. Press the monitor button again to switch the monitor and camera power off. When the camera is powered by batteries, it turns off - Olympus D-100 | D-100 Instruction Manual - Page 43
SHOOTING Lens barrier ⅷ To enter the Shooting mode immediately after playback: 1. Open the lens barrier. [The monitor turns on and the Shooting mode is engaged. You can now shoot. ⅷ When the camera turns on, the monitor may light for an instant and show an image for a short time. This is not - Olympus D-100 | D-100 Instruction Manual - Page 44
44 VIEWING OR ERASING IMMEDIATELY AFTER SHOOTING Image Playback Operations Press until the monitor turns on. HQ .12.23 23 45 4 Frame operations of arrow pad keys Magnified display Frame reverse Frame advance Split display 2 4 Check that the last image - Olympus D-100 | D-100 Instruction Manual - Page 45
image in the index display is selected brings up the previous index. Monitor button To magnify part of image HQ .12.23 23 45 1 To turn off the monitor, first restore the original display size and then press the monitor button. 2 1. Press the arrow pad key to magnify the central area - Olympus D-100 | D-100 Instruction Manual - Page 46
Erasing Pictures (One-Frame Erase) You can increase the number of images remaining on a card by erasing unnecessary images. OK/menu button Operating Procedure Press until the monitor turns on. Check that the camera is set to the Playback mode by holding down the monitor button for a moment - Olympus D-100 | D-100 Instruction Manual - Page 47
card of all stored image data. 1/3 SELECT NO OFF NO NO SET OK NO OFF YES NO SET OK Operating Procedure Check that the camera or a write protect seal is attached to the card. ( Page 51) ⅷ For details on handling your card, refer to the instructions provided with it. 4. Select "YES" by pressing - Olympus D-100 | D-100 Instruction Manual - Page 48
Images Automatically in Sequence (Slide Show) Images in the card can be viewed automatically in their stored order. This card. OK/menu button Arrow pad Press until the monitor turns on. 1/3 SELECT NO OFF NO NO SET OK Playback mode menu 1/3 screen Operating Procedure Check that the camera - Olympus D-100 | D-100 Instruction Manual - Page 49
49 VIEWING OR ERASING IMMEDIATELY AFTER SHOOTING OK/menu button To cancel Slide Show: 4. Press the OK/menu button. Arrow pad 12 - Olympus D-100 | D-100 Instruction Manual - Page 50
images to avoid accidentally erasing them. When an image is protected, it cannot be erased. OK/menu button Press until the monitor turns on. Operating Procedure Check that the camera is set to the Playback mode by holding down the monitor button for a moment. Arrow pad 1/3 SELECT NO OFF NO NO - Olympus D-100 | D-100 Instruction Manual - Page 51
OK/menu button. [Protection is canceled and the protect indicator ( ) disappears. ⅷ When the card is formatted, protected images are erased. ⅷ Images on a card with a write protect seal attached to it cannot be protected. For details, refer to the instructions included with the provided SmartMedia. - Olympus D-100 | D-100 Instruction Manual - Page 52
as well as when viewing images on the monitor. Operating Procedure Check that the camera is set to the Playback mode by holding down the monitor button for a brightness setting will be held in memory even after the camera is turned off. ⅷ The monitor brightness can also be set from the shooting mode - Olympus D-100 | D-100 Instruction Manual - Page 53
for a wide range of situations, including the use of spare cards, flash operation, continuous shooting, close-up shooting and exposure Selecting the Image Quality (Record Mode) ⅷ Using the Flash ⅷ Zooming in on a Subject (Digital Zoom) ⅷ Shooting a Close Subject (Macro Shooting) ⅷ Using the - Olympus D-100 | D-100 Instruction Manual - Page 54
Selecting the Image Quality (Record Mode) The record modes allow you to shoot images with higher quality (SHQ) or larger number of images per card (SQ). The default setting of the record mode is HQ which is the standard-quality mode. OK/menu button Operating Procedure Check that the lens - Olympus D-100 | D-100 Instruction Manual - Page 55
refer to "Selecting the Appropriate Card" ( Page 23). ⅷ The selected record mode is held in memory even after the camera is turned off. Cautions when shooting open the card cover or remove the AC adapter, batteries or card while the orange lamp is blinking. Otherwise, the data on the card may be - Olympus D-100 | D-100 Instruction Manual - Page 56
56 ADVANCED SHOOTING FEATURES Using the Flash The flash has been designed to fire automatically when shooting under low light or against strong back light. You can change this flash mode according to different shooting situations. OK/menu button Operating Procedure Check that the lens barrier is - Olympus D-100 | D-100 Instruction Manual - Page 57
under artificial light such as a fluorescence lamp. Because of the pre-flashes, it takes about one second before the shutter is actually released. Hold the camera securely during this period to prevent camera shake. The fill-in flash effect may not be noticeable under very bright light. - Olympus D-100 | D-100 Instruction Manual - Page 58
blurred. ⅷ When the Red-Eye Reduction Flash mode is set, the setting is held in memory even after the camera is turned off. Other flash mode settings are reset to Auto when the camera is turned off. ⅷ The flash working distance is approx. 0.2 ~ 3 m/0.7 ~ 9.8 ft. ⅷ The blinking of the orange lamp on - Olympus D-100 | D-100 Instruction Manual - Page 59
a compact camera (35 mm film) using a 36 mm lens, but digital zoom allows you to shoot a zoomed-in image equivalent to that shot using a 72 mm lens. OK/menu button Monitor button Operating Procedure Check that the lens barrier is open. Arrow pad 1. Press the arrow pad key. [The monitor turns on - Olympus D-100 | D-100 Instruction Manual - Page 60
pressing the or arrow pad key. 4. Press the OK/menu button. [The monitor turns on so you can compose close-up images in the monitor. is displayed on . Otherwise, correct shooting may not be possible due to errors in focus and exposure. ⅷ When the camera is less than 10 cm/0.4 in from the subject, - Olympus D-100 | D-100 Instruction Manual - Page 61
is useful for taking pictures with yourself included in the image. Fix the camera securely on a tripod, etc., before self-timer shooting. Operating Procedure the shutter button. [The self-timer lamp on the front of the camera lights for 10 seconds and then blinks for 2 seconds, after which the - Olympus D-100 | D-100 Instruction Manual - Page 62
62 ADVANCED SHOOTING FEATURES Shooting Images Sequentially (Continuous Shooting) The Continuous Shooting mode allows you to take a rapid succession of still images by pressing and holding the shutter button. You can choose the best image from a series of sequential shots. When you have found your - Olympus D-100 | D-100 Instruction Manual - Page 63
mode is set to Auto, it is switched to Flash Off. ⅷ To prevent camera shake, the maximum shutter speed is limited to 1/30 second. As a result, dark number of shootable images on the card. Do not open the card cover or remove the AC adapter, batteries or card while the orange lamp on the right of - Olympus D-100 | D-100 Instruction Manual - Page 64
64 ADVANCED SHOOTING FEATURES Varying the Image Brightness (Exposure Compensation) Although the camera's exposure is set automatically, you can vary it to change the image brightness in the range of ±2 stops (to 4-times brighter or 1/4-times darker image) - Olympus D-100 | D-100 Instruction Manual - Page 65
can be shot successively while maintaining the corrected exposure value. 6. Turn the camera OFF. [The exposure value is reset to ±0 (no correction). , the variation may be less noticeable when the subject is dark. In this case, check the shot image to confirm that exposure is satisfactory. ⅷ If the - Olympus D-100 | D-100 Instruction Manual - Page 66
Varying the Image Color Tone (White Balance Control) This camera incorporates electronic circuitry to automatically adjust color hues so results due to weather or illumination, you can control the white balance manually. Natural hues cannot be obtained automatically under a mixture of artificial - Olympus D-100 | D-100 Instruction Manual - Page 67
SHQ 5. Press the shutter button. [Images can be shot successively while maintaining the selected white balance setting. 6. Close the lens barrier to turn the camera off turn the camera off. [The white balance control is reset to Auto White Balance Control mode. If you want an image color tone that - Olympus D-100 | D-100 Instruction Manual - Page 68
camera may be annoying when shooting images at a wedding, theater or when photographing animals. You can mute the beep tones in such cases " by pressing the or arrow pad key. 4. Press the OK/menu button. [The camera returns to the shooting mode. 5. Now you can start shooting with beep tones muted. - Olympus D-100 | D-100 Instruction Manual - Page 69
to power the camera from the dedicated AC adapter. ⅷ Using the AC Adapter (Optional) ⅷ Viewing Images on a TV Screen ⅷ Printing Images in a Lab or on a Printer ⅷ Making a Print Reservation on Smart Media Card ⅷ Operations Available with Your PC ⅷ Finding the Best Way to Download Image Data to - Olympus D-100 | D-100 Instruction Manual - Page 70
matches your local voltage. For more information, contact your dealer or local Olympus service representative. ⅷ Do not unplug the AC adapter when the camera is turned on. Doing so may affect camera settings. ⅷ Do not use the camera if the AC adapter is not plugged in completely. ⅷ Never plug or - Olympus D-100 | D-100 Instruction Manual - Page 71
Connect the video cable to the A/V OUT jack of the camera and video input connector of the TV. Monitor button 2. Turn the TV on and select the video input. For video input selection, refer to your TV's instruction manual. Arrow pad ⅷ The camera's monitor turns off when the camera is connected to - Olympus D-100 | D-100 Instruction Manual - Page 72
Digital Print Order Format) is a format used to record automatic print information from cameras. By specifying which images are to be printed, the images can be printed easily by DPOF-compatible printing service DPOF reservation is made using this camera on a card which has already been subjected to - Olympus D-100 | D-100 Instruction Manual - Page 73
instruction manual of the specified printer. Main Features of the P-400/P-200/P330N(E)/P-330(E) • Single-frame print • Multi-frame print (4-frame print/9-frame print) • DPOF-reserved print • Camera reservation (card on the card by connecting a printer directly to the USB connector of the camera. ⅷ If - Olympus D-100 | D-100 Instruction Manual - Page 74
SELECT NO OFF NO NO SET OK Playback mode menu 1/3 Check that the camera is set to the Playback mode by pressing the monitor button. 1. Press OK YES OFF YES NO SELECT SET OK Card print reservation screen 3. Press the OK/menu button. [The card print reservation screen is displayed. 4. Select - Olympus D-100 | D-100 Instruction Manual - Page 75
playback mode menu 2/3 is restored. The reservation data on the card is held in memory even when the camera is turned off. Selecting "RESET" clears all reservation. ⅷ If the card already contains reservation data made by this camera, the message "PRINT ORDERED" is displayed after step 3 together - Olympus D-100 | D-100 Instruction Manual - Page 76
76 VIEWING OPTIONS Operations Available with Your PC You can download images from the camera to a PC and take advantage of PC-based image processing and other features provided with commercially available application software. With CAMEDIA Master ⅷ Storing image data on a PC hard disk. ⅷ Viewing - Olympus D-100 | D-100 Instruction Manual - Page 77
PC Use this flowchart to find the best way to download images that have been shot with this camera to your PC. Start Does your PC have a Yes USB interface? Is there a connector marked on your PC? No USB cable Use the provided USB cable. ( Page 78) SmartMedia reader/writer Use the optional - Olympus D-100 | D-100 Instruction Manual - Page 78
CD-ROM. The latest version of the USB driver can be downloaded from the Olympus web site. ⅷ It is recommended that you power the camera from the optional AC adapter. If battery power runs out while the PC is accessing the card in the camera, the camera turns off in the middle of operation and this - Olympus D-100 | D-100 Instruction Manual - Page 79
to the USB port of your PC and inserting the card into it, you can download images to your PC directly from the card. First make sure that your PC is a USB-compatible machine with Windows 98/Mac OS 8.6 or later. For details, see the USB SmartMedia reader/writer instructions. USB SmartMedia reader - Olympus D-100 | D-100 Instruction Manual - Page 80
information on optional accessories, visit our website at http://www.olympus.com ⅷ Depending on the PC operating environment or storage capacity of the card, the above devices may be unusable. Make sure you can use your required device before trying to download images. ⅷ Errors will occur frequently - Olympus D-100 | D-100 Instruction Manual - Page 81
port varies depending on the PC. 2. Open the connector cover on the camera. To USB connector 3. Connect the end of the USB cable marked to the USB connector on the camera. [When the camera starts downloading, the green lamp on the right of the viewfinder lights. The connection is complete. When - Olympus D-100 | D-100 Instruction Manual - Page 82
When using a Windows PC Click Check Click Make sure the camera is properly connected to your PC. 5. If the PC screen Click "Next" in the window shown on the left. 7. Select "Search for the best driver for your device" in the window shown on the left, and then click "Next". 8. Insert the provided CD- - Olympus D-100 | D-100 Instruction Manual - Page 83
on the left is displayed automatically, press "close" to close it. Check Click F:¥USB¥WIN98 Browse button 10. After selecting "Specify a location" in the window shown on the 5 to 9 are required only when the camera is being connected to a PC for the first time. Skip to step 13 from the next time. - Olympus D-100 | D-100 Instruction Manual - Page 84
USB card reader/writer, etc.) is connected to your PC. 15. Open the "Dcim" folder. DColiucbkle 16. Open "100olymp" folder. DColiucbkle 17. Now you can view images (JPEG files). When images are only displayed, it does not mean they are saved. For how to save images, refer to the user's guide - Olympus D-100 | D-100 Instruction Manual - Page 85
85 VIEWING OPTIONS When using a Macintosh with OS9 DColiucbkle Make sure the camera is properly connected to your PC. 5. The desktop of the PC shows an "unti- tled" icon. 6. Open "untitled". 7. , it does not mean they are saved. For how to save images, refer to the user's guide of your PC. - Olympus D-100 | D-100 Instruction Manual - Page 86
86 VIEWING OPTIONS ⅷ Downloaded images can be viewed using Olympus CAMEDIA Master or other graphic software such as Paint Shop Pro or Photoshop, as well as Internet browsers such as Netscape Communicator and Microsoft Internet Explorer. For details, refer to your software user's manual. ⅷ For the - Olympus D-100 | D-100 Instruction Manual - Page 87
is a malfunction, please refer to the page below that most closely corresponds with your question. Many problems with this camera can be solved easily without the help of Olympus service representatives. ⅷ Simplified Operation Chart ⅷ If an Alarm Message Is Displayed ⅷ If an Operation Does Not Work - Olympus D-100 | D-100 Instruction Manual - Page 88
88 TROUBLESHOOTING Simplified Operation Chart Refer to this chart whenever you're not sure what the correct operation sequence is. For detailed descriptions of each operation, page references are provided in this chart. Press Press Press Flash (P. 56) Macro (P. 60) Digital zoom - Olympus D-100 | D-100 Instruction Manual - Page 89
89 TROUBLESHOOTING If an Alarm Message Is Displayed Warning Monitor Display Card absence NO CARD Card full CARD FULL Write protect CARD PROTECTED Card error CARD ERROR Playback error CAN NOT OPEN FILE No image NO PICTURE Card cover CARD-COVER OPEN Error Meaning Treatment Card is not inserted or - Olympus D-100 | D-100 Instruction Manual - Page 90
90 TROUBLESHOOTING If an Operation Does Not Work When the camera does not work properly Cause Remedy See The camera power is off. Open the lens barrier to turn the camera on. P. 30 Batteries are inserted the wrong way. Remove and insert correctly. P. 29 The battery power has run out. - Olympus D-100 | D-100 Instruction Manual - Page 91
press it again when the orange lamp has camera is still processing the last shot. stopped blinking. There is a problem with the card. Check the error message. P. 89 The card is full. Replace the card, erase unnecessary image P. 46 frames or download images to a PC, and then P. 47 erase all - Olympus D-100 | D-100 Instruction Manual - Page 92
button to turn the cam- P. 30 The battery power is low. It is recommended to use the AC adapter P. 70 (optional) when the digital camera is connected to a PC. The USB driver is installed incorrectly Observe instructions given in the installation P. 81 in your PC. manual of the USB driver and - Olympus D-100 | D-100 Instruction Manual - Page 93
If Image Quality Is Poor 93 TROUBLESHOOTING When the image is too bright Cause The flash When the image is too dark Cause Remedy See You blocked the flash with your finger, etc. Hold the camera correctly, taking care not to P. 28 cover the flash surface The subject was out of reach of the - Olympus D-100 | D-100 Instruction Manual - Page 94
94 TROUBLESHOOTING When part of image is cut off Cause Remedy See The lens was blocked by your finger Hold the camera correctly, taking care and 0.5 m/1.6 ft. In other case, use the normal mode. In self-timer shooting, you pressed Do not stand in front of the camera. Press the P. 61 the shutter - Olympus D-100 | D-100 Instruction Manual - Page 95
images ( Page 26). Note that the date and time settings are cleared when the camera is left for about a dayr without batteries. Q Can a filter or hood be attached to the camera? A No. Q Can an external flash be attached to the camera? A No. Q Why do the eyes look red when they are shot under flash - Olympus D-100 | D-100 Instruction Manual - Page 96
a PC. It is convenient because you do not have to turn the camera and PC off before connecting the USB cable. If your PC has a rectangular connector marked , measuring about 6 x 15 mm/0.25 x 0.5 in, it is the USB port. Q What kind of software is required to retouch images or insert them in documents - Olympus D-100 | D-100 Instruction Manual - Page 97
SPECIFICATIONS GLOSSARY OF TERMS ⅷ Specifications ⅷ Glossary of Terms - Olympus D-100 | D-100 Instruction Manual - Page 98
36 mm lens with 35 mm camera) Photometric system : Digital ESP metering using image pickup device Exposure control system : Programmed auto exposure Aperture settings* : F2.8, F8 Shutter speed* : 1/2 to 1/1000 sec. (in combination with the mechanical shutter) *Manual setting is not available - Olympus D-100 | D-100 Instruction Manual - Page 99
connector (USB), batteries or NiCd batteries, or R6/AA alkaline batteries. UM3 manganese batteries cannot be used. Dimensions : 110(W) x 62(H) x 34(D) mm/4.3(W) x 2.4(H) x 1.3(D) in (excluding projections) Weight : Approx. 165 g/5.8 oz (excluding batteries and card) Design and specifications - Olympus D-100 | D-100 Instruction Manual - Page 100
100 SPECIFICATIONS/GLOSSARY OF TERMS Glossary of Terms A AC adapter All-frame erasure Auto-Flash Used to power the digital camera from a household AC P. 70 power. The use of this product is especially recommended when the camera is to be used for an extended period of time such as when it is - Olympus D-100 | D-100 Instruction Manual - Page 101
101 SPECIFICATIONS/GLOSSARY OF TERMS E Error message Displayed when there is an error in operation. P. 89 Exposure compensation This feature makes it possible to brighten or darken the P. 64 images by varying the camera's exposure. F Fill-in flash Flash off Focus lock Formatting Frame numbers - Olympus D-100 | D-100 Instruction Manual - Page 102
SPECIFICATIONS/GLOSSARY OF TERMS M Macro mode Monitor Monitor adjustment This mode is useful when shooting subjects at close dis- P. 60 tances. When the working distance is less than 0.5 meter/1.6 feet, the macro mode provides better images. LCD panel provided on the rear of the camera per card - Olympus D-100 | D-100 Instruction Manual - Page 103
P. 48 sequence when in the playback mode. A type of memory card to be used to store photographs P. 22 taken with a digital camera. Application programs used by a PC. P. 76 U USB cable A cable allowing easy connection between the camera and P. 78 PC. W White balance control Adjustment of the - Olympus D-100 | D-100 Instruction Manual - Page 104
AMERICA INC. Two Corporate Center Drive, Melville, NY 11747-3157, U.S.A. Tel. 631-844-5000 (Technical support) Tel. 1-888-553-4448 [email protected] http://www.olympus.com OLYMPUS OPTICAL CO. (EUROPA) GMBH. (Premises/Goods delivery) Wendenstraße 14-18, 20097 Hamburg, Germany. Tel. 040-237730
-
 1
1 -
 2
2 -
 3
3 -
 4
4 -
 5
5 -
 6
6 -
 7
7 -
8
-
9
-
10
-
11
-
12
-
13
-
14
-
15
-
16
-
17
-
18
-
19
-
20
-
21
-
22
-
23
-
24
-
25
-
26
-
27
-
28
-
29
-
30
-
31
-
32
-
33
-
34
-
35
-
36
-
37
-
38
-
39
-
40
-
41
-
42
-
43
-
44
-
45
-
46
-
47
-
48
-
49
-
50
-
51
-
52
-
53
-
54
-
55
-
56
-
57
-
58
-
59
-
60
-
61
-
62
-
63
-
64
-
65
-
66
-
67
-
68
-
69
-
70
-
71
-
72
-
73
-
74
-
75
-
76
-
77
-
78
-
79
-
80
-
81
-
82
-
83
-
84
-
85
-
86
-
87
-
88
-
89
-
90
-
91
-
92
-
93
-
94
-
95
-
96
-
97
-
98
-
99
-
100
-
101
-
102
-
103
-
104
 |
 |
Reference Manual
±
Thank you for purchasing this Olympus digital camera.
±
Before using your new digital camera, please carefully read this instruction
manual and separately provided “Safety Precautions” and “Battery Handling
Precautions”.
±
We recommend that you take test shots to make sure that the camera functions
properly before taking important photographs.