Onkyo HT-R640 Owner Manual - Page 44
Changing the Input Display, TV Format Setup, not North American models - ipod dock
 |
View all Onkyo HT-R640 manuals
Add to My Manuals
Save this manual to your list of manuals |
Page 44 highlights
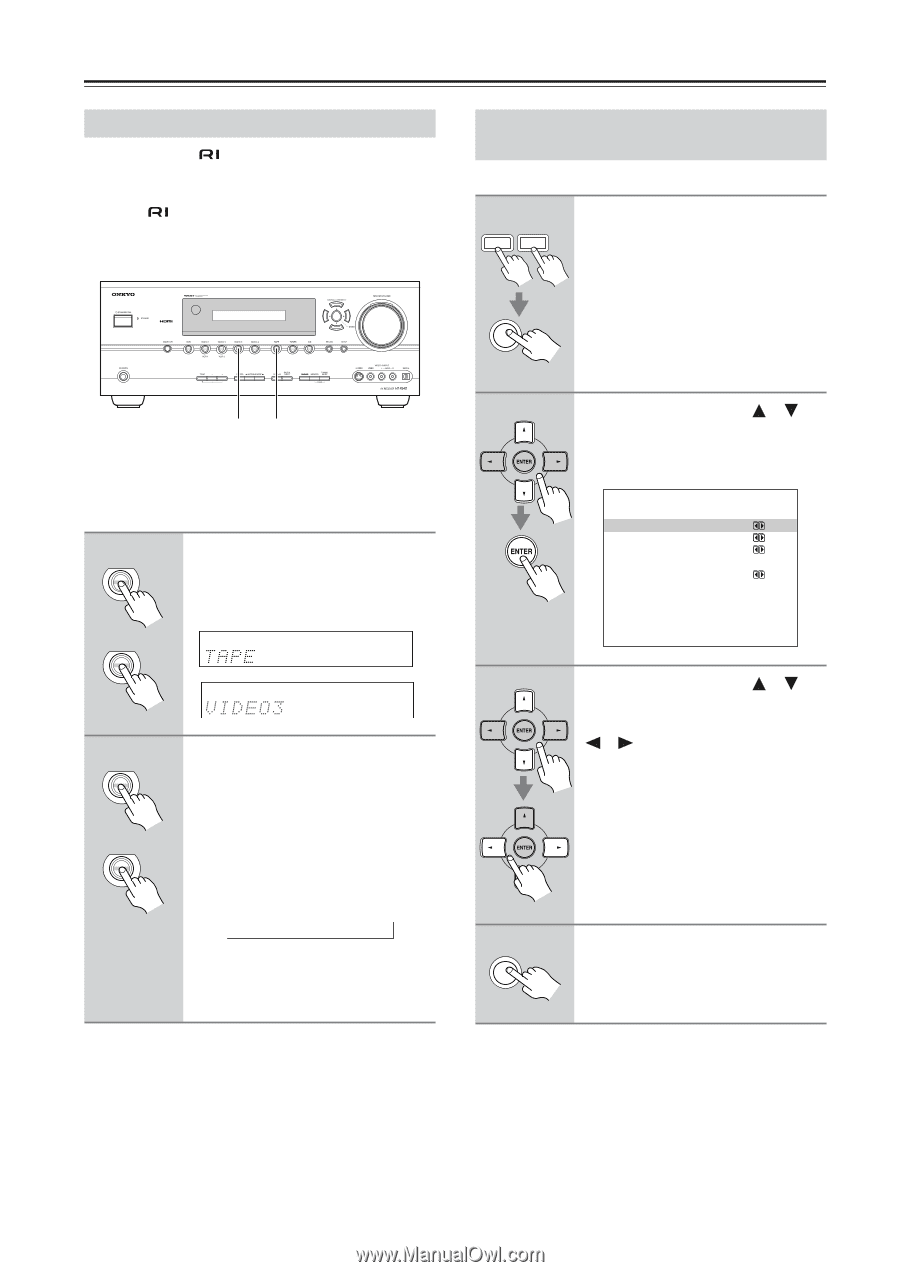
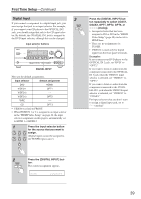
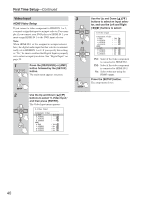
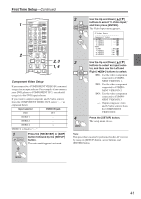
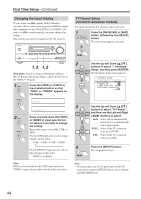
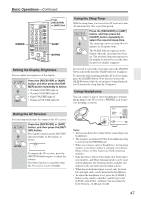
First Time Setup-Continued Changing the Input Display If you connect an -capable Onkyo MiniDisc recorder, CD recorder, or next generation HDD-compatible component to the TAPE IN/OUT or VIDEO 3 IN jacks, for to work properly, you must change this setting. This setting can only be changed on the AV receiver. TV Format Setup (not North American models) You must specify the TV system used in your area. 1 AMP RECEIVER Press the [RECEIVER] or [AMP] button, followed by the [SETUP] button. The main menu appears onscreen. SETUP 1, 2 1, 2 iPod photo: If you're using an iPod photo with the DS-A1 Remote Interactive Dock, connect the DS-A1 to the VIDEO 3 IN jacks. 1 TAPE Press the [TAPE] or [VIDEO 3] input selector button so that "TAPE" or "VIDEO3" appears on the display. VIDEO 3 2 TAPE VIDEO 3 Press and hold down the [TAPE] or [VIDEO 3] input selector button (about 3 seconds) to change the setting. Repeat this step to select MD, CDR, or HDD. For the TAPE input selector, the setting changes in this order: TAPE → MD → CDR → HDD → For the VIDEO 3 input selector, the setting changes in this order: VIDEO 3 ↔ HDD Note: HDD can be selected for the TAPE input selector or VIDEO 3 input selector, but not both at the same time. 2 Use the Up and Down [ ]/[ ] buttons to select "7. Hardware Setup," and then press [ENTER]. The Hardware Setup menu appears. 7.Hardware Setup a.TV Format :Auto b.Remote ID :1 c.HDMI Audio Out :Off d.SW Input Sensitivity : 0dB 3 Use the Up and Down [ ]/[ ] buttons to select "TV Format," and then use the Left and Right [ ]/[ ] buttons to select: Auto: Select this to automatically detect the TV system from the video input signals. NTSC: Select if the TV system in your area is NTSC. PAL: Select if the TV system in your area is PAL. 4 SETUP Press the [SETUP] button. The setup menu closes. Note: • This procedure can also be performed on the AV receiver by using its [SETUP] button, arrow buttons, and [ENTER] button. 44
-
 1
1 -
2
-
3
-
4
-
5
-
6
-
7
-
8
-
9
-
10
-
11
-
12
-
13
-
14
-
15
-
16
-
17
-
18
-
19
-
20
-
21
-
22
-
23
-
24
-
25
-
26
-
27
-
28
-
29
-
30
-
31
-
32
-
33
-
34
-
35
-
36
-
37
-
38
-
 39
39 -
 40
40 -
 41
41 -
 42
42 -
 43
43 -
 44
44 -
 45
45 -
 46
46 -
 47
47 -
 48
48 -
 49
49 -
50
-
51
-
52
-
53
-
54
-
55
-
56
-
57
-
58
-
59
-
60
-
61
-
62
-
63
-
64
-
65
-
66
-
67
-
68
-
69
-
70
-
71
-
72
-
73
-
74
-
75
-
76
-
77
-
78
-
79
-
80
 |
 |